Code Coverage is a measure of how much of your code has been executed. It is typically presented as a report that shows the percentage of the code that has been executed. For automated testing, the report does not measure the quality of tests, only whether your code is executed by the tests. It is especially useful to check that critical or high-risk areas of your code are covered because they should receive the most rigorous testing.
In Unity, the Code Coverage package generates code coverage data and reports from your automated tests. Additionally, the Code Coverage package offers a Coverage Recording feature that allows capturing coverage data on demand, for manual testing, or when there are no automated tests in the project.
In this tutorial, you will learn how to set up code coverage in a Unity project using the Code Coverage package and how to integrate Codecov with your GitHub repository using GitHub Actions to generate coverage reports every time you push changes or make a pull request.
Tasks:
– Setting up the project
– Running tests and generating a Coverage report locally
– Configuring GitHub Actions
– Setting up Codecov
Setting up the project
1. Create a new Unity project
Launch the Unity Hub and open an existing project or create a new Unity empty 3D project. Code Coverage is available in Unity version 2019.3 and above.
2. Install the Code Coverage package
Use the Unity Package Manager (Window > Package Manager) to find and install the Code Coverage package.
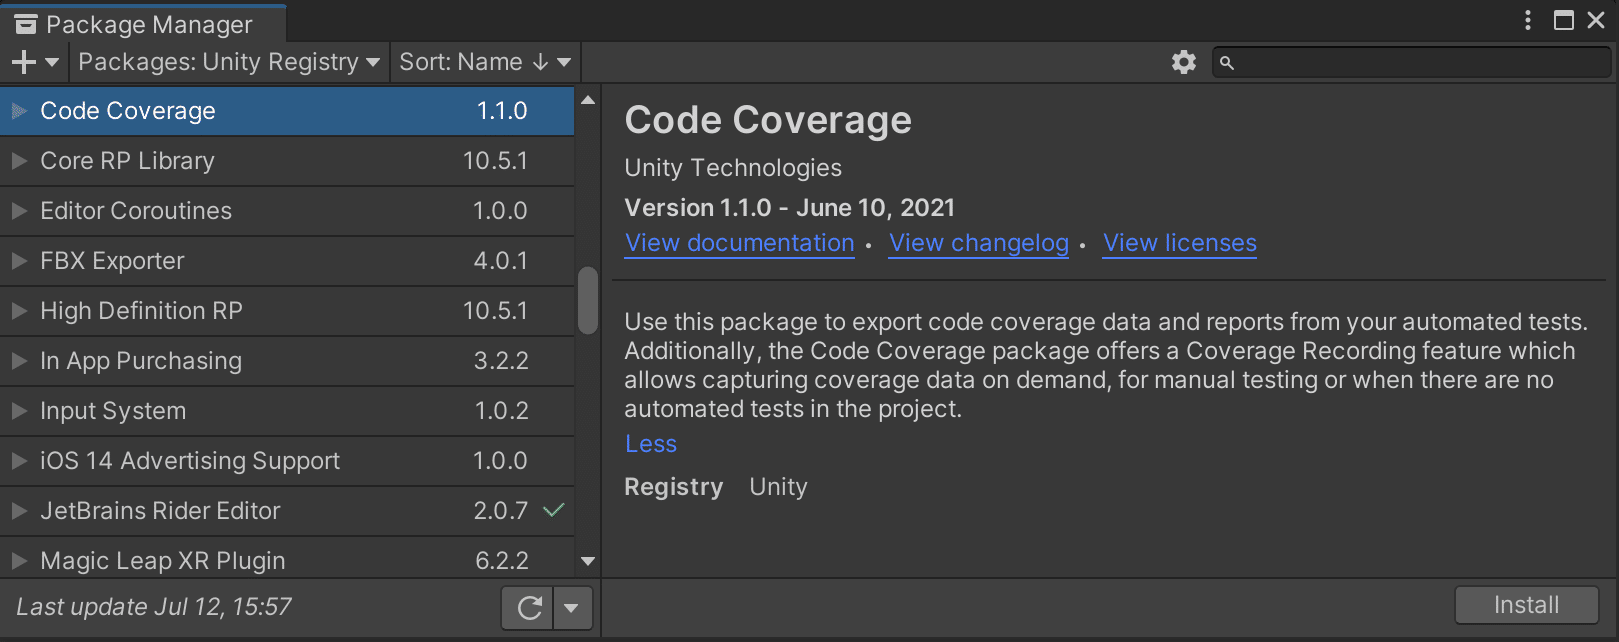
Alternatively, use the Add(+) dropdown and select Add package from git URL… or Add package by name… and type com.unity.testtools.codecoverage.

3. Install the Asteroids sample project
In the Unity Package Manager (Window > Package Manager) select the Code Coverage package, if not already selected.
Find the Samples section in the package details (right-hand side) and select Import next to Code Coverage Tutorial.

Running tests and generating a Coverage report locally
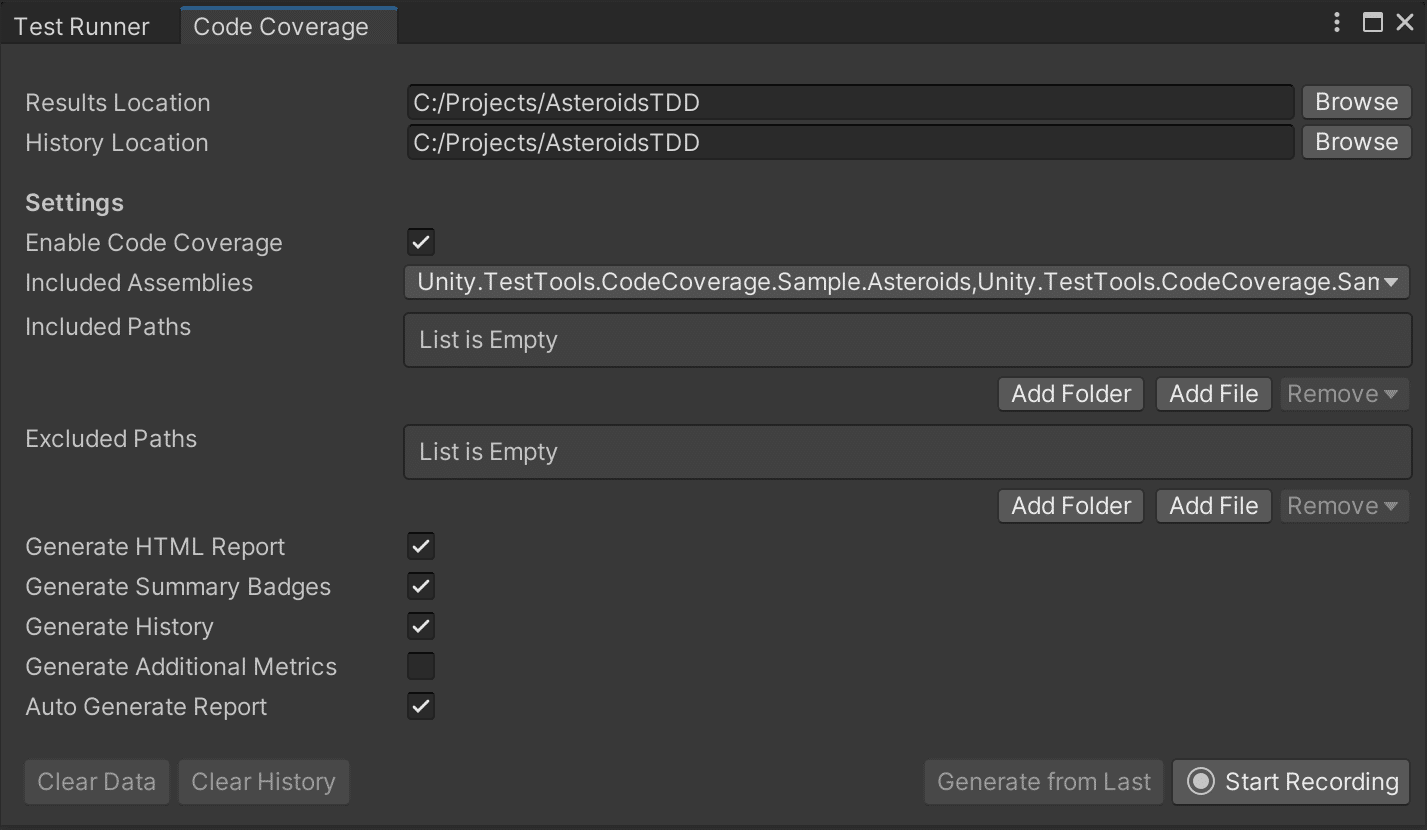
1. Enable Code Coverage
To enable Code Coverage open the Code Coverage window (Window > Analysis > Code Coverage) and select Enable Code Coverage if not already selected, to be able to generate Coverage data and reports.

Note: Enabling Code Coverage adds some overhead to the editor and can affect the performance.
If you see this warning select Switch to debug mode.

Code Optimization was introduced in Unity 2020.1; in Release mode the code is optimized and therefore not directly represented by the original code. Therefore, Debug mode is required in order to obtain accurate code coverage information.
2. Generate a Coverage report from PlayMode tests
1. Make sure only Unity.TestTools.CodeCoverage.Sample.Asteroids and Unity.TestTools.CodeCoverage.Sample.Asteroids.Tests assemblies are selected in Included Assemblies.
2. Make sure Generate HTML Report and Auto Generate Report are checked.
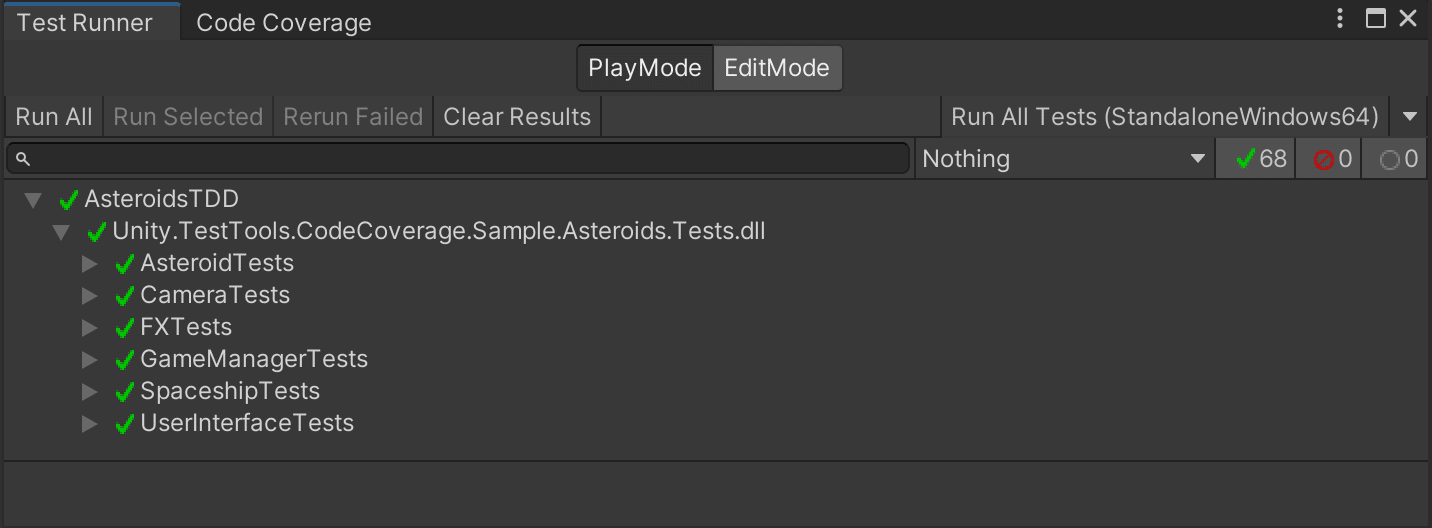
3. Switch to the Test Runner window, select the PlayMode tab, and hit Run All tests.
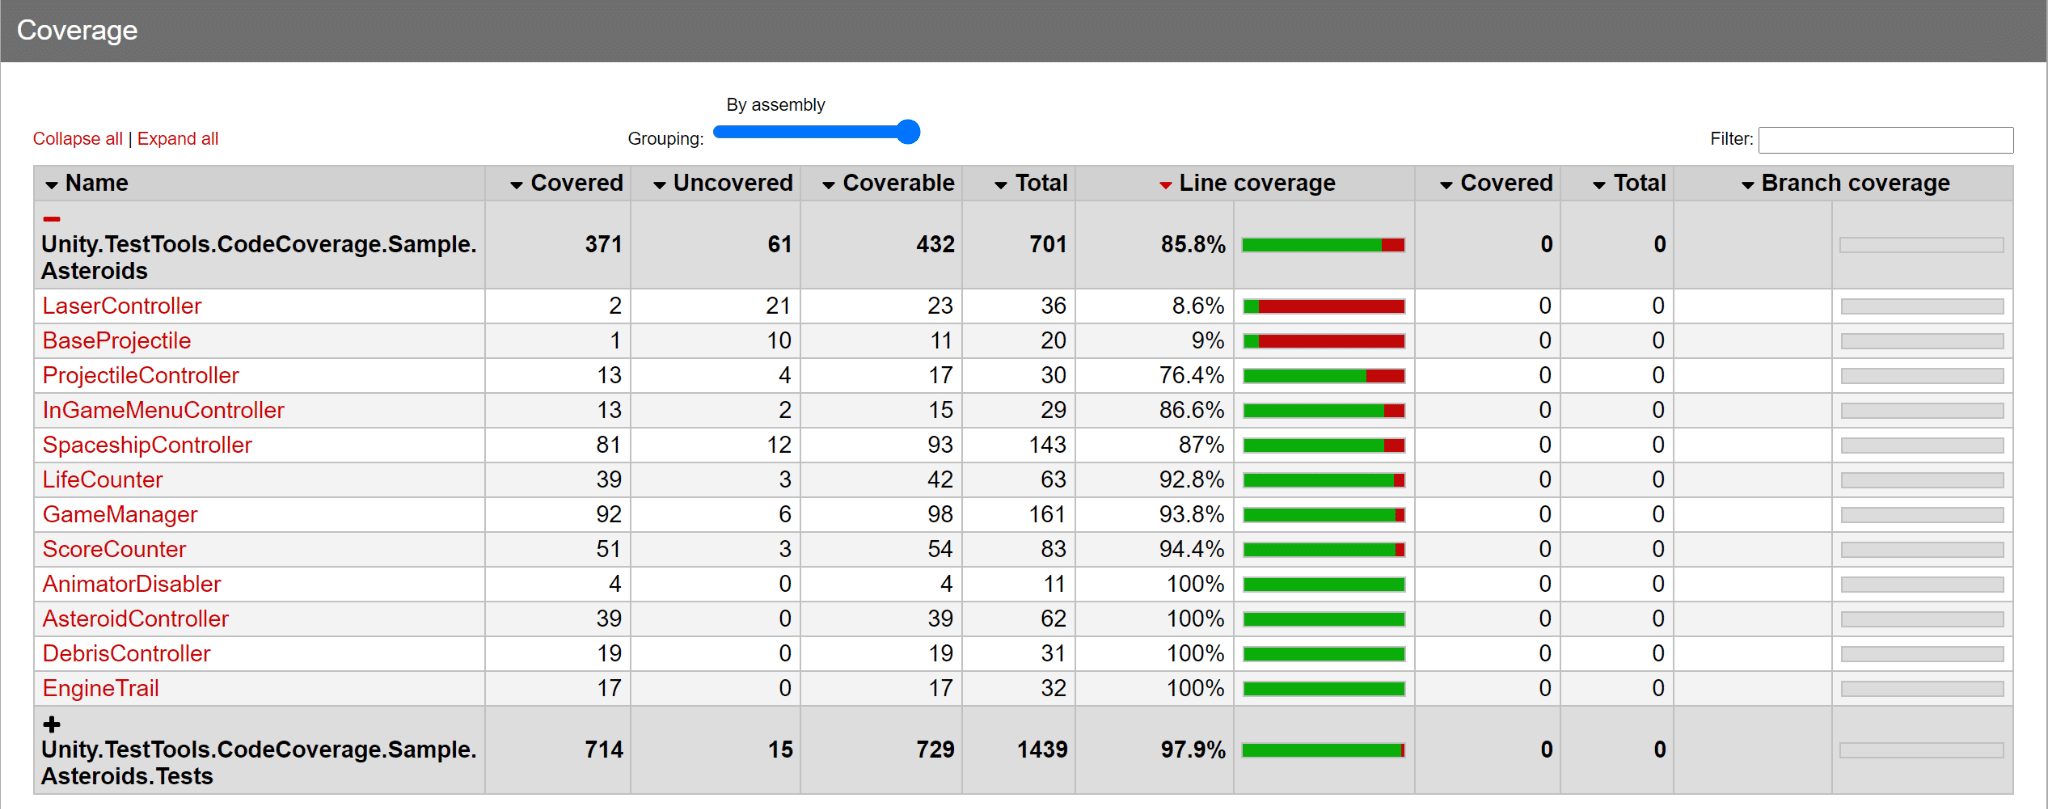
4. When the tests finish running, a file viewer window will open up containing the coverage report. Select index.htm.
5. Look for the classes with low coverage, especially LaserController, BaseProjectile, and ProjectileController. You can sort the results by Line coverage, and click on each class for a more detailed report. See How to interpret the results.
Configuring GitHub Actions
1. Create a GitHub repository
Create a GitHub repository and push the project there. It is recommended to include GitHub’s .gitignore Unity template. You can add /[Cc]ode[Cc]overage/ in the .gitignore too.
2. Setup GitHub Actions
There is no officially supported way of running Unity in Github Actions, but the community has created some solutions. For this tutorial, we will use the GitHub Actions provided by GameCI.
1. Setting up a Unity license
All actions use a Unity installation, which needs to be activated. Follow the instructions on the Activation page in GameCI to set up a Unity license.
2. Setting up the main workflow
Create a file called .github/workflows/main.yml and add the workflow definition below:
name: CI

on:
  # Replace with your main branch if needed
  push:
    branches:
      - main
  pull_request:
    branches:
      - main

jobs:

  runTests:

    name: Run Tests
    runs-on: ubuntu-latest

    steps:

      - name: Checkout repository
        uses: actions/checkout@v2
        with:
          lfs: true

      - name: Cache Library
        uses: actions/cache@v2
        with:
          path: Library
          key: Library

      - name: Run tests and generate Coverage XML report
        uses: game-ci/unity-test-runner@v2
        env:
          UNITY_LICENSE: ${{ secrets.UNITY_LICENSE }}
        with:
	  # Replace with the Unity version your project should be tested on.
          # Minimum version: 2019.3
          unityVersion: 2020.3.13f1
          testMode: playmode
          customParameters: -debugCodeOptimization -enableCodeCoverage -coverageResultsPath ./coverage-results -coverageOptions generateAdditionalMetrics
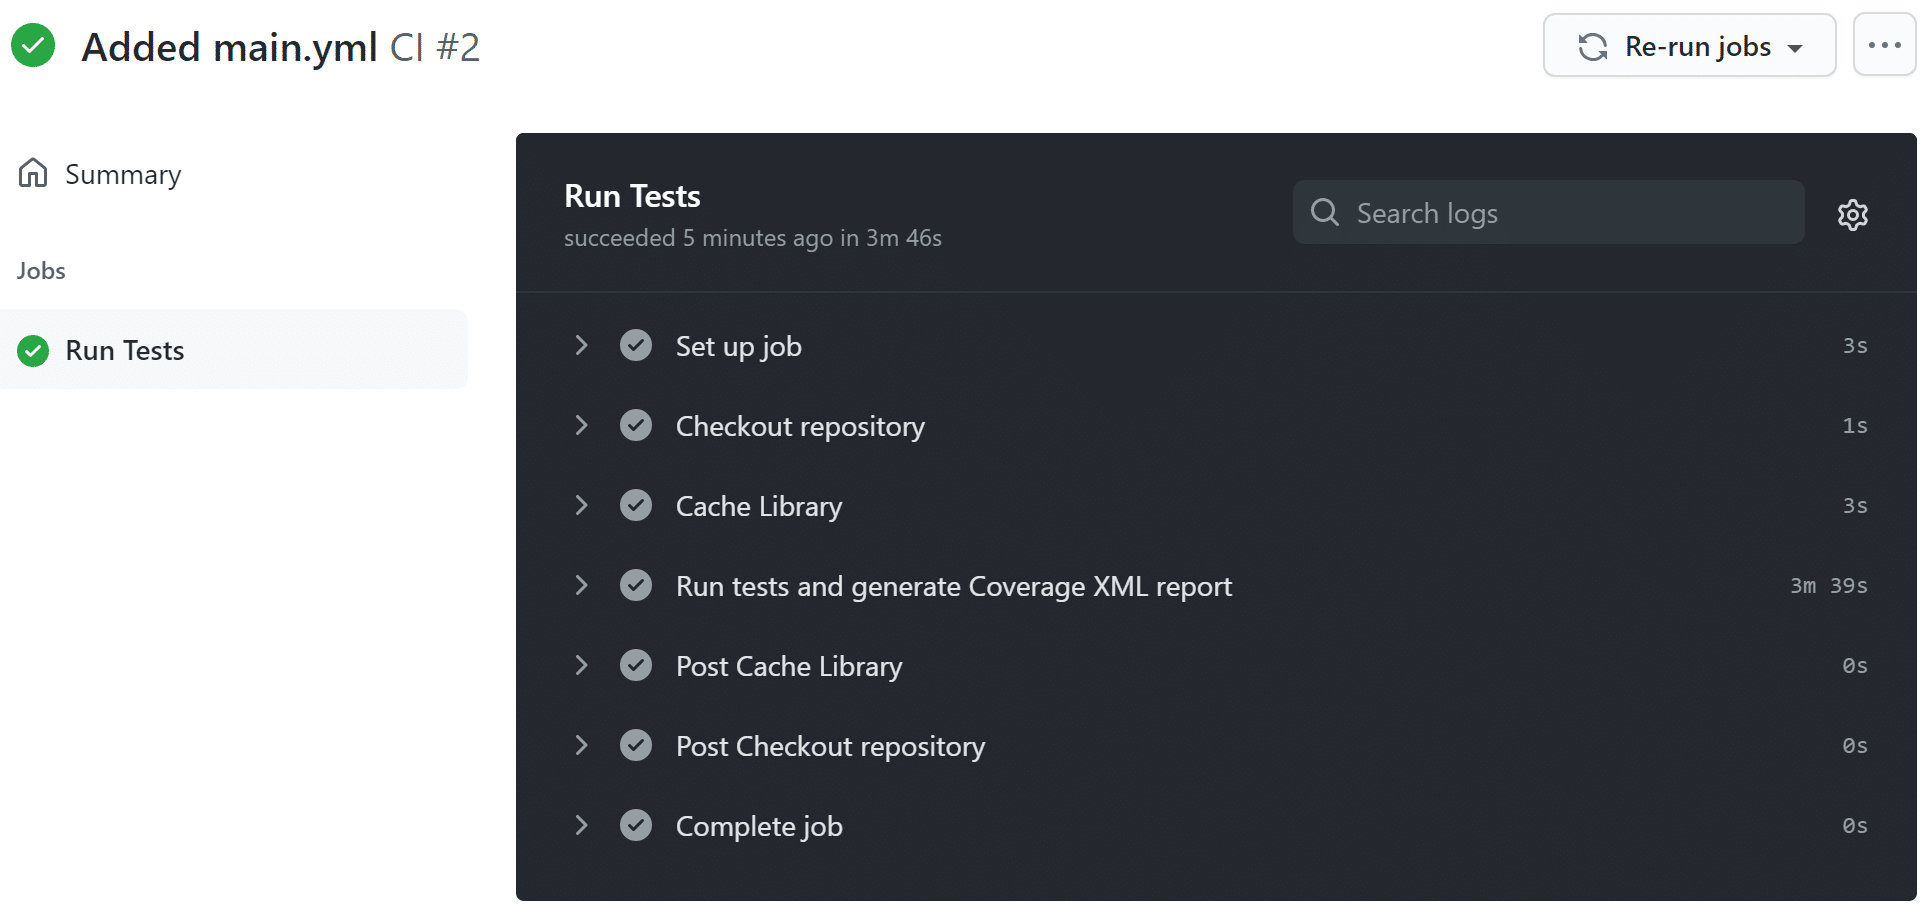
This workflow triggers when you push code to the main branch in the repository, or create/update a pull request. It contains a runTests job which has 3 steps:
- Check out the repository
- Cache the Library folder
- Run the PlayMode tests and generate a Coverage XML report.
Note: The code coverage arguments are passed in customParameters. See Using Code Coverage in batchmode for more information.
Commit and push your workflow definition.
Go to the Actions tab in GitHub and select the latest commit’s workflow.
Setting up Codecov
1. Sign Up to Codecov
If you don’t already have an account, head over to Codecov and sign up with your GitHub account. Once you do that, you’ll see a list of your GitHub repositories. Choose the repository you just created to link it with Codecov. You will be presented with an upload token. If your repository is private, you need to copy the upload token from the Codecov dashboard and paste it into a GitHub encrypted secret named CODECOV_TOKEN.
2. Setup Codecov GitHub Action
We are now going to add a new step in the workflow, which will upload the Coverage XML report to Codecov:
   - name: Upload XML report to Codecov
     uses: codecov/codecov-action@v2
     with:
       name: PlayMode
       flags: automated
       token: ${{ secrets.CODECOV_TOKEN }}
       files: coverage-results/**/*.xml
Commit and push the updated workflow definition.
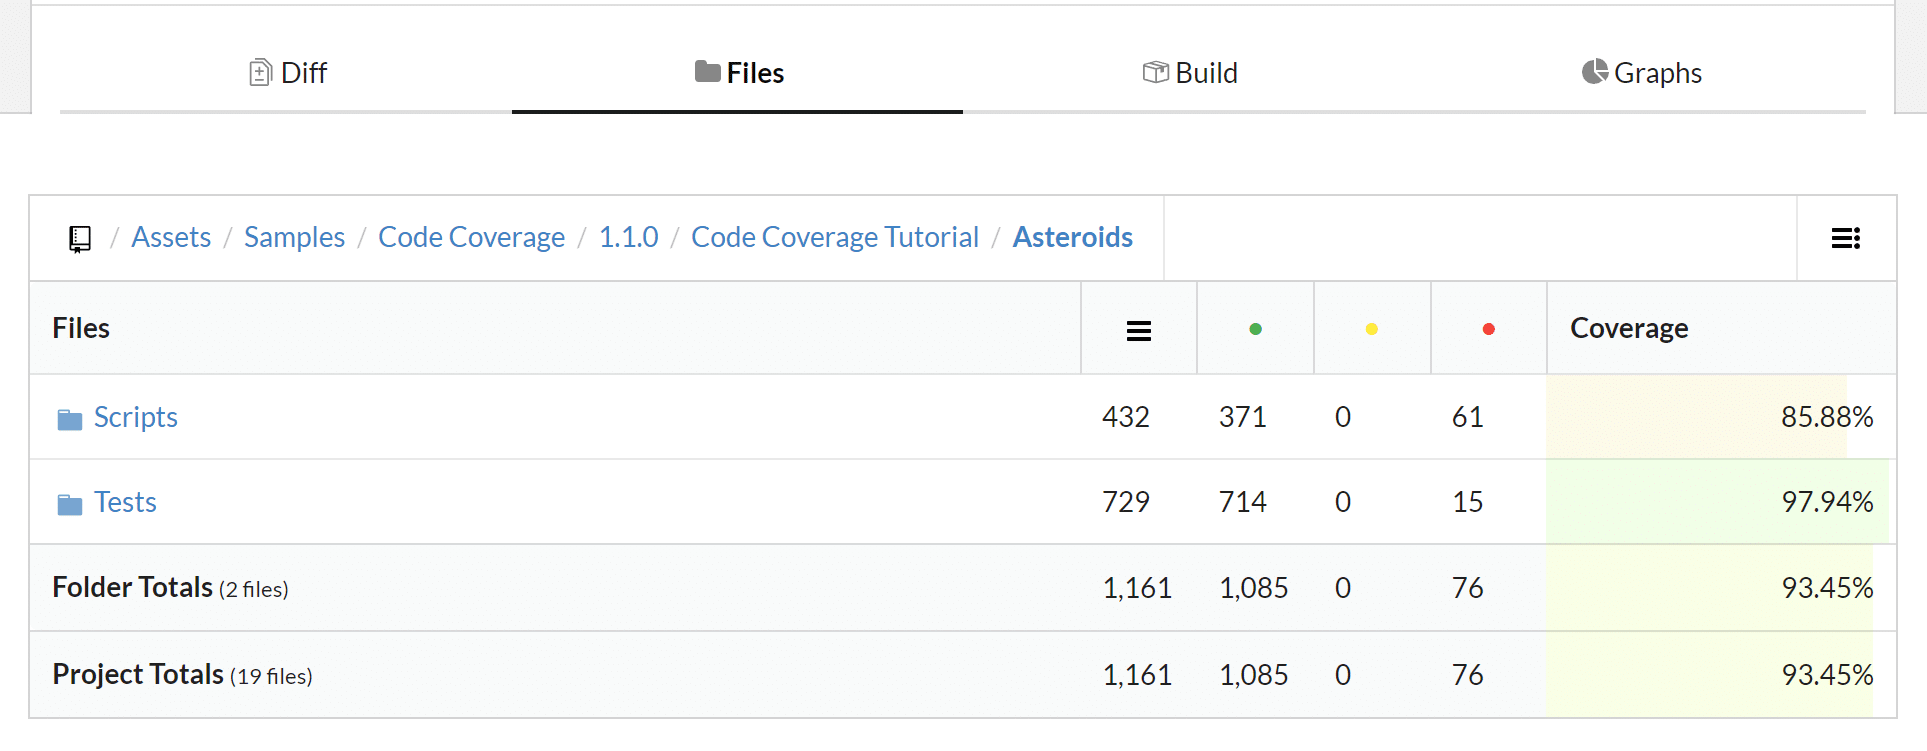
3. View Codecov report
When the new workflow finishes, navigate to the repository in the Codecov dashboard and select the latest commit.
4. Integrating with Pull Requests
1. Grant access to the Codecov bot to your account.
2. Create a new branch and name it add-weapon-tests.
3. Add Weapon tests to improve coverage; open the Tests/WeaponTests.cs script and uncomment all the tests (from line 35 down to line 237).
4. Commit and push the changes.
5. Create a pull request from the new branch. You should see a report like the one below on the pull request when the actions complete:
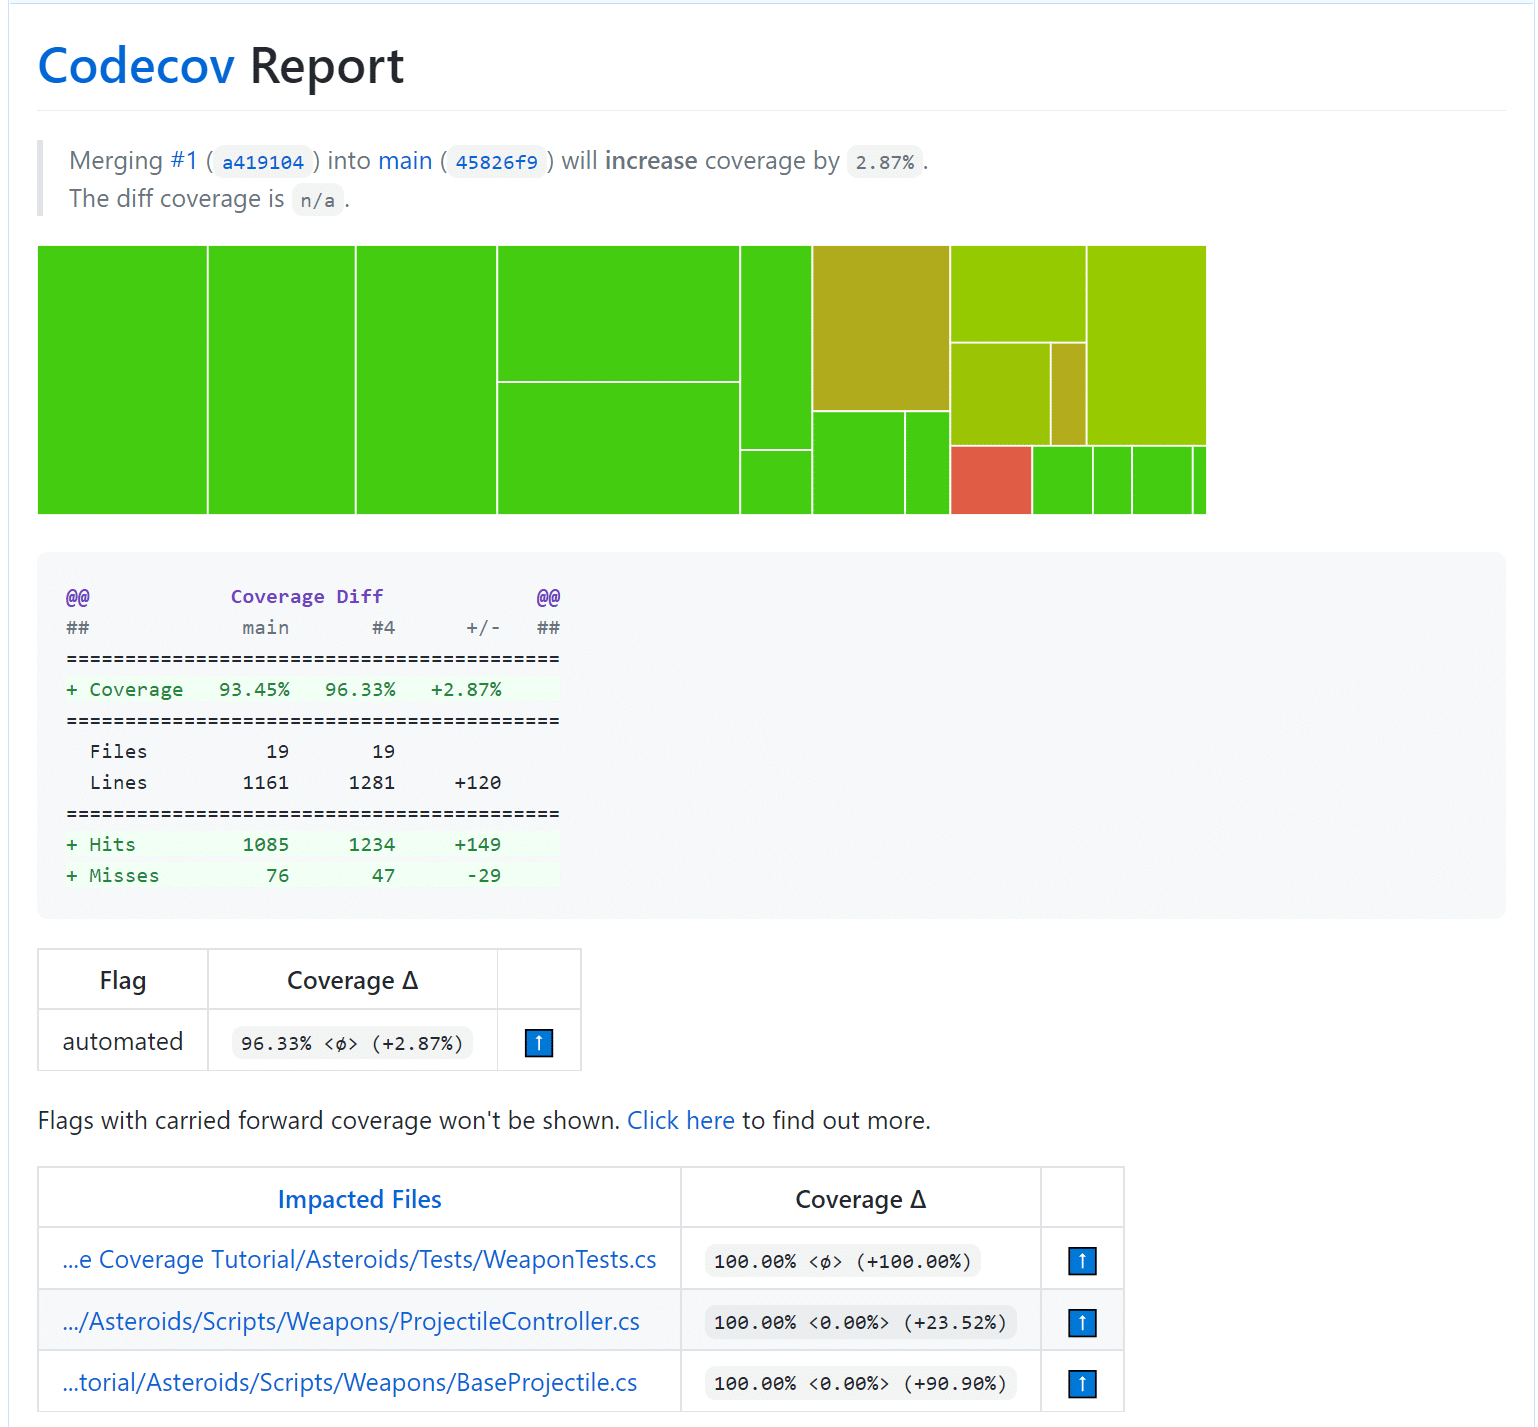
Observe that the coverage increases as expected.
Note: To configure the Codecov Report shown in the pull request, you can add a codecov.yml file in the root of the project, or update the Codecov Yaml file in the Codecov dashboard. See About Codecov yaml for more information.
Conclusion
In this tutorial, you learned about how code coverage is important for identifying portions of your code that are not covered by automated tests. Code coverage lets you understand where your tests are lacking and helps you detect bugs early.
You also learned how to set up code coverage in a Unity project using the Code Coverage package and how to integrate Codecov with your GitHub repository using GitHub Actions to generate coverage reports every time you push changes or make a pull request.