Code coverage is an important quality indicator for any software application, but it’s especially important to track if you’re building apps for the Salesforce AppExchange. Before deploying to Apex, your tests must pass and you must have 75 percent unit test coverage. Because code coverage is an essential part of Salesforce app development, having a code coverage monitoring tool like Codecov is a valuable piece of your CI toolbox.
In this tutorial, I’ll show you how to create code coverage reports and upload them to Codecov as part of your continuous integration process. You’ll use GitHub Actions and the Salesforce DX CLI to programmatically set up a sandbox organization in Salesforce, run your tests, and generate coverage reports. Finally, I’ll show you how you can use the Codecov dashboard to track your code coverage over time and ensure that every pull request is in compliance with the Salesforce Apex requirements.
Prerequisites
Before you get started, you should have:
- A Salesforce DX account (you can sign up for a free developer account here)
- The Salesforce DX Command Line Interface (available here)
- A Codecov account linked to your GitHub profile
Running Tests with the Salesforce DX CLI
You need some Salesforce Apex code and tests to run. If you want to start a completely new Apex project, you can follow Salesforce’s documentation here. To simplify things, I added a HelloWorld.cls, a HelloWorldTest.cls file, and the necessary meta and configuration files to this GitHub repository. You can clone this repository to your local machine if you want to get the final working code.
Note: Don’t fork this repository, as secrets won’t be included in your GitHub Action if it’s a fork.
The Apex code in the repository is a single Hello, world class and method:
public with sharing class HelloWorld {
    public String hey(String name) {
        return 'How are you ' + name + '?';
    }
}
And the test code ensures that the Apex class returns the expected message:
@isTest
public class HelloWorldTest {
    @isTest
    static void checkMessage() {
        final String name = 'Jeff';
        final String expectedMessage = 'How are you Jeff?';

        HelloWorld myHelloWorld = new HelloWorld();
        String message = myHelloWorld.hey(name);

        System.assertEquals(expectedMessage, message);
    }
}
_Note the @isTest annotation ensures that Salesforce recognizes this as a test class and disregards it from the aforementioned code coverage requirements._
After you log into the Salesforce DX CLI, you’re ready to run your tests. Create a scratch organization to run your tests on:
sfdx force:org:create --setdefaultusername --definitionfile config/project-scratch-def.json --setalias localdev --durationdays 1 -u <YOUR SALESFORCE USERNAME>
Next, push your source code to the scratch org:
sfdx force:source:push
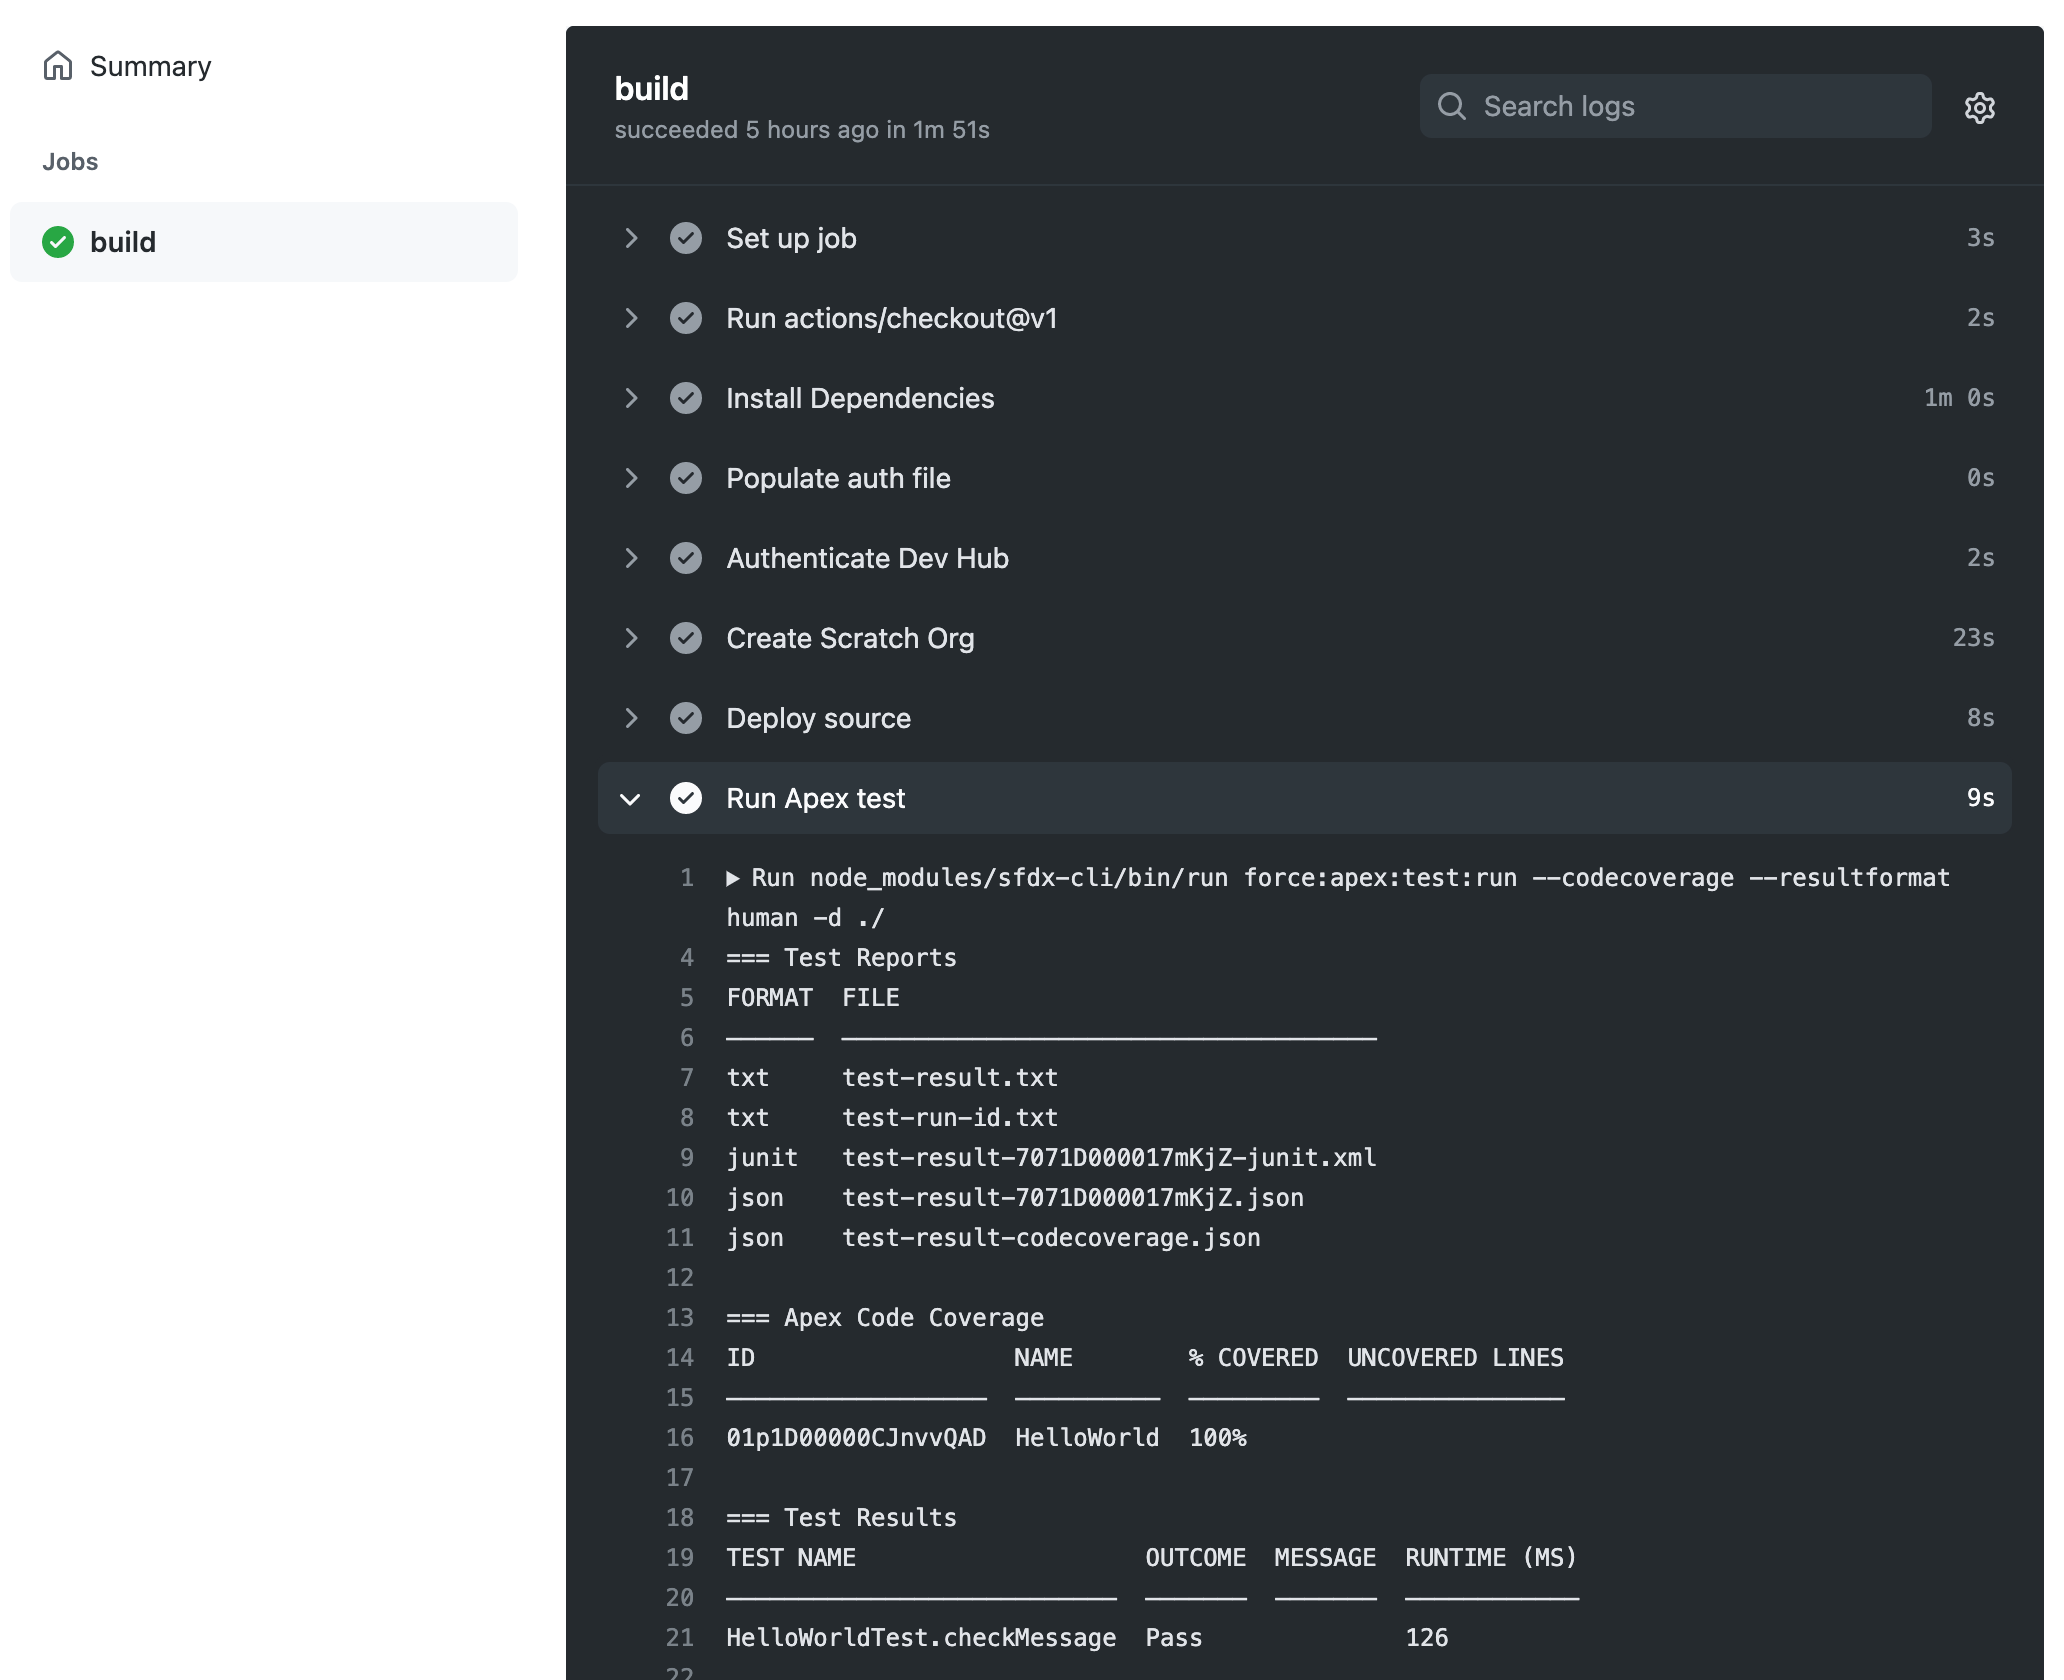
Finally, run your tests with code coverage using the following command:
sfdx force:apex:test:run --codecoverage --resultformat human
You’ll see the results of your test run in your terminal:
=== Test Summary
NAME                 VALUE
───────────────────  ──────────────────────────────────────────────────────
Outcome              Passed
Tests Ran            1
Passing              1
Failing              0
Skipped              0
Pass Rate            100%
Fail Rate            0%
...
Test Run Coverage    100%
Org Wide Coverage    100%
You’ve successfully run your Salesforce application’s tests locally. In the following sections, you’ll see how to run these tests using a GitHub Action and push the code coverage report to Codecov.
Setting Up a GitHub Action to Run the Salesforce DX CLI
To add a GitHub Action to your repository, create a new file called code-coverage.yml to the .github/workflows directory in your project. This YAML file will contain step-by-step instructions for running your tests, but for now, just add a step to check out your latest code and install the Salesforce DX CLI using NPM:
name: code-coverage
on: [push]
jobs:
  build:
    runs-on: ubuntu-latest
    steps:
    - uses: actions/checkout@v1
    - name: Install Dependencies
      run: npm install sfdx-cli
Next, you need a way to authenticate your GitHub Action with Salesforce. Depending on your security requirements, you can choose any of the authentication methods supported by Salesforce DX, but I’ll use the sfdxurl method. This uses your local CLI’s authentication to generate a Salesforce auth URL that can be used by your GitHub action to access your Salesforce environment.
Get your Salesforce auth URL by running the following command locally:
sfdx force:org:display -u <YOUR SALESFORCE USERNAME> --verbose
Save the value of the Sfdx Auth Url. You’ll need this in your GitHub Action.
Now that you have your auth URL, set up a new GitHub repository. You’ll push your completed GitHub Action here later, but for now create a new secret called SALESFORCE_AUTH_URL and set the value equal to the auth URL you just saved.
Open your code-coverage.yml file and add the following steps:
...
    - name: Populate auth file
      run: 'echo "${{ secrets.SALESFORCE_AUTH_URL }}" > ./SALESFORCE_AUTH_URL.txt'
    - name: Authenticate Dev Hub
      run: 'node_modules/sfdx-cli/bin/run force:auth:sfdxurl:store -f ./SALESFORCE_AUTH_URL.txt -a devhub -d'
    - name: Create Scratch Org
      run: node_modules/sfdx-cli/bin/run force:org:create --targetdevhubusername devhub --setdefaultusername --definitionfile config/project-scratch-def.json --setalias ciorg --durationdays 1
    - name: Deploy source
      run: node_modules/sfdx-cli/bin/run force:source:push
    - name: Run Apex tests
      run: node_modules/sfdx-cli/bin/run force:apex:test:run --codecoverage --resultformat human -d ./
This copies your SALESFORCE_AUTH_URL secret into a text file, uses it to authenticate via the Salesforce DX CLI, and then runs the same steps that you ran above locally to create a scratch org, deploy your source, and run your Apex tests.
Your GitHub Action should now work. Commit your changes and push them to your GitHub repository.
You’ll see your Action run through each step, ending with a (hopefully) successful test run. Now you’re ready to add Codecov to your Action.
Setting Up Codecov for Code Coverage Reporting
Assuming you’ve already linked your GitHub and Codecov accounts, the next step is to add your new GitHub repository to Codecov. Find your repo in Codecov’s list and copy the CODECOV_TOKEN from the Codecov project page. Go back to your GitHub repository and add this token as a new secret called CODECOV_TOKEN.
Next, open up your code-coverage.yml file again and add the last two steps you need to upload coverage to Codecov and delete your temporary scratch org from Salesforce:
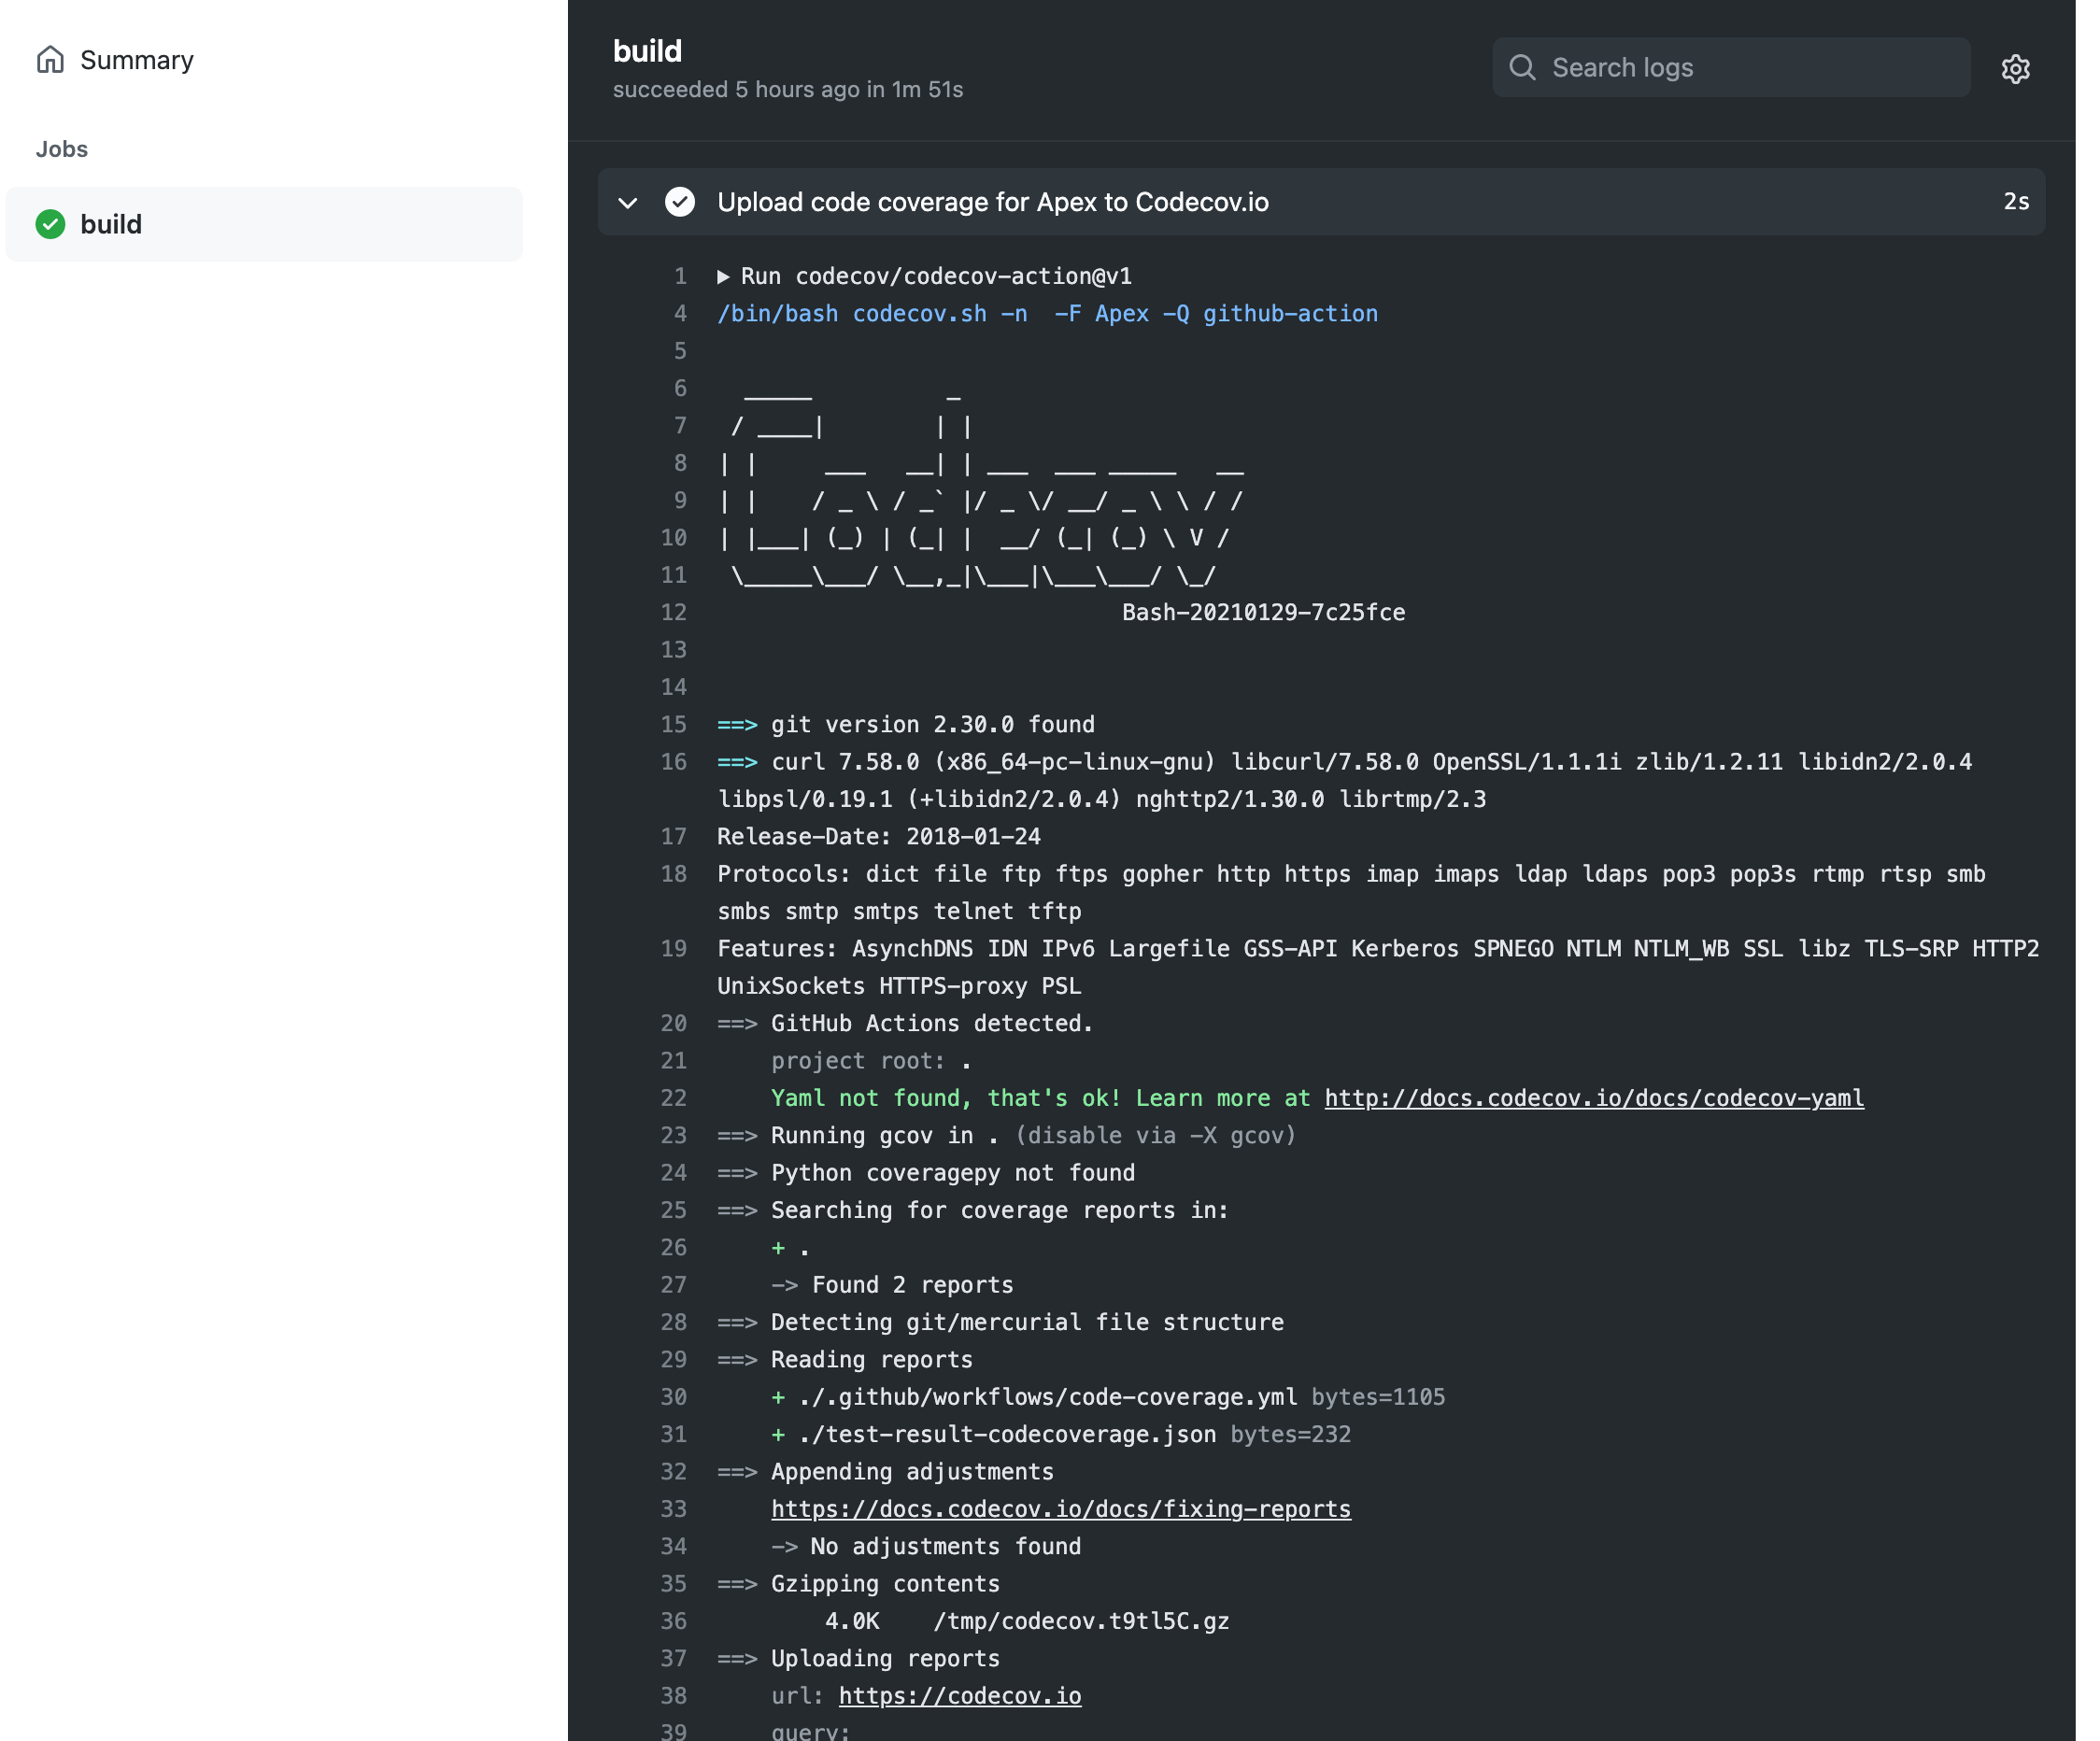
    - name: Upload code coverage for Apex to Codecov.io
      uses: codecov/codecov-action@v2
      with:
        flags: Apex
    - name: Delete Scratch Org
      run: node_modules/sfdx-cli/bin/run force:org:delete --noprompt
Commit and push this final change and make sure the new steps work.
Pull Requests Reports
Because of the Salesforce AppExchange code coverage requirements, it’s vital that your engineering team pays attention to how changes affect your coverage. Codecov’s pull request reports can show you how each pull request impacts your overall code coverage.
To demonstrate this feature, first add a blank codecov.yml file to your project. You can use this to further configure your Codecov project, but for now it just needs to exist so that pull request reports appear.
Next, create a new branch and add a second method to the HelloWorld.cls:
...
    public String bye(String name) {
        return 'Good to see you, ' + name + '.';
    }
...
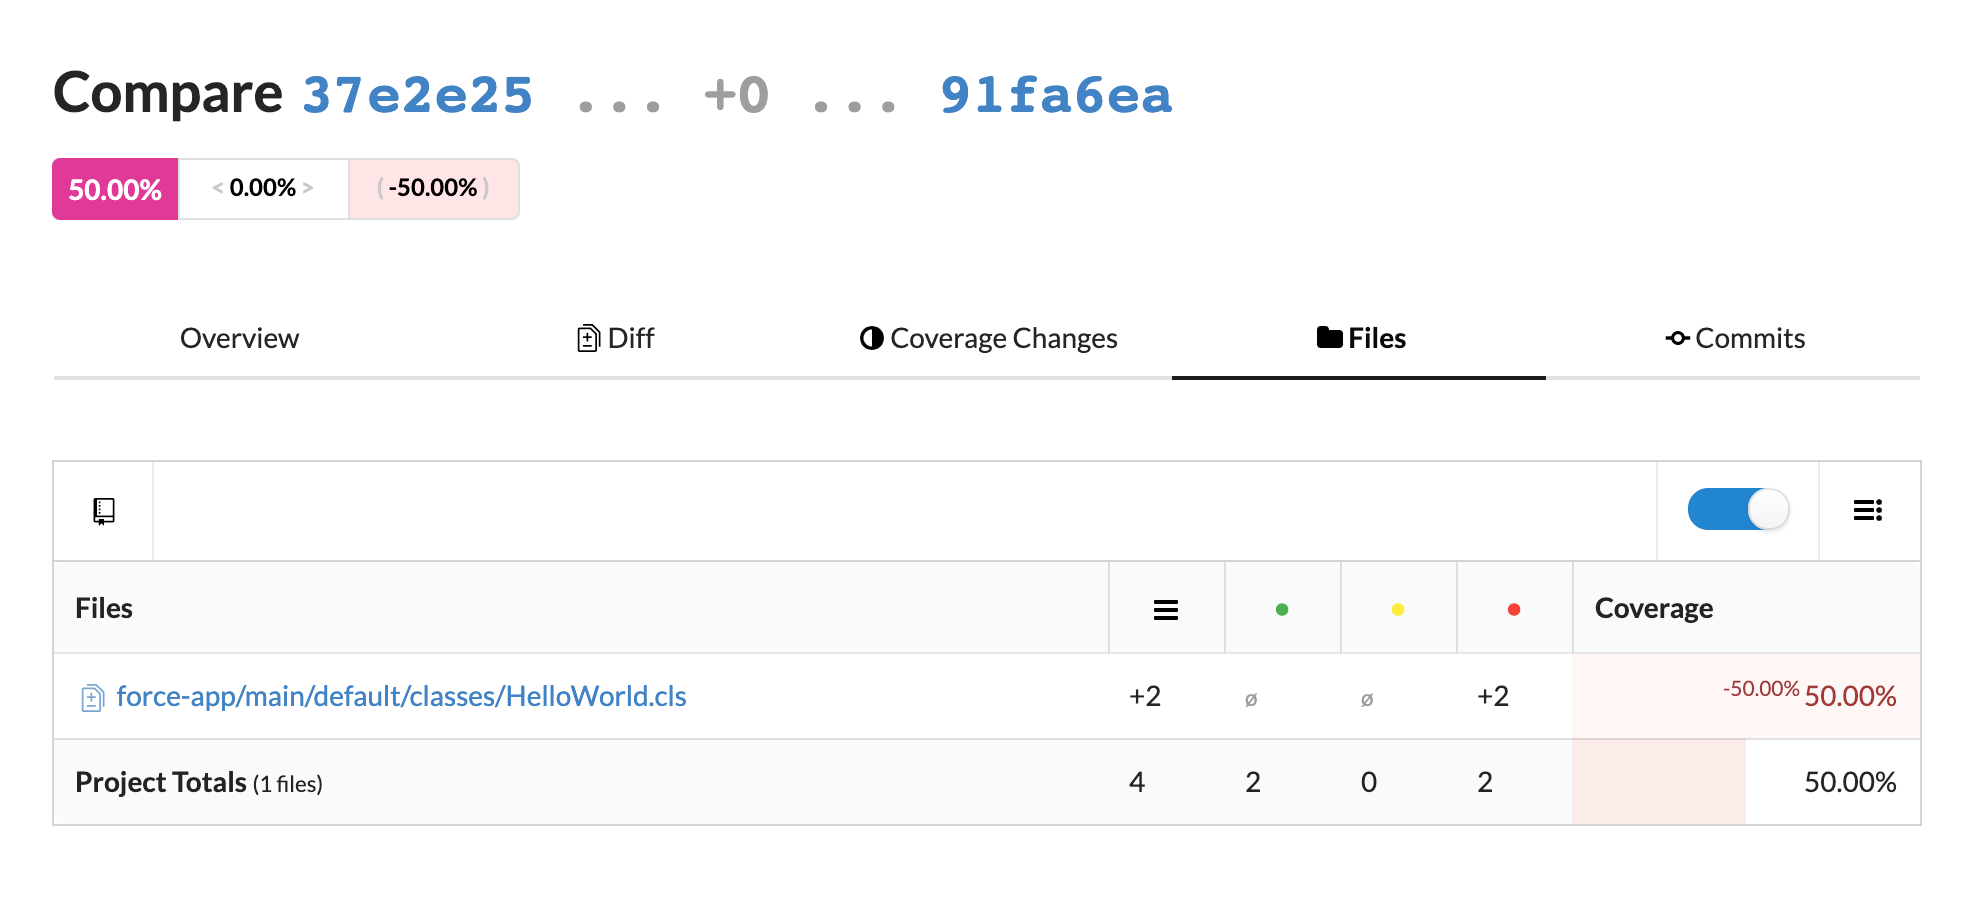
This method isn’t covered by a test, so when you push the change to GitHub and create a pull request, Codecov will show you that your coverage percentage has decreased dramatically:

Since this is a very small pull request, it’s easy to tell which file caused the issue, but in a real-world application, you’ll probably need more information. You can click through to Codecov to see which files’ coverage has decreased so you can correct the pull request before it’s merged into production.
The Codecov Dashboard
As your application changes and grows, you might want to know how coverage has changed over time (for better or worse). Your Codecov project page shows a line graph of coverage, which can help you make sure a new Salesforce app has the necessary coverage, or that an old project’s coverage isn’t degrading over time.
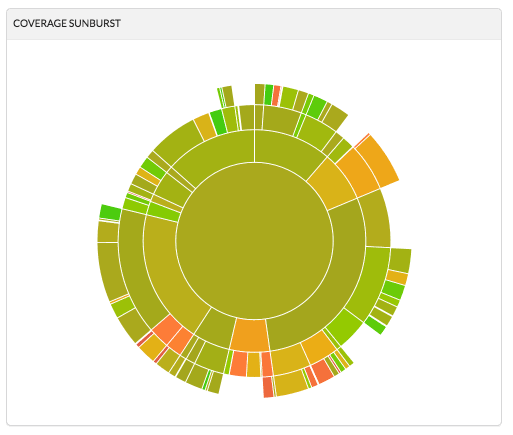
Finally, you can use Codecov’s interactive sunburst graph to see how your coverage stacks up in different parts of your Salesforce app. This can be useful if you have different teams or developers focused on different parts of the code.