You want to ensure that your app’s features work as expected and that future changes don’t break your codebase. Naturally, you test your code. But do you know how well your tests actually work? Code coverage is the measure of how much of your code your test suite touches, and you want that percentage to be high.
Codecov is a reporting tool that can help you increase the coverage of your codebase. It integrates with your workflow to point out where you can add or update tests, especially in pull requests where new features and bug fixes often occur.
In this tutorial I’ll show you how to set up code coverage in your iOS application built in Swift, as well as generate code coverage reports every time you push changes using GitHub Actions and Codecov.
Running Tests and Coverage Locally in Xcode
First, download the demo project from GitHub.
- Open the
CodecovDemoTestsfolder and hit Command + U to run the tests. - Open the test navigator to ensure all the tests pass.
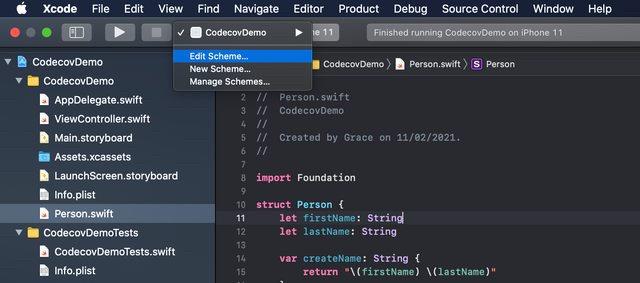
- To enable code coverage, click the scheme editor in the toolbar.
- Select the CodecovDemo scheme and choose Edit Scheme.
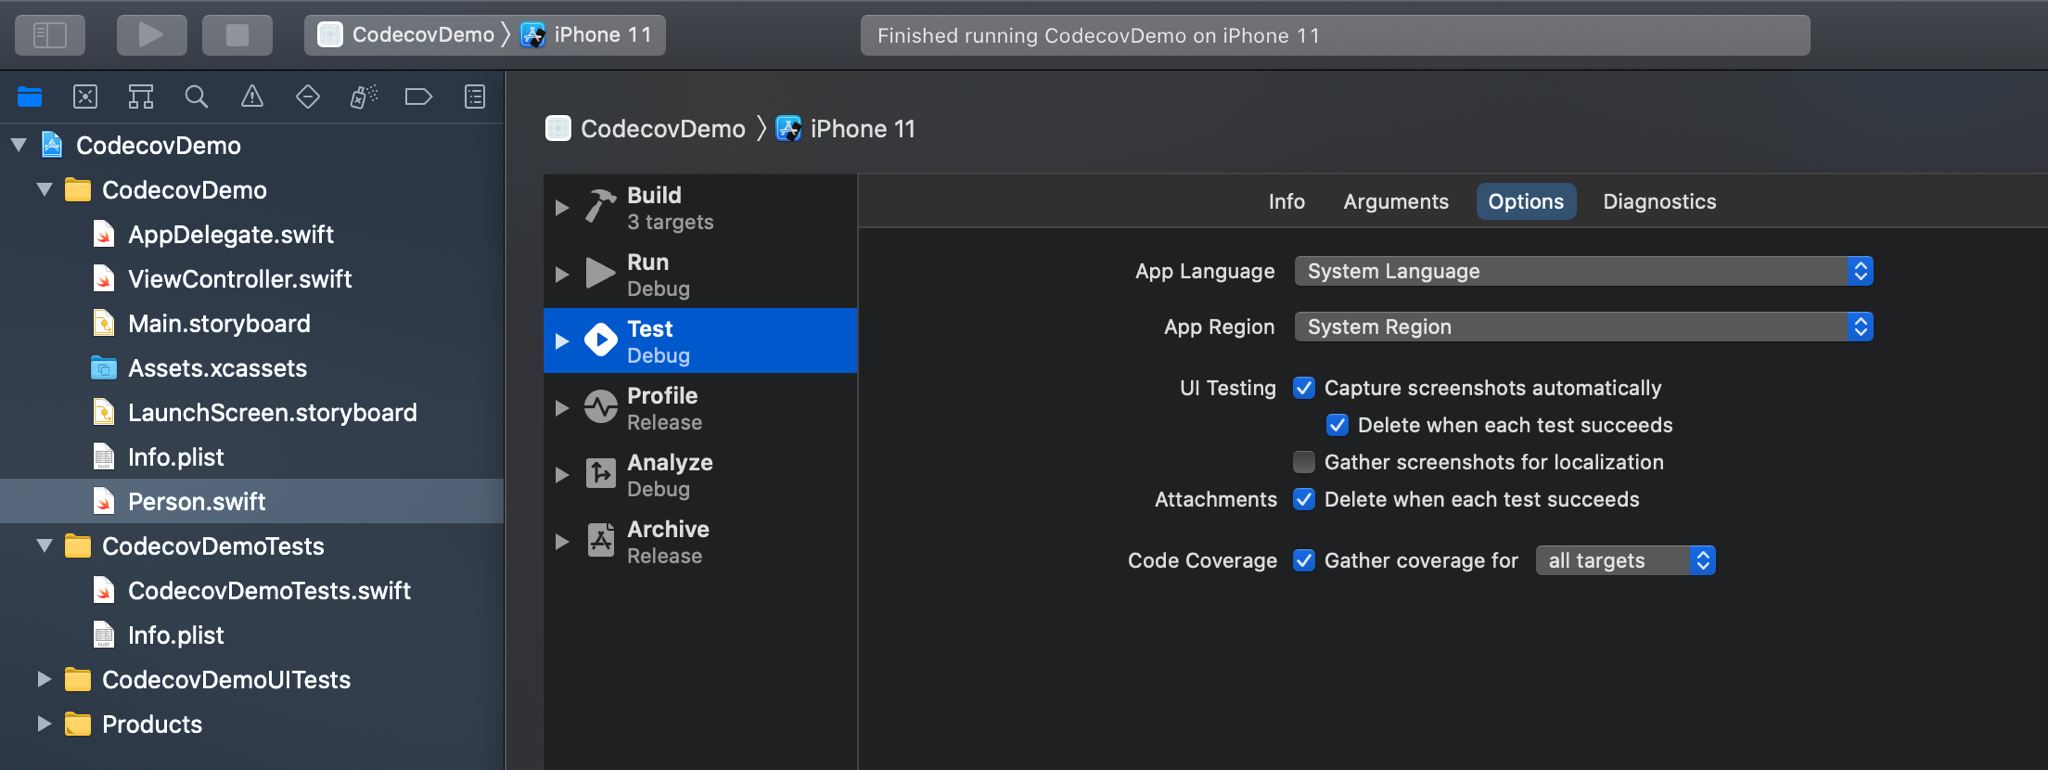
- Select the Test action on the left. Check the Code Coverage box to gather coverage data.
- Run the test suite one more time to collect code coverage data.
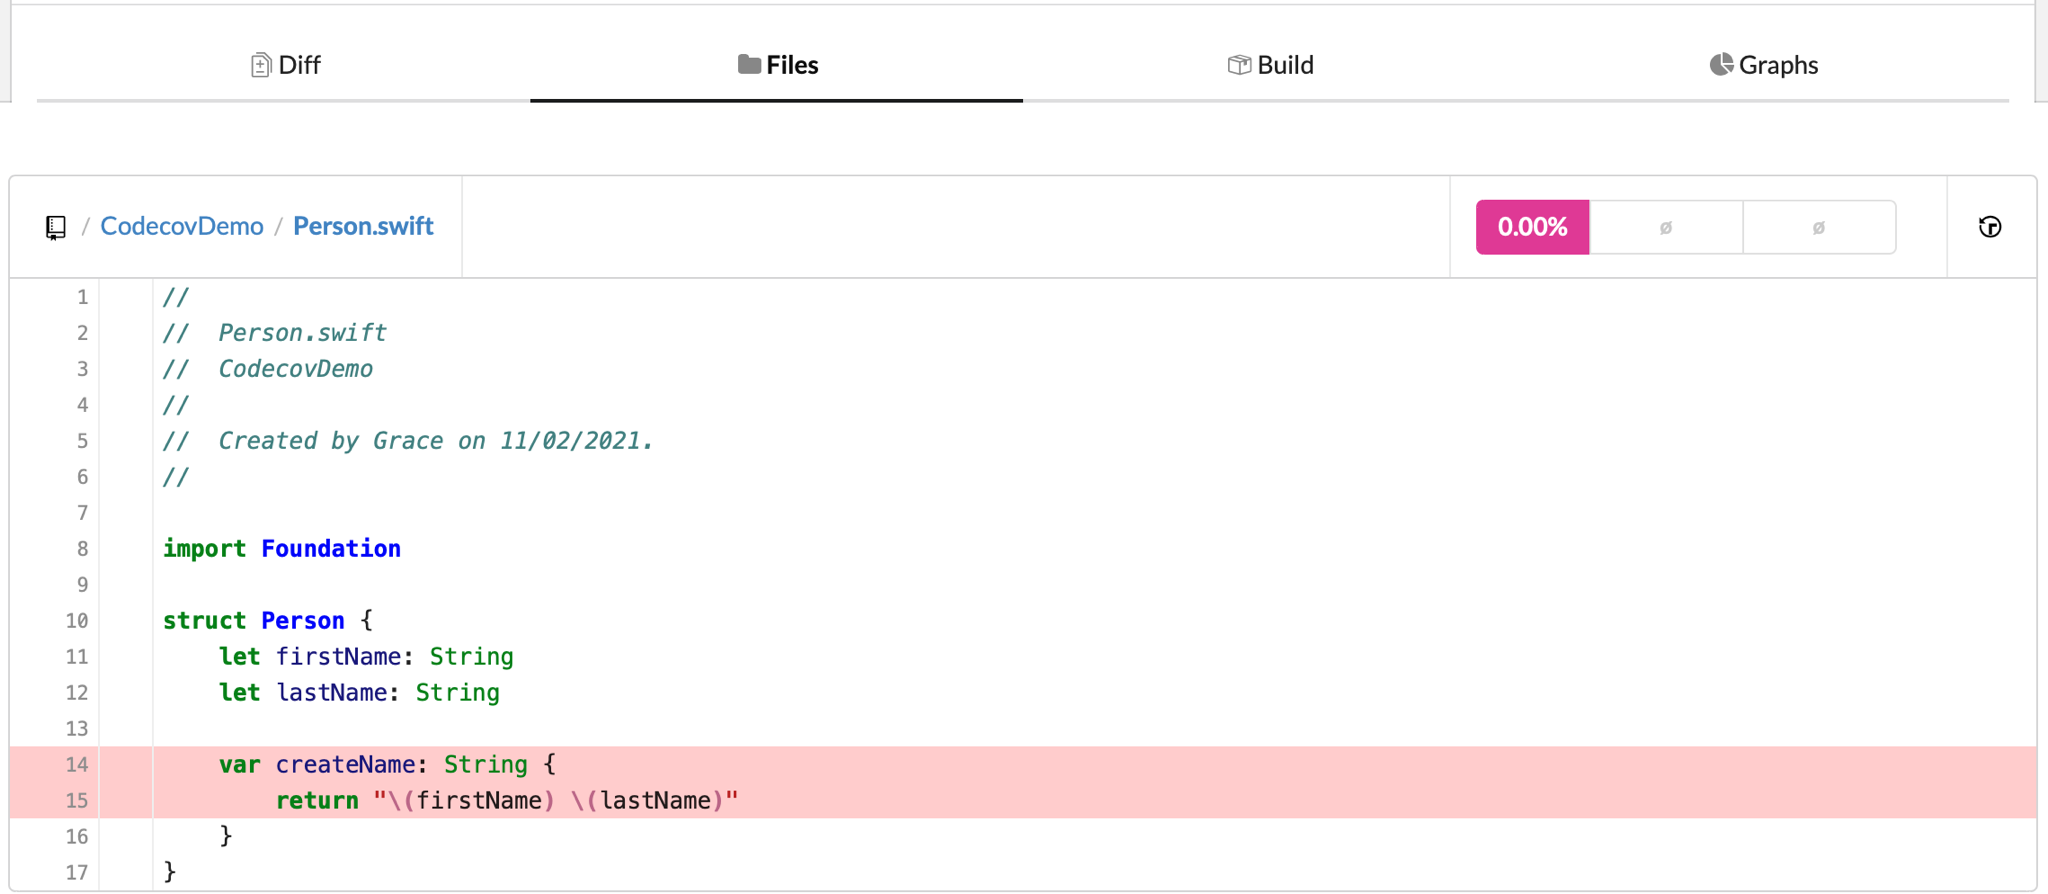
- To see the code coverage report, open the Report Navigator on the left, select the latest report for the last test run, and select Coverage from the Test dropdown menu. You can see our person model is not completely covered by the tests written; we will fix that soon.
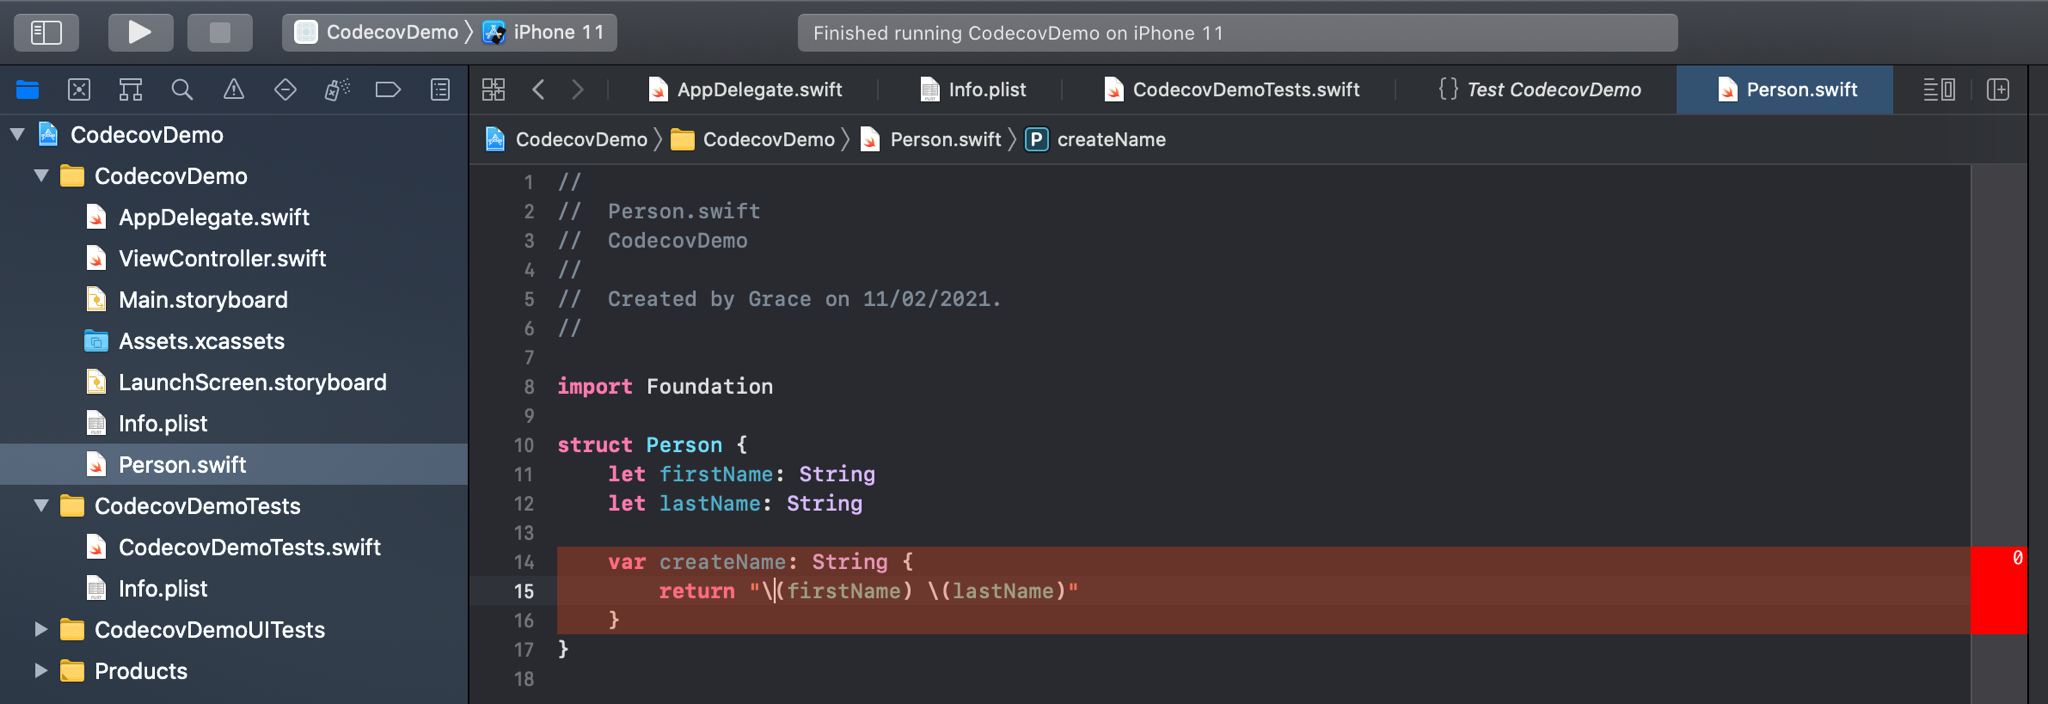
Xcode uses colored highlights and a number to indicate which code has not been tested. Green signifies that the code was covered by the test, red shows it’s not covered at all, and the number to the right of the screen signifies how many times the code was run during testing. You can activate the editor by selecting Editor, then Code Coverage from the options.
Setting Up GitHub Actions
GitHub Actions allow you to automate, customize, and execute your software development workflows right in your repository. The workflow is an automated procedure that you add to your repository using a .yml file.
To create your workflow files, you must first create the .github/workflows directory where you’ll store them.
- From the top of your directory in terminal, run the following command:
mkdir .github/workflows
- Change to the workflow directory, create the .yml file, and open it:
touch codecovdemo.yml
open codecovdemo.yml
- Add the following lines to your .yml file:
name: Codecov Demo

on:
  push:
    branches:
main
  pull_request:
    branches:
main

jobs:
  build:
    runs-on: macOS-latest
    steps:
      - name: Test
        uses: actions/checkout@v1
      - name: Build and Test
        run:  xcodebuild test -project CodecovDemo.xcodeproj -scheme CodecovDemo -destination 'platform=iOS Simulator,name=iPhone 11,OS=14.3' build test
Take note of how the lines are formatted, as that will determine whether your workflow will be successful or not.
- In your file, you can adjust
nameto describe the name of your workflow. This can be optional. If a name is not included, GitHub will set your workflow name to the workflow file path relative to the root of your repository. - Your workflow triggers when code is pushed to the main branch or a pull request is made to the branch. This is described under the mandatory
onoption; you can specify many more branches or events by adding them to an array. - Define
jobsin your workflow. Each job runs in an environment specified inruns-on. Jobs run in parallel, so if one job fails, the next one will not be executed. A job contains a sequence of tasks calledsteps. Steps can run commands, run setup tasks, or run an action in your repository; in this case, your steps are building and running tests specified in your Xcode project. - For the
-destinationoption, provide an iOS simulator name and OS version that’s available in your Xcode. - Save the changes and commit them to GitHub.
You can view your workflows under the Actions tab in GitHub.
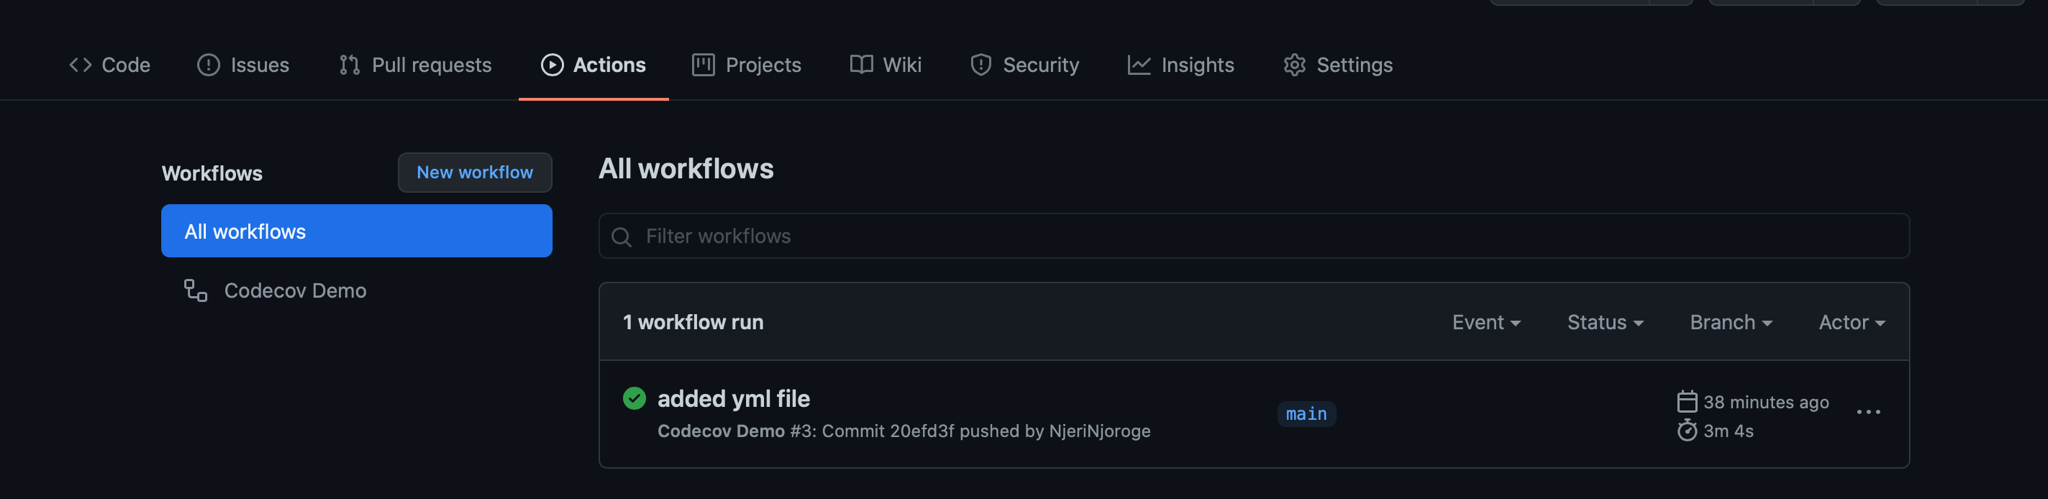
Check out other actions you can add to your workflow here: “Workflow syntax for GitHub Actions”.
Setting Up Codecov for Code Coverage Reporting
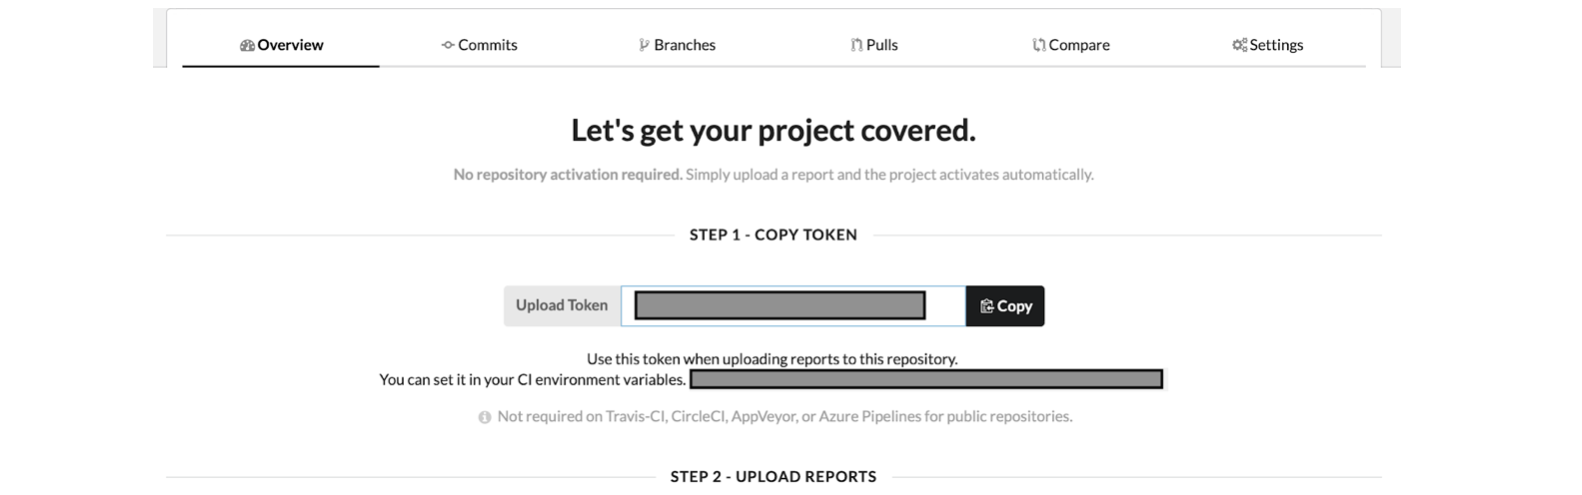
You can set up Codecov from the GitHub Marketplace or navigate to Codecov.io and sign up using GitHub, GitLab, or Bitbucket.
- When you’re asked to choose a repository, select the demo repository you’ve been using in this tutorial. You’ll receive a copy token unique for this project, however you don’t need it if your GitHub project is public.
- Now that you’ve set up Codecov, add the right script command to your .yml file. Open the .yml file and add the following lines:
   - name: Upload coverage to Codecov
        uses: codecov/codecov-action@v1.2.1
Your .yml file should look like the one below. Make sure you edit the scheme name if you’re using a different project, and your Xcode OS version.
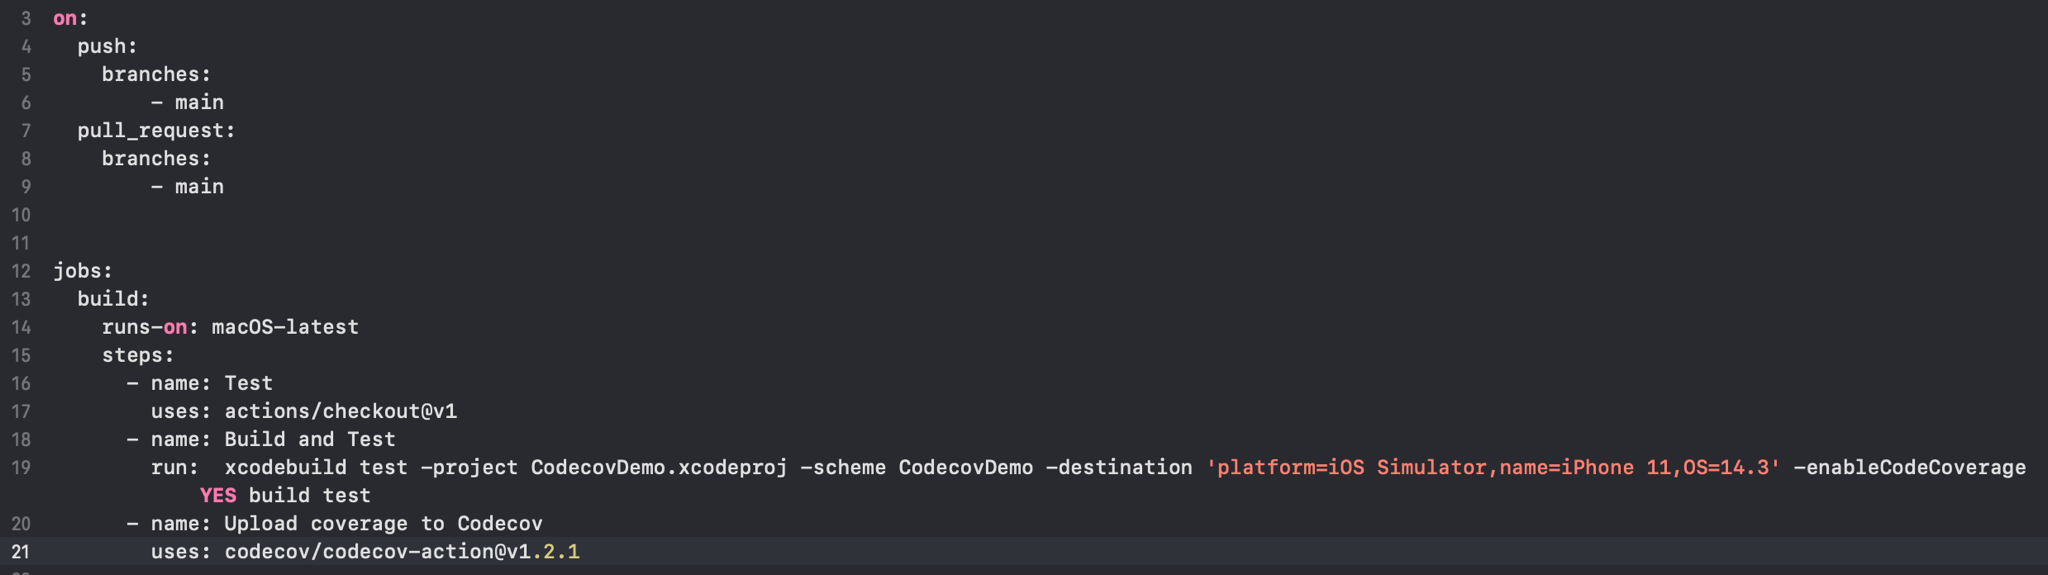
- Save and commit your changes to GitHub. You can expand your workflows if you need more insight, or in this case to view your Codecov report. At the bottom of the logs for Upload coverage to Codecov, you can find a link to the coverage report.

Viewing Code Coverage in Codecov
The overview page is a great place to view a summary of your project. Codecov provides a downloadable overview chart of your tests, commits, and files.
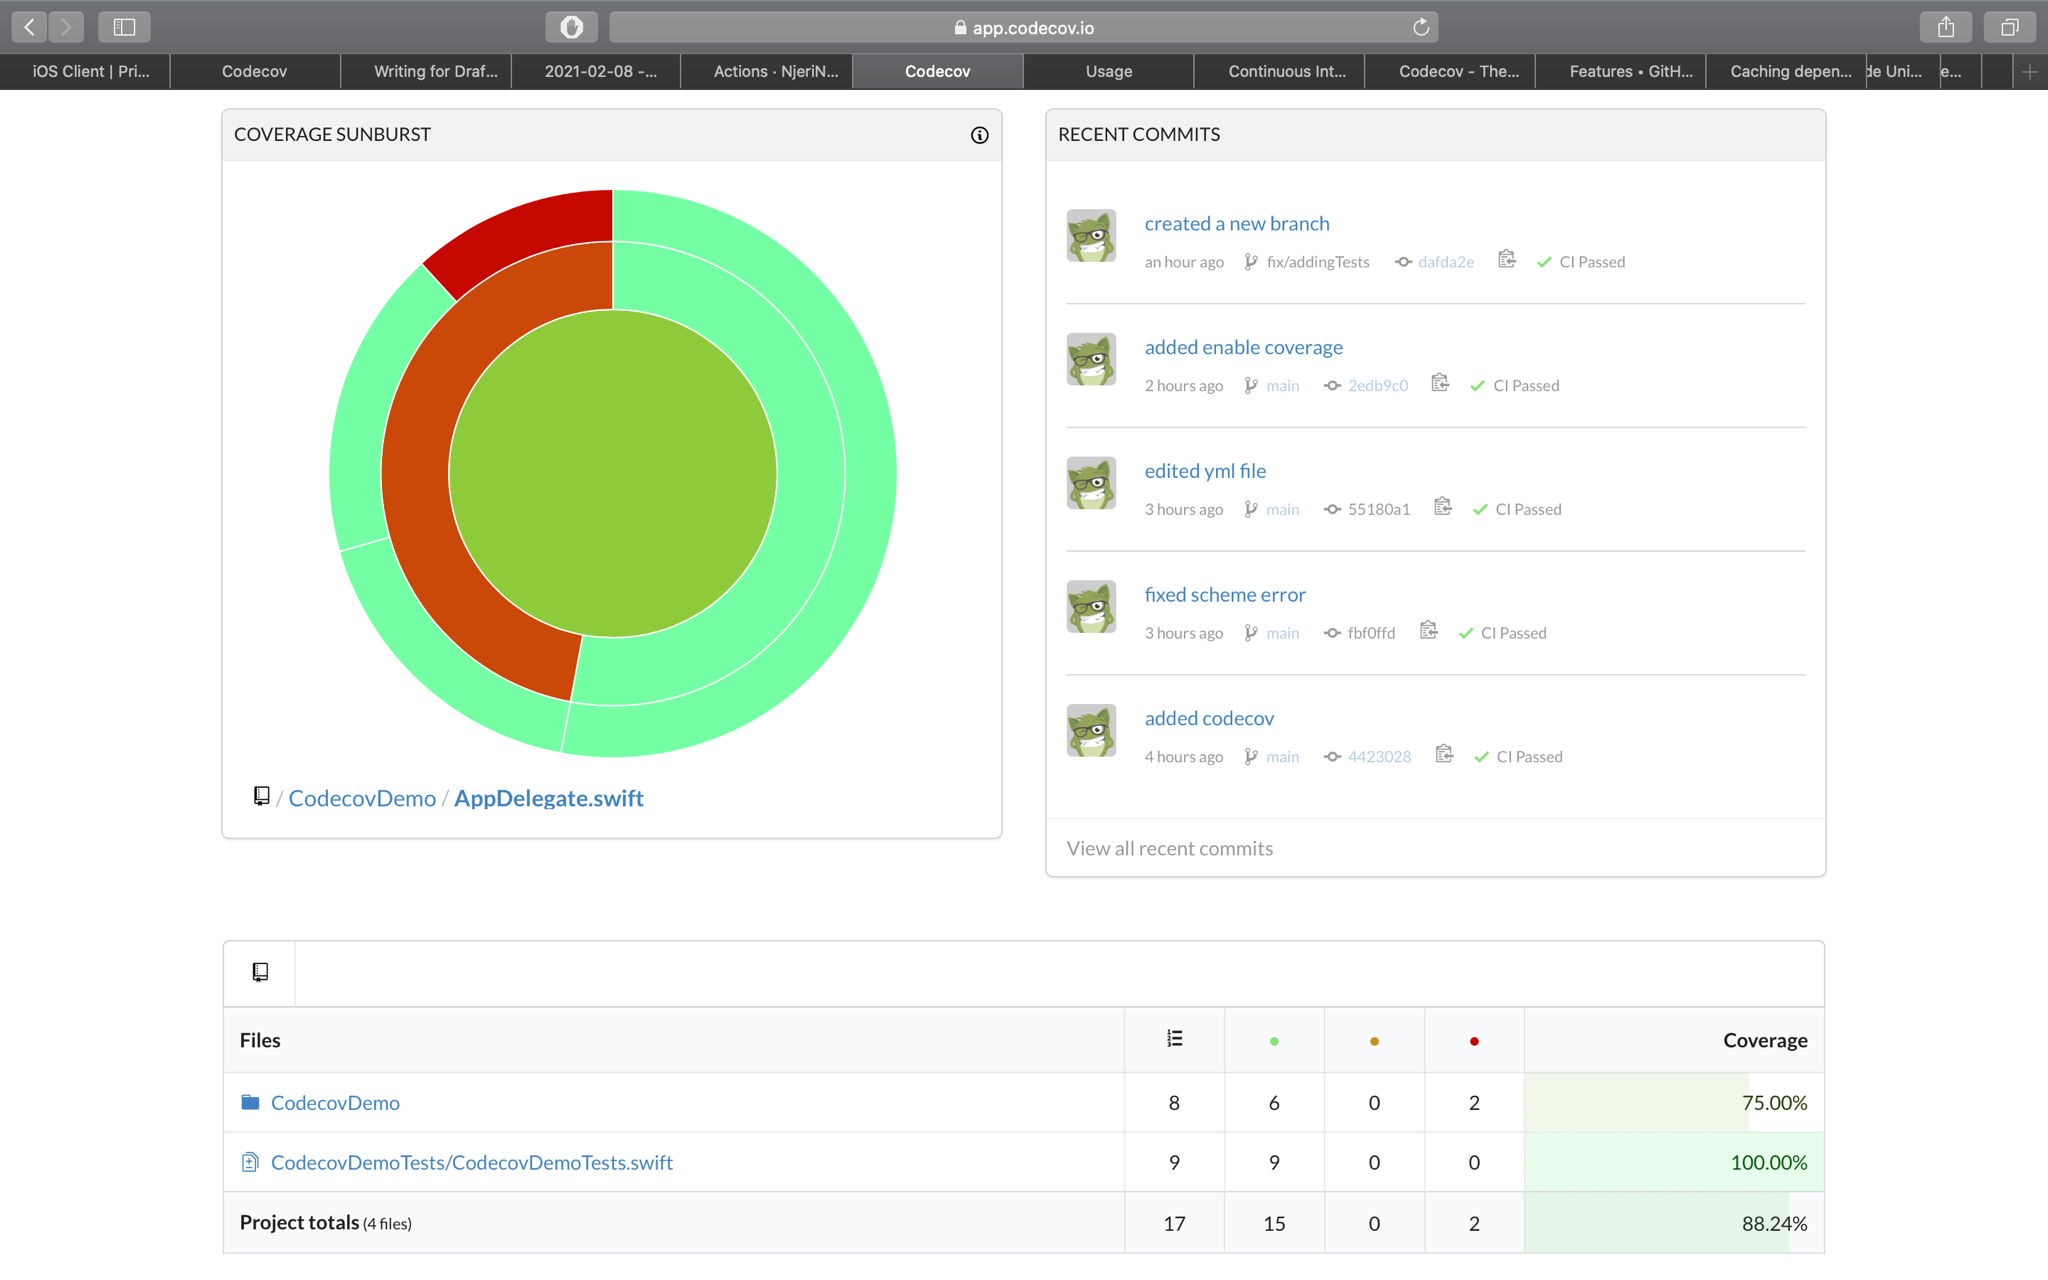
In this example, the test coverage isn’t a hundred percent, which isn’t necessarily bad. In a large codebase, you should aim for at least 75 percent test coverage. However, since our code is only doing one task, we can get the test coverage to a hundred percent.
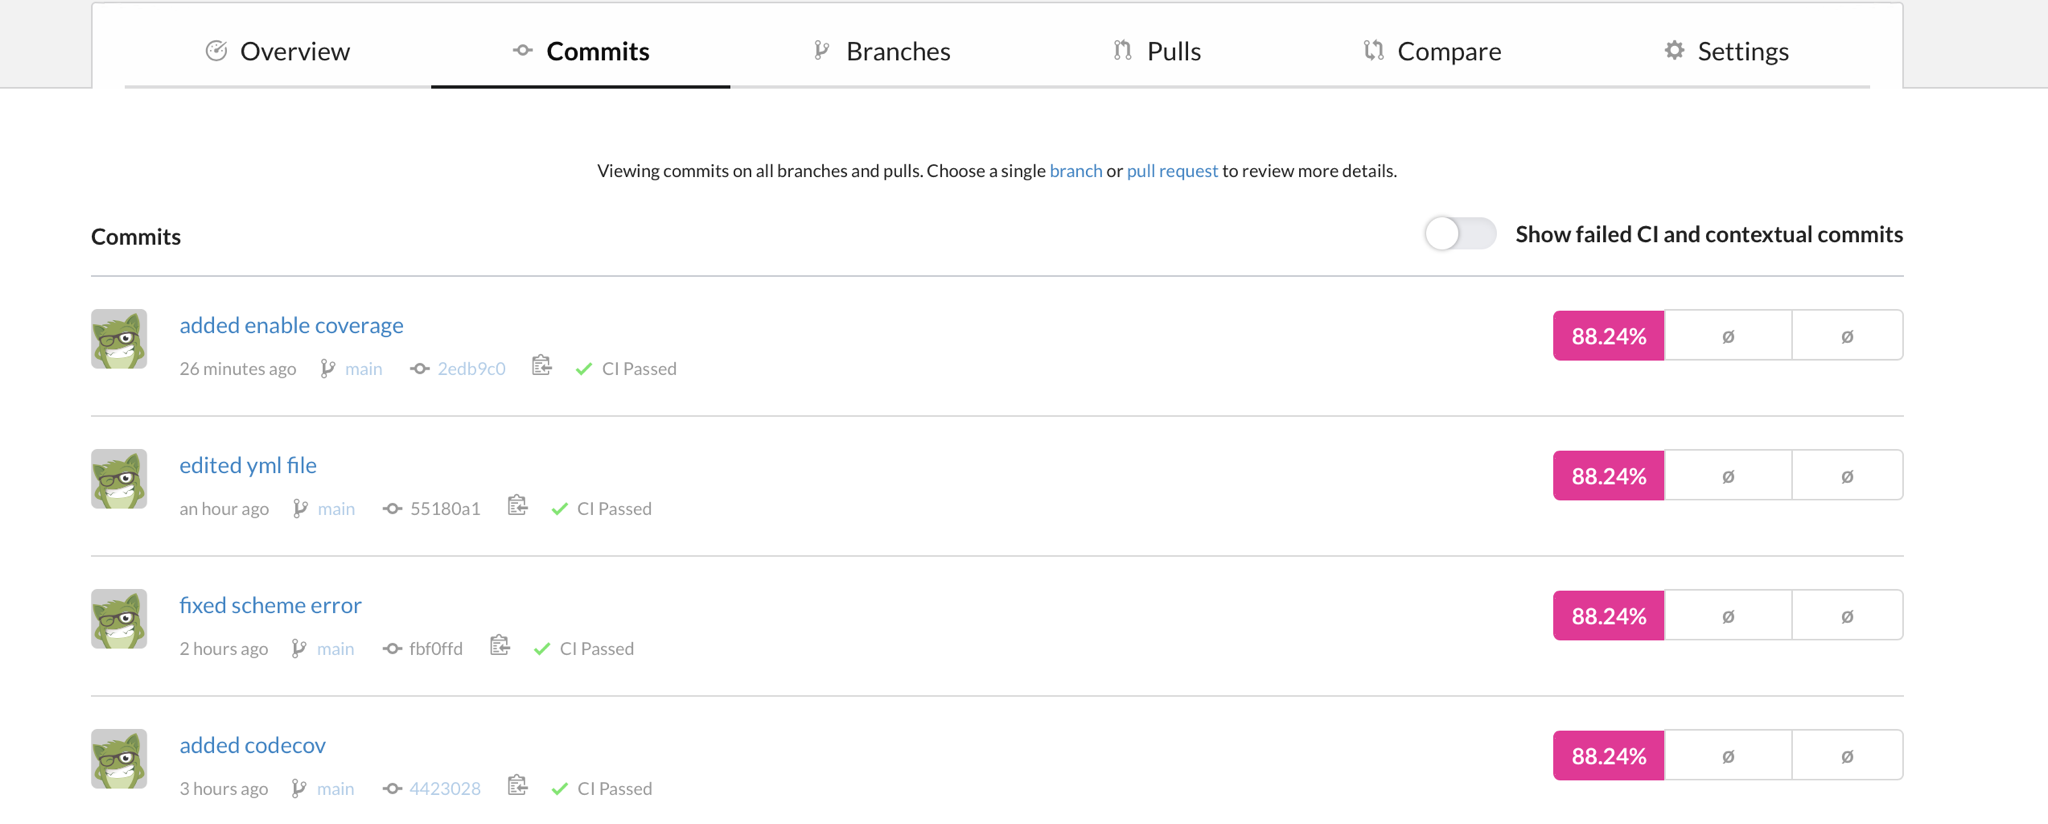
The number highlighted in pink is your entire project’s coverage report. You can examine which files have not been covered by selecting one of the commits to review.
- To fix the above error, create another branch from the main branch.
- Add the following code to your
CodecovDemoTests.swift.
    func testNameCreation() {
        let nameInit = Person(firstName: "Grace", lastName: "Njoroge")
        XCTAssertEqual(nameInit.createName, "Grace Njoroge")
    }
on:
  push:
    branches:
        [main, fix/addingTests]
  pull_request:
    branches:
        [main, fix/addingTests]
- Hit Command + U to run the test locally.
- Before committing your changes, amend the .yml file under branches to include the new branch.
- Save and commit to GitHub.
After the job is successful, you can view your new branch in Codecov and under commits it tells you the change in coverage.

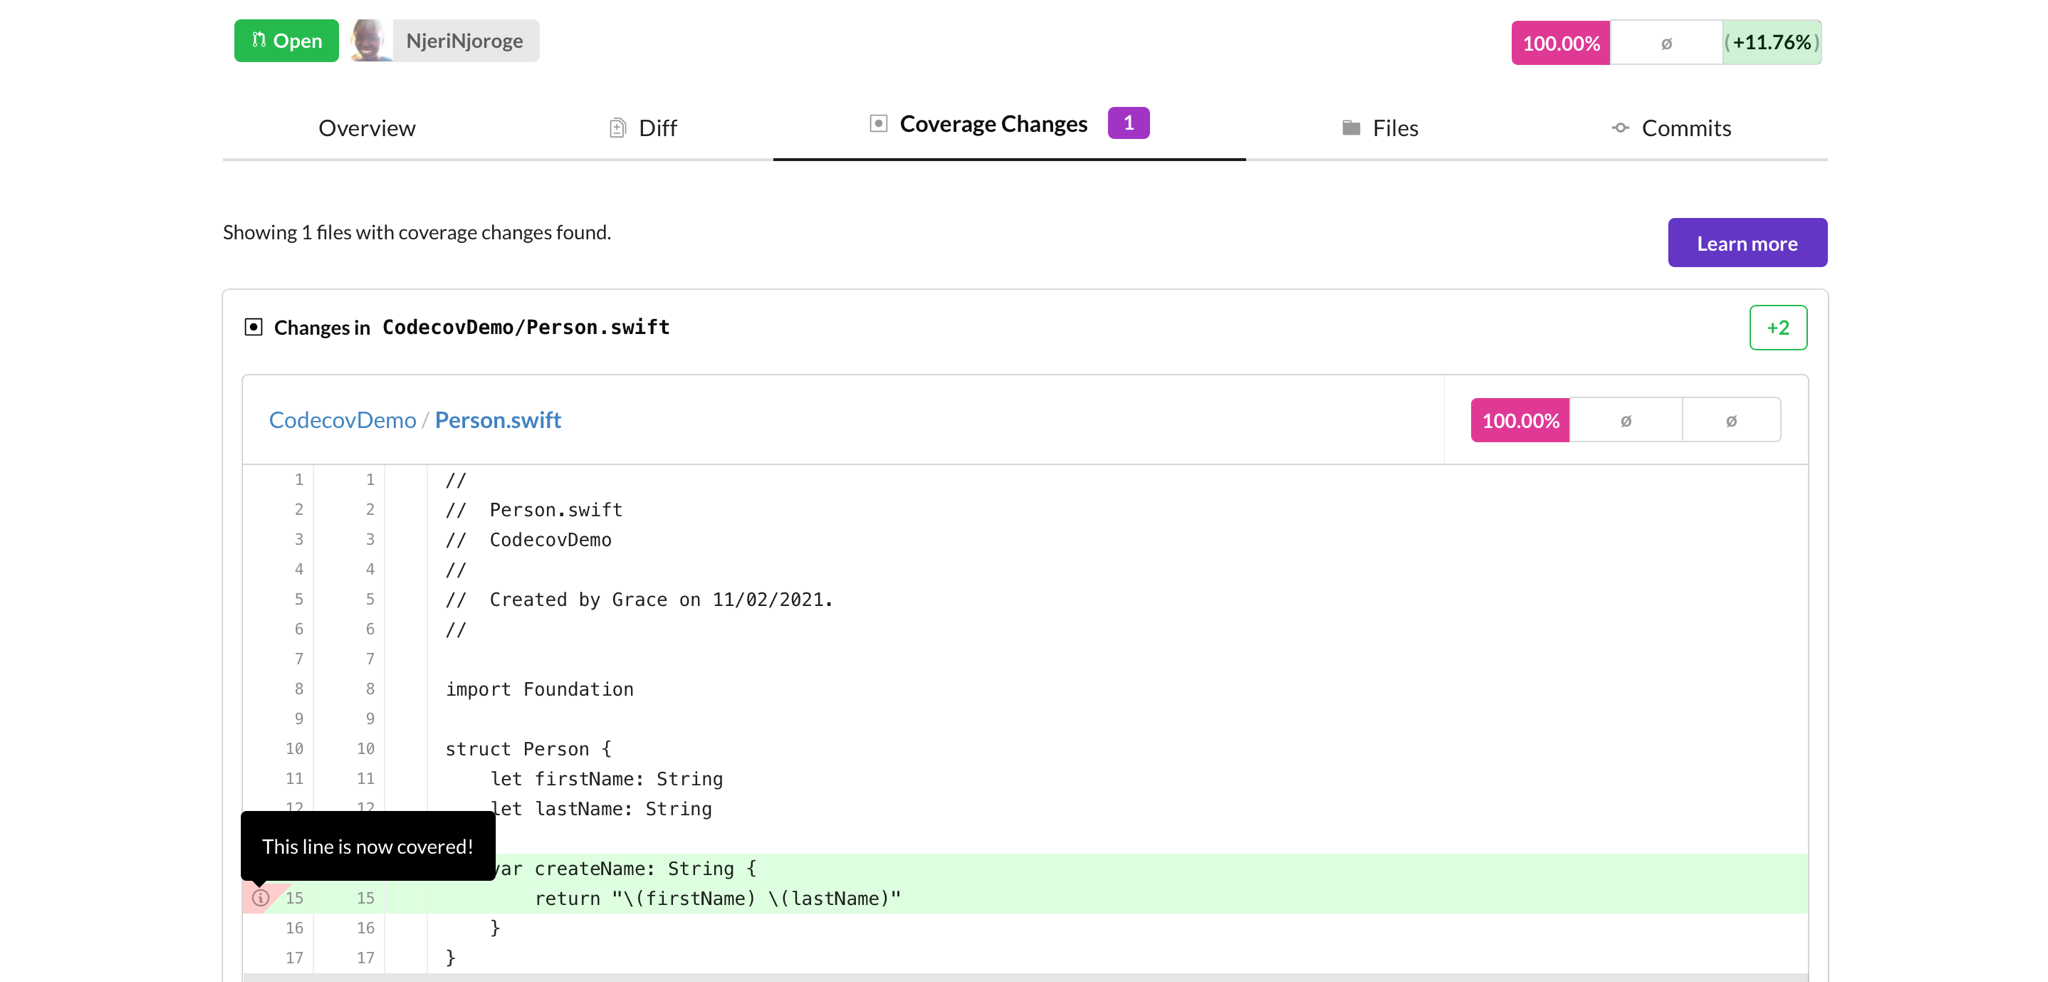
The percentage highlighted in green shows how much coverage is gained when compared to the commit’s parent. If the number is highlighted in red, it would show the loss of coverage with the new branch.
If you want to merge the new branch to the main branch, Codecov will examine the pull request and give you an overview. You can check out the differences in the files, the coverage changes, and the code lines covered by the test.
Codecov also has a compare feature where you can see the differences between branches even without a pull request. You can follow the evolution of your coverage throughout development. Pretty neat!
Conclusion
I hope this tutorial was helpful in learning how to set up GitHub Actions for your project. You should be able to integrate Codecov into your workflow easily now and understand what your coverage reports mean.
As your codebase grows larger, maintaining quality can come in second to getting new work done. Having insight into how your new code affects your old code, and vice versa, can go a long way in identifying and fixing problems quickly. Sign up for Codecov to improve your workflow today.