Code coverage is a metric used to measure how much of your source code has been covered by your test suite. In other words, it tells you what percentage of your code is executed when you run your tests, and helps you find out which parts are not covered by the test. As a C developer, you can use code coverage to identify gaps in test cases at an early stage and improve the quality of your tests.
Codecov is a reporting tool that can take the code coverage generated by your build tools and convert it into a meaningful representation with graphs and charts which can help you better understand your code coverage. Codecov also integrates smoothly with your existing CI/CD systems, like GitHub Actions, and provides coverage reports for every commit and pull request so that you have an understanding of how your tests are performing without any hassle.
In this tutorial, you’ll learn how to set up code coverage using Gcov and how to integrate Codecov with your GitHub repository using a GitHub Action to generate coverage reports every time you push changes or make a pull request. If you’d like more info you can request a demo at any time.
You can check out the GitHub repo for this tutorial here.
Building the application
First, let’s create two files to run a calculator application. The app will have 4 functions to perform basic calculator operations (add, subtract, multiply, and divide). Create a file calculator.h with the following code:
double add(double, double);
double subtract(double, double);
double multiply(double, double);
double divide(double, double);
and the file calculator.c with the following code:
#include <stdio.h>

#include "calculator.h"

double add(double x, double y) {
    return x + y;
}

double subtract(double x, double y) {
    return x - y;
}

double multiply(double x, double y) {
    return x * y;
}

double divide(double x, double y) {
    if (y == 0) {
        printf("Cannot divide by 0");
        return 0;
    }
    return x * 1.0 / y;
}
Running Tests Locally
This tutorial assumes you have gcc installed and set up on your computer. The tool gcov comes bundled with GCC.
Writing unit tests
Now, let’s create a test file for our calculator. Create a test_calculator.c file with the following code:
#include <assert.h>

#include "calculator.h"

void test_add() {
    assert(add(1, 2) == 3.0);
    assert(add(1.0, 2.0) == 3.0);
    assert(add(0, 2.0) == 2.0);
    assert(add(2.0, 0) == 2.0);
    assert(add(-4, 2.0) == -2.0);
}

void test_subtract() {
    assert(subtract(1, 2) == -1.0);
    assert(subtract(2, 1) == 1.0);
    assert(subtract(1.0, 2.0) == -1.0);
    assert(subtract(0, 2.0) == -2.0);
    assert(subtract(2.0, 0) == 2.0);
    assert(subtract(-4, 2.0) == -6.0);
}

void test_multiply() {
    assert(multiply(1, 2) == 2.0);
    assert(multiply(1.0, 2.0) == 2.0);
    assert(multiply(0, 2.0) == 0.0);
    assert(multiply(2.0, 0) == 0.0);
    assert(multiply(-4, 2.0) == -8.0);
}

void test_divide() {
    assert(divide(1, 2) == 0.5);
    assert(divide(1.0, 2.0) == 0.5);
    assert(divide(0, 2.0) == 0);
    assert(divide(-4, 2.0) == -2.0);
    // assert(divide(2.0, 0) == 0.0);
}

int main() {
    test_add();
    test_subtract();
    test_multiply();
    test_divide();
}
You’ll see that we have a bunch of test cases for each mathematical operation. Also, note that we are commenting out the last assert in the test_divide function. We’ll see why in a minute.
Compiling and running our code
In order to run our tests and collect coverage, we will need to compile our code into an object file. In order to enable code coverage, you need to pass the -ftest-coverage and -fprofile-arcs flag to gcc. The flag -O0 is also needed so that the compiler doesn’t optimize away our trivial example.
gcc -fprofile-arcs -ftest-coverage -O0 -o test_calculator test_calculator.c calculator.c>f2.
This will create an executable called test_calculator in the current directory as well as test_calculator.gcno and calculator.gcno files. They contain important information about how many times individual lines have been executed. Note that these .gcno files will be generated for every object file.
Now you need to run the tests:
./test_calculator
Since all your tests pass successfully, this should exit without any output. You’ll notice that two more files have been created, namely test_calculator.gcda and calculator.gcda. Similar to the .gcno files, the gcda files contain information related to the code coverage.
Creating coverage reports
Now that all the necessary files have been generated, you can run gcov to create the actual coverage report. You only want the coverage report of your library (calculator.c) and not the unit test file (test_calculator.c). So you’ll run gcov on calculator.c only:
gcov -pb caluclator.c Here are the explanations for the flags used:
-b, --branch-probabilities Include branch probabilities in output

-p, --preserve-paths Preserve complete path information in the names of generated .gcov files.
This should give an output like the following:
--> gcov -pb calculator.c
File 'calculator.c'
Lines executed:83.33% of 12
Branches executed:100.00% of 2
Taken at least once:50.00% of 2
No calls
Creating 'calculator.c.gcov'
Now a file called calculator.c.gcov is created in the same directory. This file contains the detailed coverage report:
--> cat calculator.c.gcov
        -:    0:Source:calculator.c
        -:    0:Graph:calculator.gcno
        -:    0:Data:calculator.gcda
        -:    0:Runs:1
        -:    0:Programs:1
        -:    1:#include
        -:    2:
        -:    3:#include "calculator.h"
        -:    4:
function add called 5 returned 100% blocks executed 100%
        5:    5:double add(double x, double y) {
        5:    6:    return x + y;
        -:    7:}
        -:    8:
function subtract called 6 returned 100% blocks executed 100%
        6:    9:double subtract(double x, double y) {
        6:   10:    return x - y;
        -:   11:}
        -:   12:
function multiply called 5 returned 100% blocks executed 100%
        5:   13:double multiply(double x, double y) {
        5:   14:    return x * y;
        -:   15:}
        -:   16:
function divide called 4 returned 100% blocks executed 75%
        4:   17:double divide(double x, double y) {
        4:   18:    if (y == 0) {
branch  0 taken 0%
branch  1 taken 100%
    #####:   19:        printf("Cannot divide by 0");
    #####:   20:        return 0;
        -:   21:    }
        4:   22:    return x * 1.0 / y;
        4:   23:}
Let’s take a quick minute to understand the report. Here each block is marked by a line with the same number as the last line of the block and the number of branches and calls in the block.
Notice that you’ve never called divide to divide by 0 in your test code. Hence the if (y == 0) 0 branch was never executed. So, it says ##### in that block.
Each function in the report is preceded with a line stating how many times it was called, how many times it returned, and the percentage of blocks that were executed.
For example, the line function add called 5 returned 100% blocks executed 100% tells you that the function add was called 5 times. It returned 100% of the time and 100% of the blocks were executed.
GitHub and Codecov
Now you’ll set up Codecov with GitHub Actions. First, you’ll create a GitHub repository and push your code there. Make sure to add the *.gcno, *.gcda, *.gcov and test_calculator executable in your .gitignore. These will be generated when the tests are run.
Now you’ll have to sign up for Codecov. So, navigate to codecov.io and click Sign Up. You can sign up with your GitHub account.
Once you do that, you’ll see a list of your GitHub repositories. Choose the repository you just created to link it with Codecov. You will be presented with an upload token.
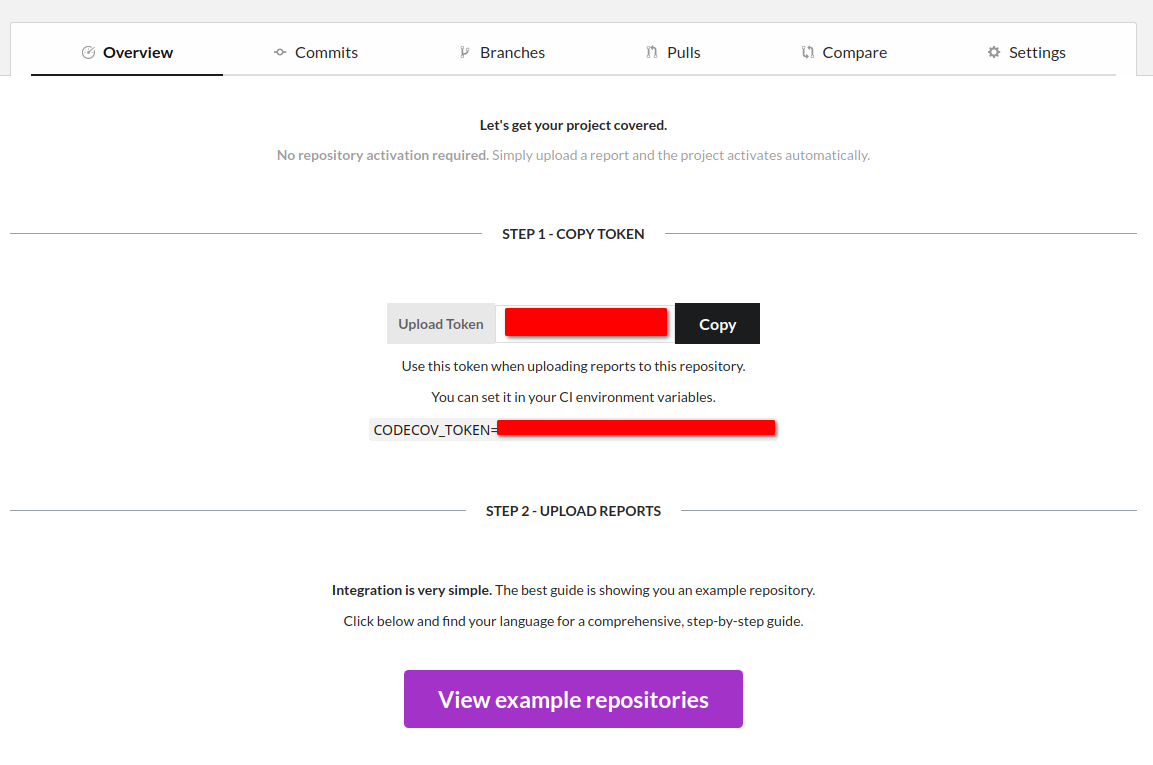
You’ll need this token if your repository is private, or becomes private in the future.
Now you’ll create a GitHub Action. If you’ve never worked with GitHub Actions, take a look at the docs first. The actions are just YAML files that need to be put in the .github/workflows directory. Each YAML file will define an action. You can name these files anything you want.
So, create a file .github/workflows/ci.yml and enter this code:
name: Workflow for Codecov example-c
on: [push, pull_request]
jobs:
  run:
    runs-on: ubuntu-latest
    steps:
      - name: Checkout
        uses: actions/checkout@v2
      - name: Compile calculator
        run: gcc -fprofile-arcs -ftest-coverage -O0 -o test_calculator test_calculator.c calculator.c
      - name: Run tests
        run: ./test_calculator
      - name: Upload coverage to Codecov
        uses: codecov/codecov-action@v3
        with:
          gcov: true
          gcov_include: calculator.c
This configuration tells GitHub that this action runs when you push to a branch or make a pull request. Then it defines a job named run with four steps:
Checkout: Clones your repo.Compile caluclator: Compiles the test code and generates the coverage report, just like you did locally.Run tests: Runs the actual codeUpload: This is where the report is uploaded to Codecov. For that, we use the codecov-action action provided by Codecov.
Notice that we do not need to run a gcov step separately. The Codecov uploader can handle that with the gcov and gcov_include parameters.
If you have a private repo, you need to get the upload token from your Codecov dashboard and put it in a GitHub encrypted secret. Then you need to add another option to the with part in the GitHub Actions file:
...
with:
  token: ${{ secrets.CODECOV_TOKEN }}
This assumes that you named the secret CODECOV_TOKEN.
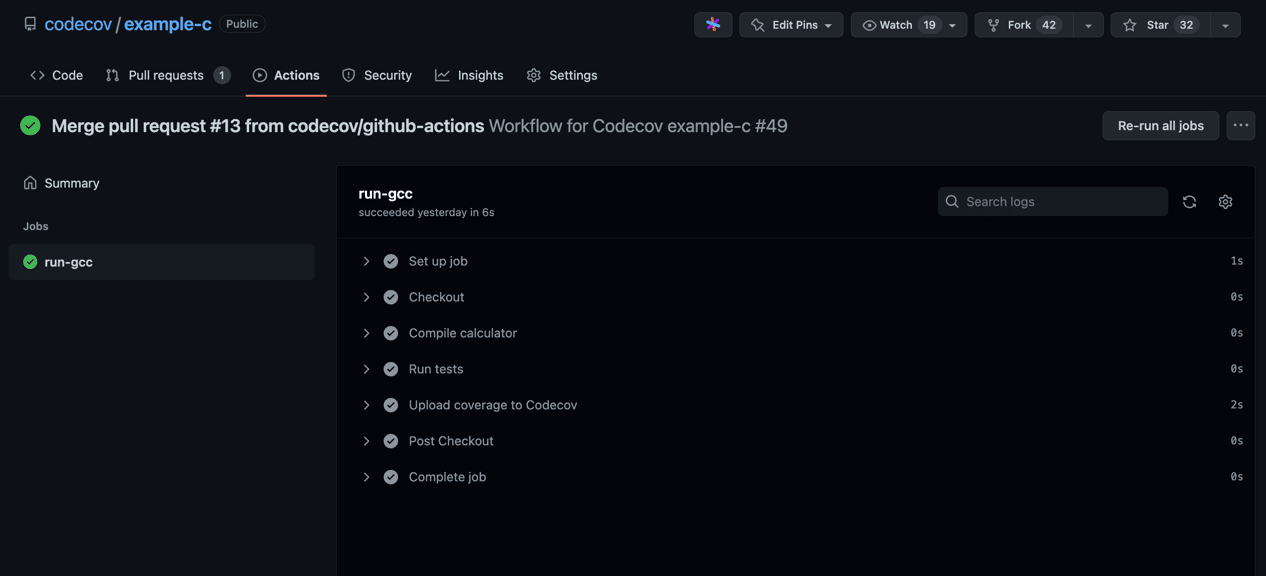
Now commit and push the repository to GitHub. As soon as the push completes, the action will start to run. You can check the progress in the Actions tab in the GitHub repo.
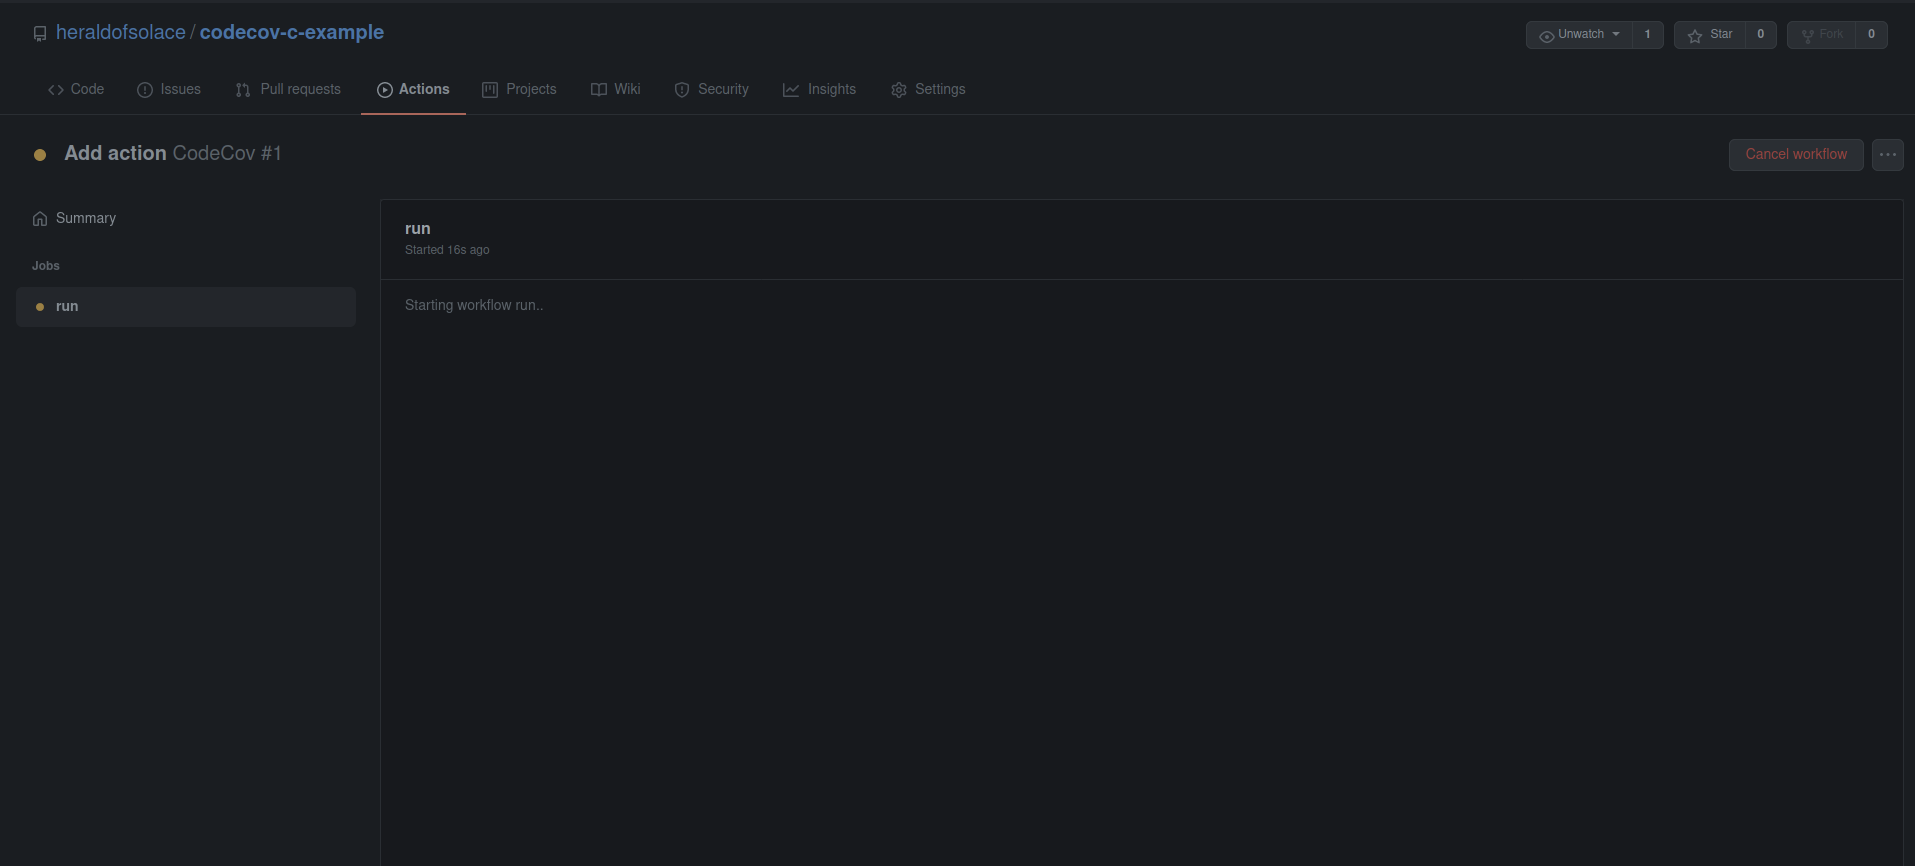
When the action finishes completely, you’ll see check marks by the names of the steps.
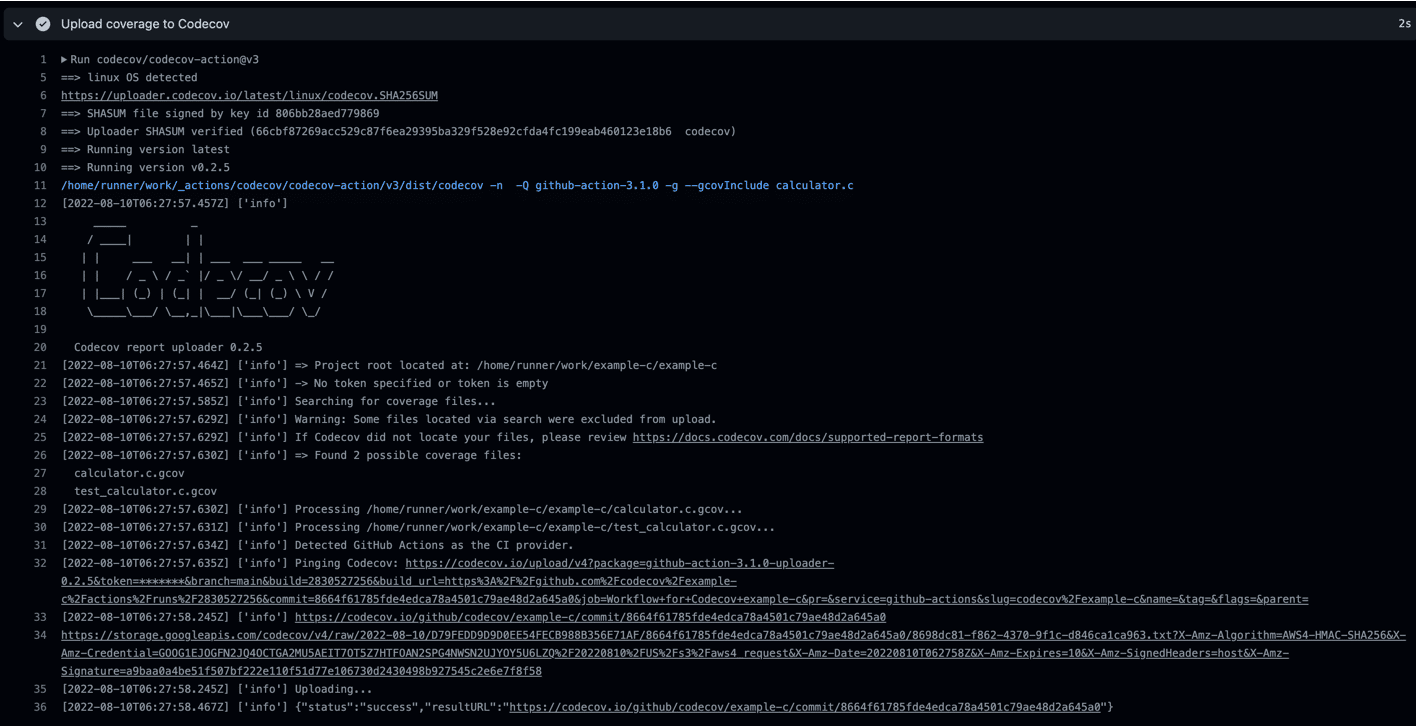
You can check that the report was successfully uploaded to Codecov by expanding the Upload step.
Now you can head over to your Codecov dashboard and navigate to your repository. You can also go to https://codecov.io/gh/USER/REPO directly; just replace USER with your GitHub username, and REPO with your GitHub repo name. Now your coverage report should be visible in the dashboard.

At the bottom of the page, you’ll see a sunburst graph and a file breakdown of your coverage. 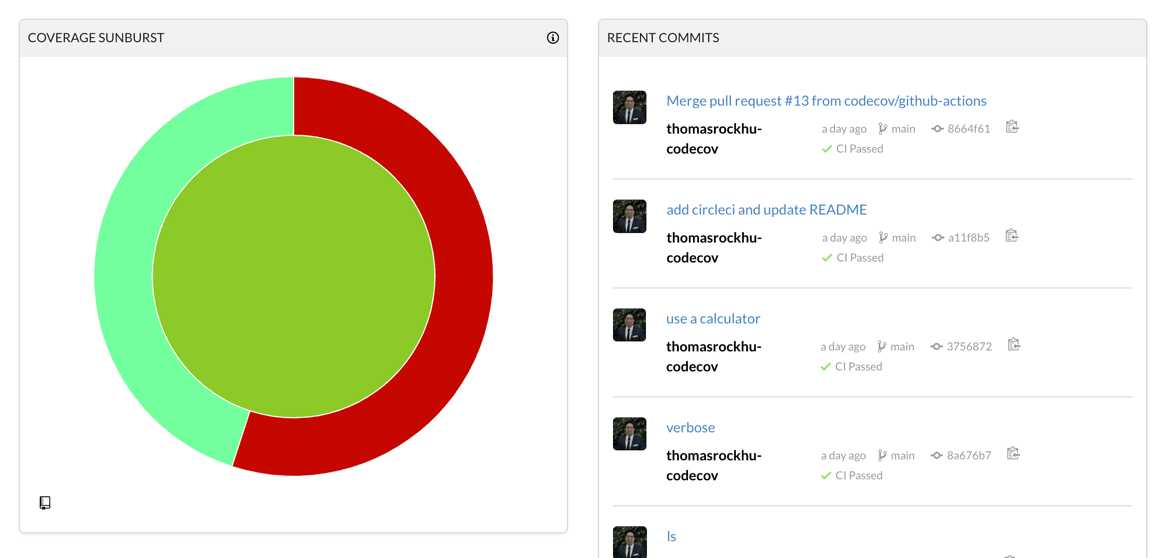
You can read the docs to learn how to navigate and use the sunburst graph.
Integrating with Pull Requests
Remember, how you had one block that was not tested? Let’s fix that and make a pull request.
First, you’ll create a new branch and make the changes in this new branch:
git checkout -b divide-by-zero
Now, open the test_caluclator.c file and remove the comment // characters:
assert(divide(2.0, 0) == 0.0);
Adding this new assert statement will cause the previously unexecuted block to execute and should increase your coverage.
So, push the changes to a new branch:
git add test_calculator.c
git commit -m 'fix: improve code coverage'
git push origin divide-by-zero
Now create a pull request from this new branch to the main branch. When you create the pull request, the action will be run and generate your coverage report.
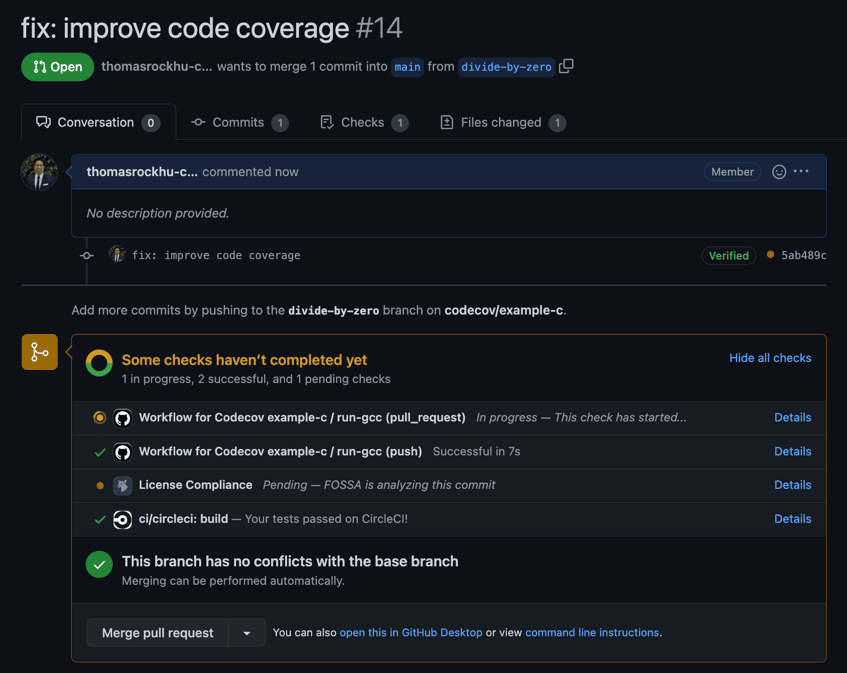
When the checks are successful, the Codecov bot will comment with a coverage report that shows how the coverage will change due to the pull request.
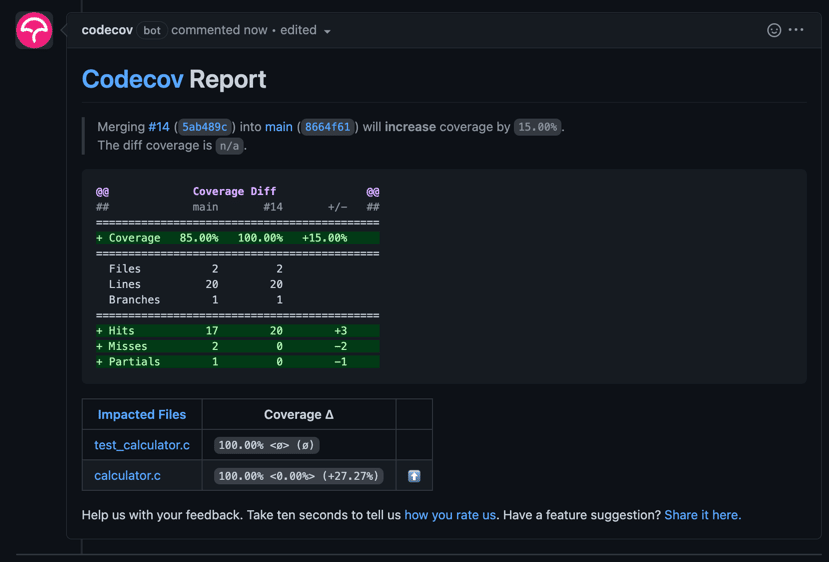
In this case, you can see that it says calculator.c will have its coverage increased to 100%, as you had guessed.
You can visit the Pulls tab in your Codecov dashboard to check the coverage for all the pull requests ever made.
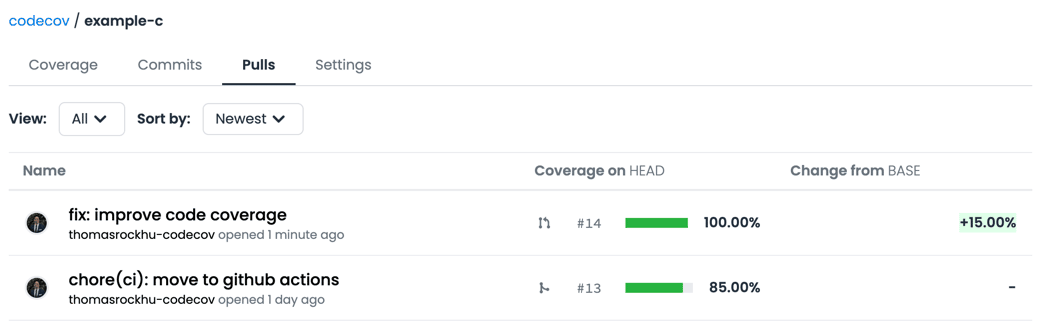
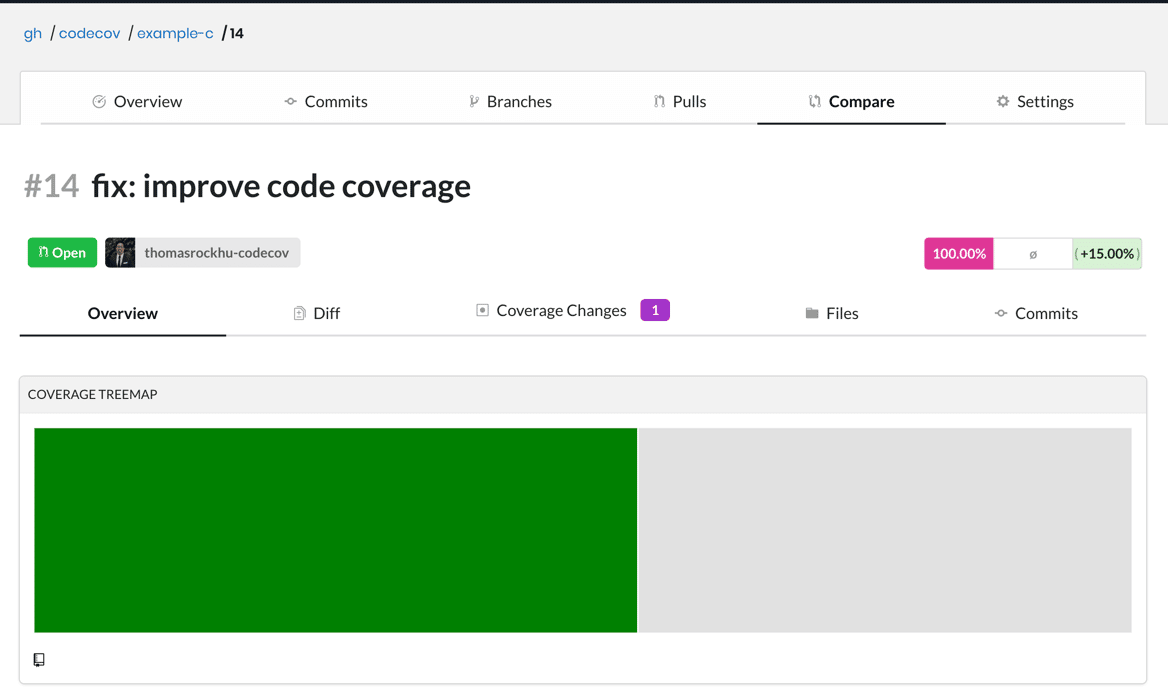
Here you can select the pull request, and you’ll get access to the detailed coverage changes, similar to the comment.
You can visit the Commits tab where you can access the coverage for individual commits.
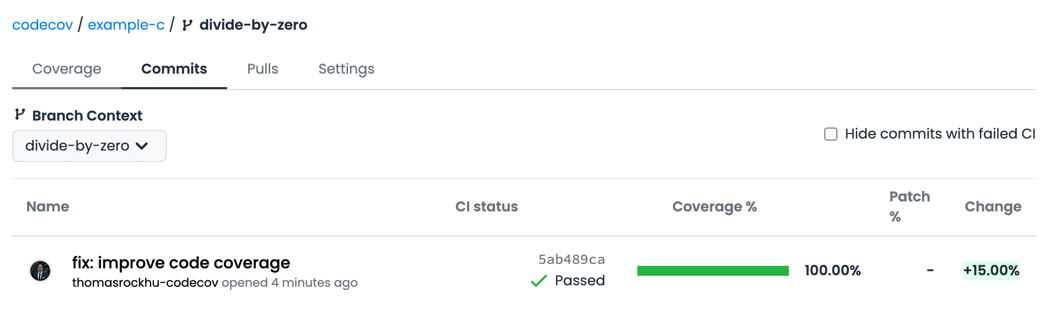
The 100% in pink indicates the coverage for the total project, and the percentage in green tells you that the coverage increased by 15.00% after this commit.
Conclusion
In this tutorial, you learned about how code coverage is important for identifying portions of your code that are not covered by the unit tests. Code coverage lets you understand where your unit tests are lacking and helps you detect bugs early.
You also learned how to set up testing for your C code locally using Gcov and how to integrate Codecov with your GitHub repository using GitHub Actions and generate coverage reports for each commit and pull request.