You know testing your code is important—but how effective are your tests? How many lines of code does it address, and does it touch enough of the subroutines? Code coverage is the measurement of how much of your source code a test covers, and understanding it can go a long way toward being confident in your test results.
How Do I Understand My Code Coverage?
Reporting tools like Codecov can take your code coverage report and turn it into meaningful data, like how pull requests will affect code coverage. Codecov works in tandem with your continuous integration (CI) system to analyze every commit, so you get insight into how your tests are performing right in your own workflow.
In short, knowing your percentage of code coverage, and what it means, can help you write better tests for your apps, which leads to building better apps. In this article, you’ll learn how to integrate JaCoCo, a free code coverage library in Java, into your Android project, then generate a report for analysis with Codecov. If you’d like, you can check out this tutorial’s GitHub repo.
Implementing Code Coverage in Android
First, let’s walk through how to implement code coverage in your Android project. You’ll write a unit test, add JaCoCo to your project, and automate the process using GitHub Actions.
To begin, make sure you’re familiar with the following prerequisites:
- GitHub Actions
- Kotlin
- Android Studio 4.2
Then it’s time to write some unit tests for your project so JaCoCo can generate a report for you:
  @Test
    fun counttext() {
        val yu = TextMethods.counttext("tuuuuu", "")
        // assertTrue("text contains two characters", yu == 2)
        //  assertNotNull("text is not null", yu)
        assertThat(yu).isGreaterThan(4)

    }

    @Test
    fun capitalizeText() {
        val yu = TextMethods.capitalizeText("tuuuuu", "")
        assertThat(yu).contains("TUUUUU")
    }
Now, add JaCoCo to your project.
Gradle project level
// Top-level build file where you can add configuration options common to all sub-projects/modules.
buildscript {
    ext.kotlin_version = "1.4.21"
    ext.jacocoVersion = '0.8.4'
    repositories {
        google()
        jcenter()
    }
    dependencies {
        classpath "com.android.tools.build:gradle:4.1.2"
        classpath "org.jetbrains.kotlin:kotlin-gradle-plugin:$kotlin_version"
        classpath "org.jacoco:org.jacoco.core:$jacocoVersion"
        // NOTE: Do not place your application dependencies here; they belong
        // in the individual module build.gradle files
    }
}
Gradle module level
plugins {
    id 'com.android.application'
    id 'kotlin-android'
    id 'jacoco'
}

task jacocoTestReport(type: JacocoReport, dependsOn: ['testDebugUnitTest', 'createDebugCoverageReport']) {

    reports {
        xml.enabled = true
        html.enabled = true
    }

    def fileFilter = ['**/R.class', '**/R$*.class', '**/BuildConfig.*', '**/Manifest*.*', '**/*Test*.*', 'android/**/*.*']
    def debugTree = fileTree(dir: "${buildDir}/intermediates/classes/debug", excludes: fileFilter)
    def mainSrc = "${project.projectDir}/src/main/java"

    sourceDirectories.setFrom(files([mainSrc]))
    classDirectories.setFrom(files([debugTree]))
    executionData.setFrom(fileTree(dir: "$buildDir", includes: [
            "jacoco/testDebugUnitTest.exec",
            "outputs/code-coverage/connected/*coverage.ec"
    ]))
}

testOptions {
        unitTests.all {
            jacoco {
                includeNoLocationClasses = true
            }
        }
        unitTests.returnDefaultValues = true
    }


    buildTypes {
        debug {
            testCoverageEnabled true
        }
        release {
            minifyEnabled false
            proguardFiles getDefaultProguardFile('proguard-android-optimize.txt'), 'proguard-rules.pro'
        }
    }
Sync your project in Android Studio to include the JaCoCo Gradle task and classes that will enable you to generate code coverage for your app.
After enabling JaCoCo in your project, generate your first code coverage in HTML format. The following Gradle command will generate a test coverage report for your project:
.gradlew connectedCheck
This will generate a report for your unit test alone:
.gradlew testDebugUnitTest
And this will generate the report for an instrumented test:
.gradlew connectedDebugAndroidTest
You can check the code coverage report of your instrumented and unit tests locally. For your instrumented test, locate your Android studio projects folder in your system. Then navigate to your project folder: _(CodeCoverageExample) > app > build > reports > androidTests > connected > flavors > debugAndroidTest > Index.html.
You’ll arrive at this screen after clicking Index.html to view the report on your web browser:
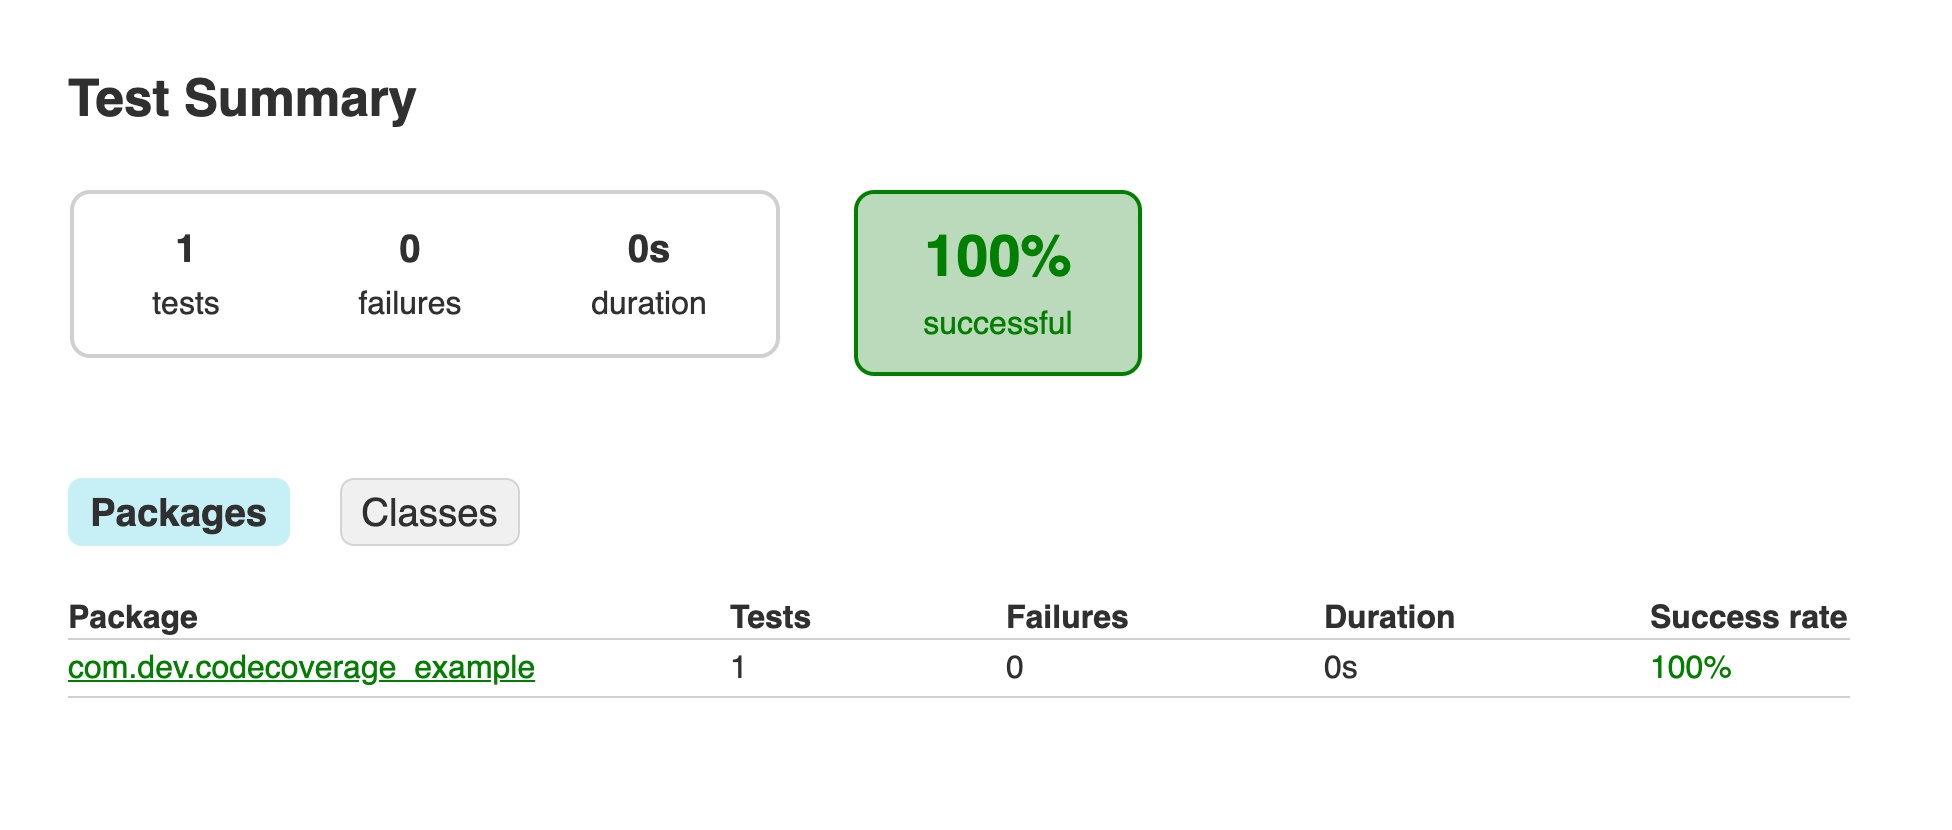
For the unit test, navigate to …reports > tests > testDebugUnitTest > Index.html. After clicking on index.html, you’ll see the following screen:
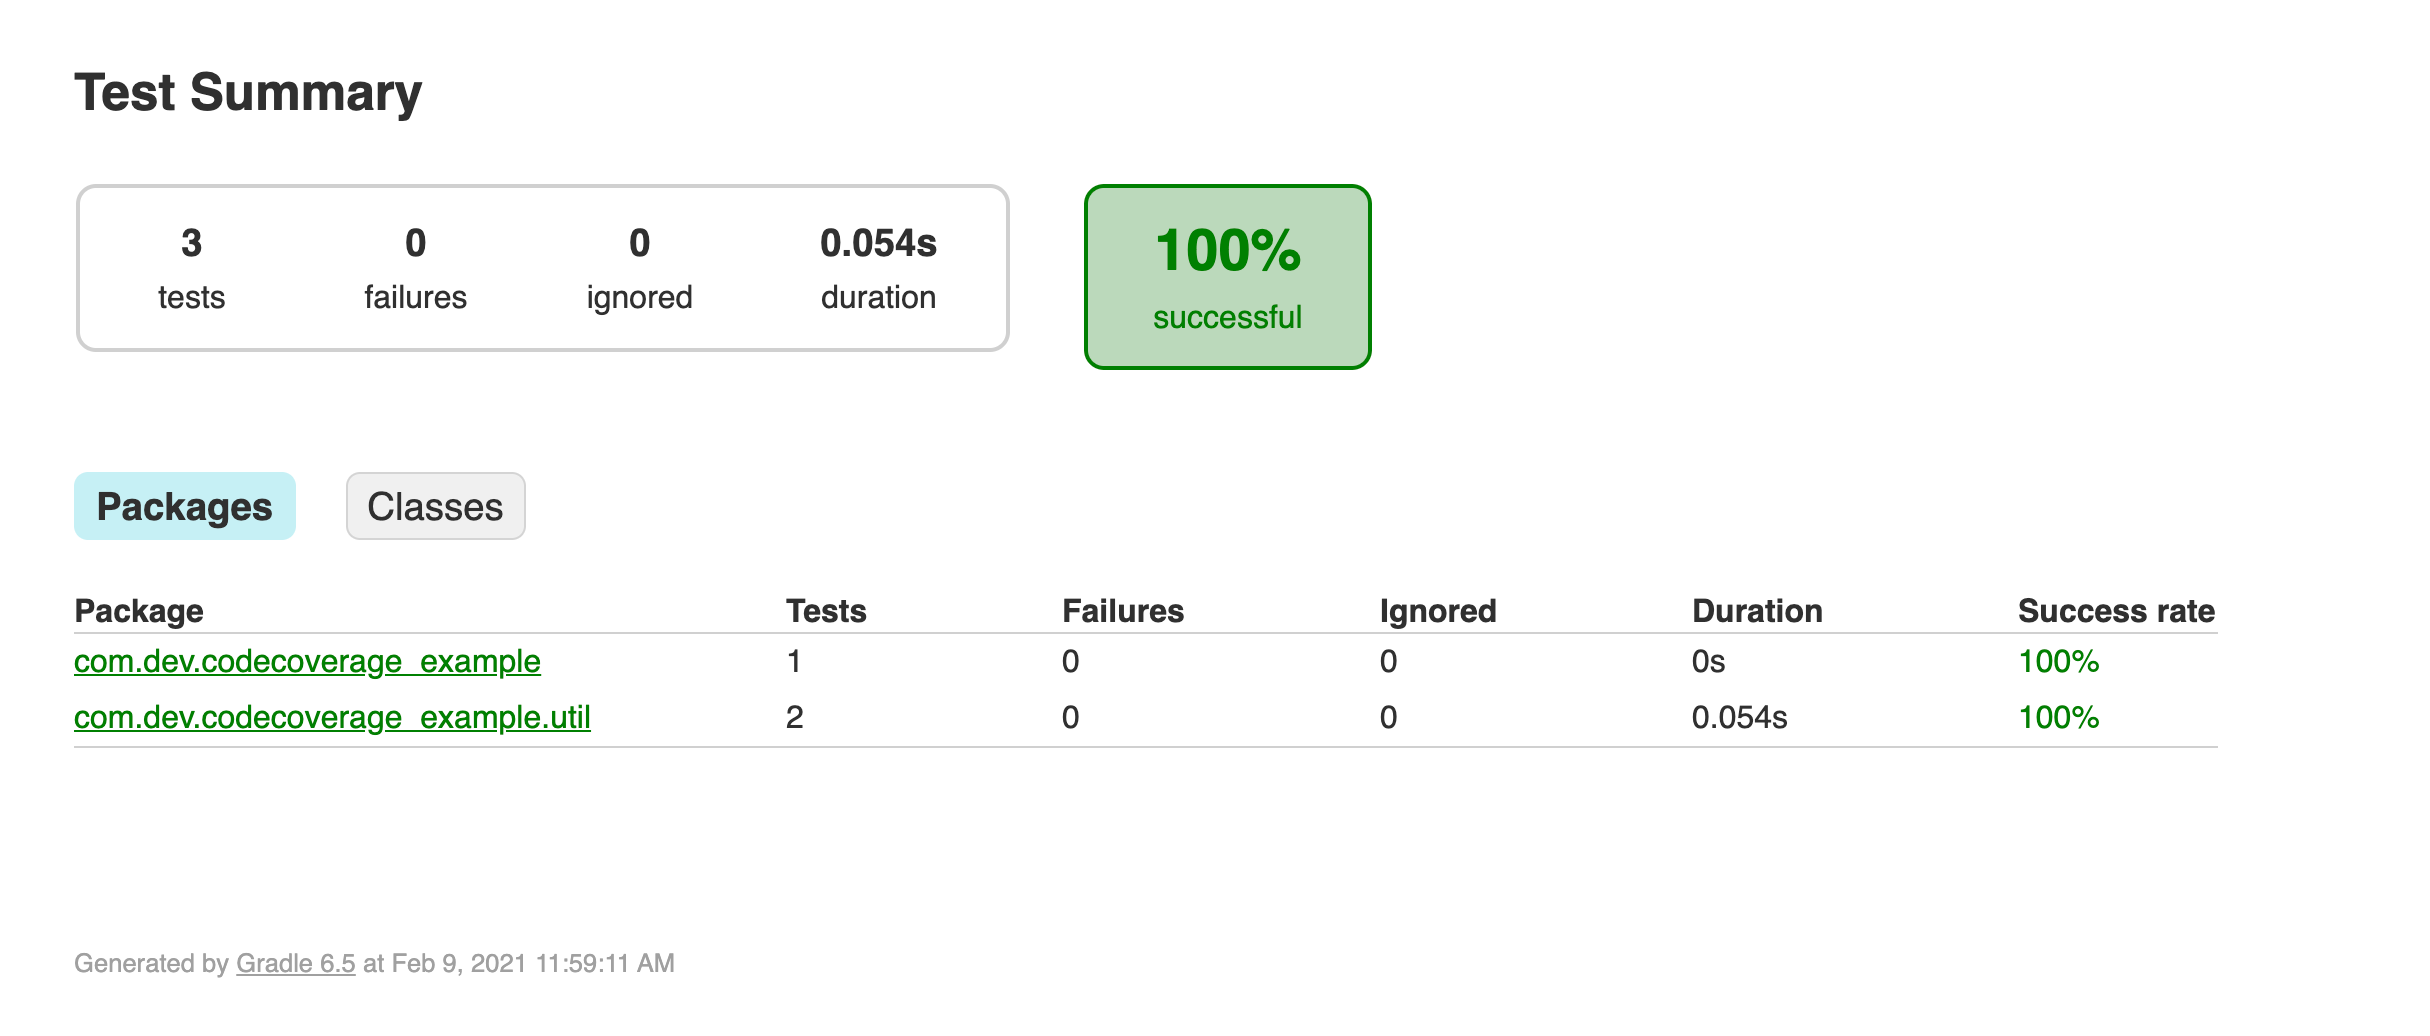
To see the test result, navigate to _com.dev.codecoverageexample.util > TestMethodsTest. To send a code coverage report to Codecov, first navigate to coverage > debug > index.html to choose a supported file format.

Finally, let’s push your project to GitHub.
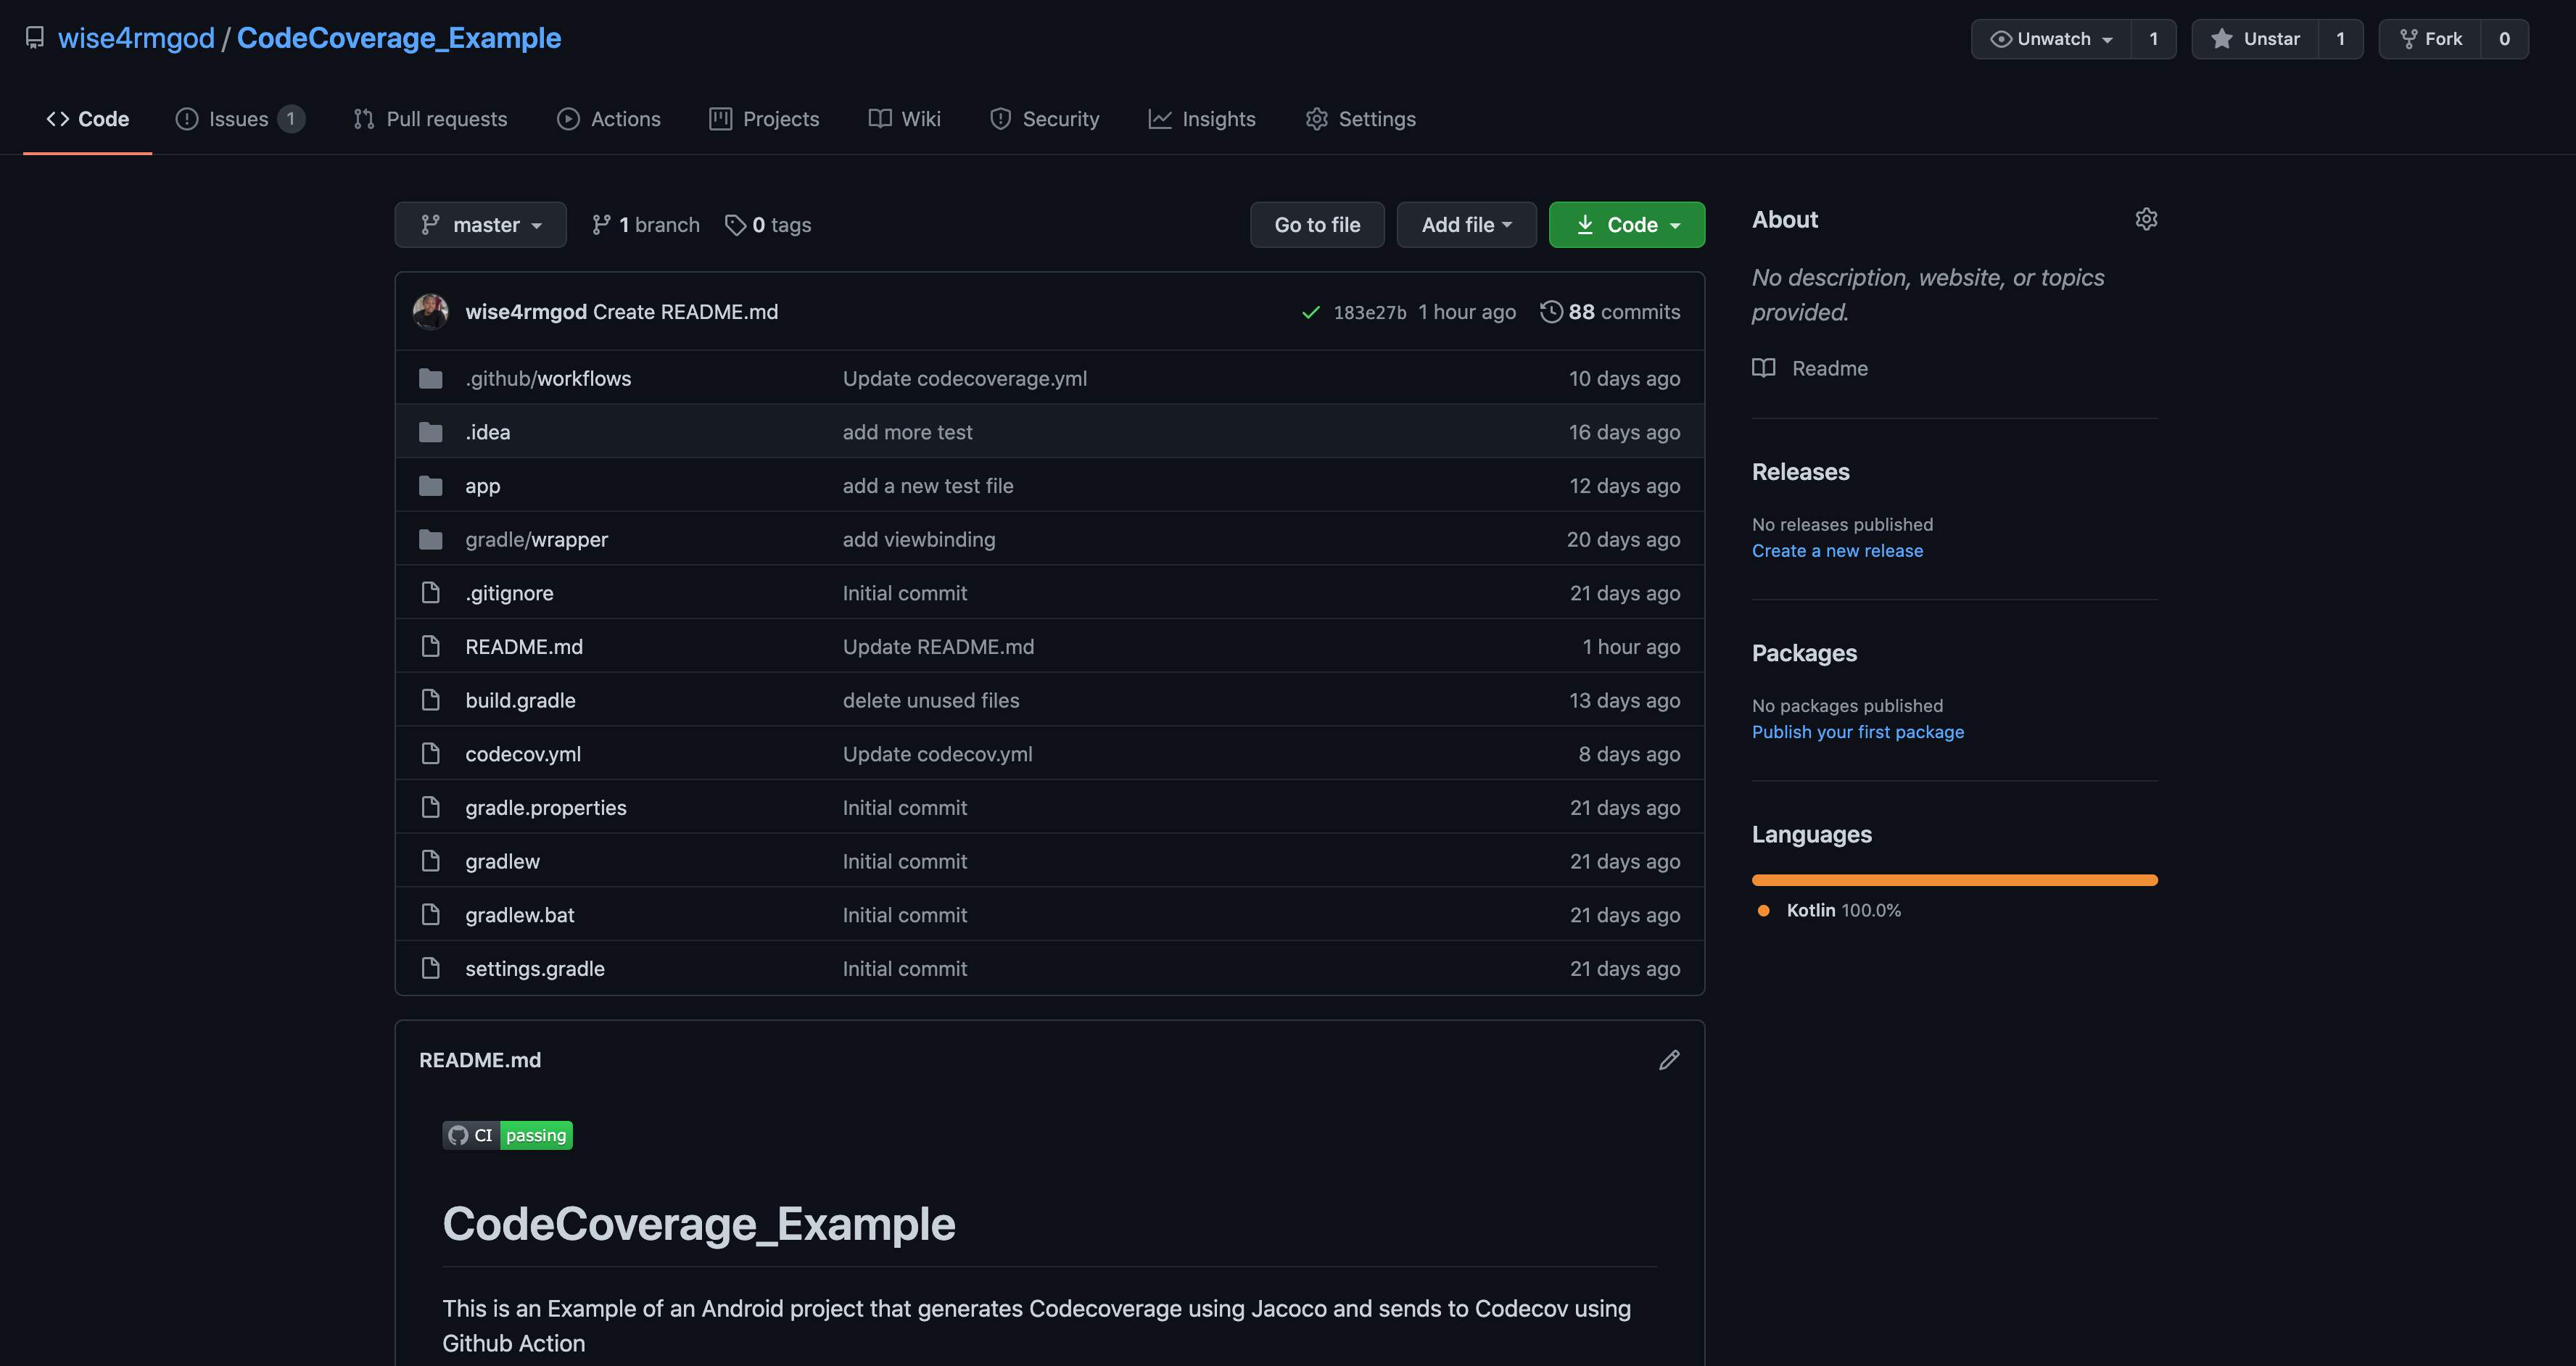
Before setting up GitHub Actions as the CI for your project, there are a few terms you should know to help you understand CI/CD using GitHub Actions:
- Job: A job in GitHub Actions contains a sequence of tasks called steps.
- Steps: Steps can run commands.
- Workflow: A workflow is a configurable automated process made up of one or more jobs.
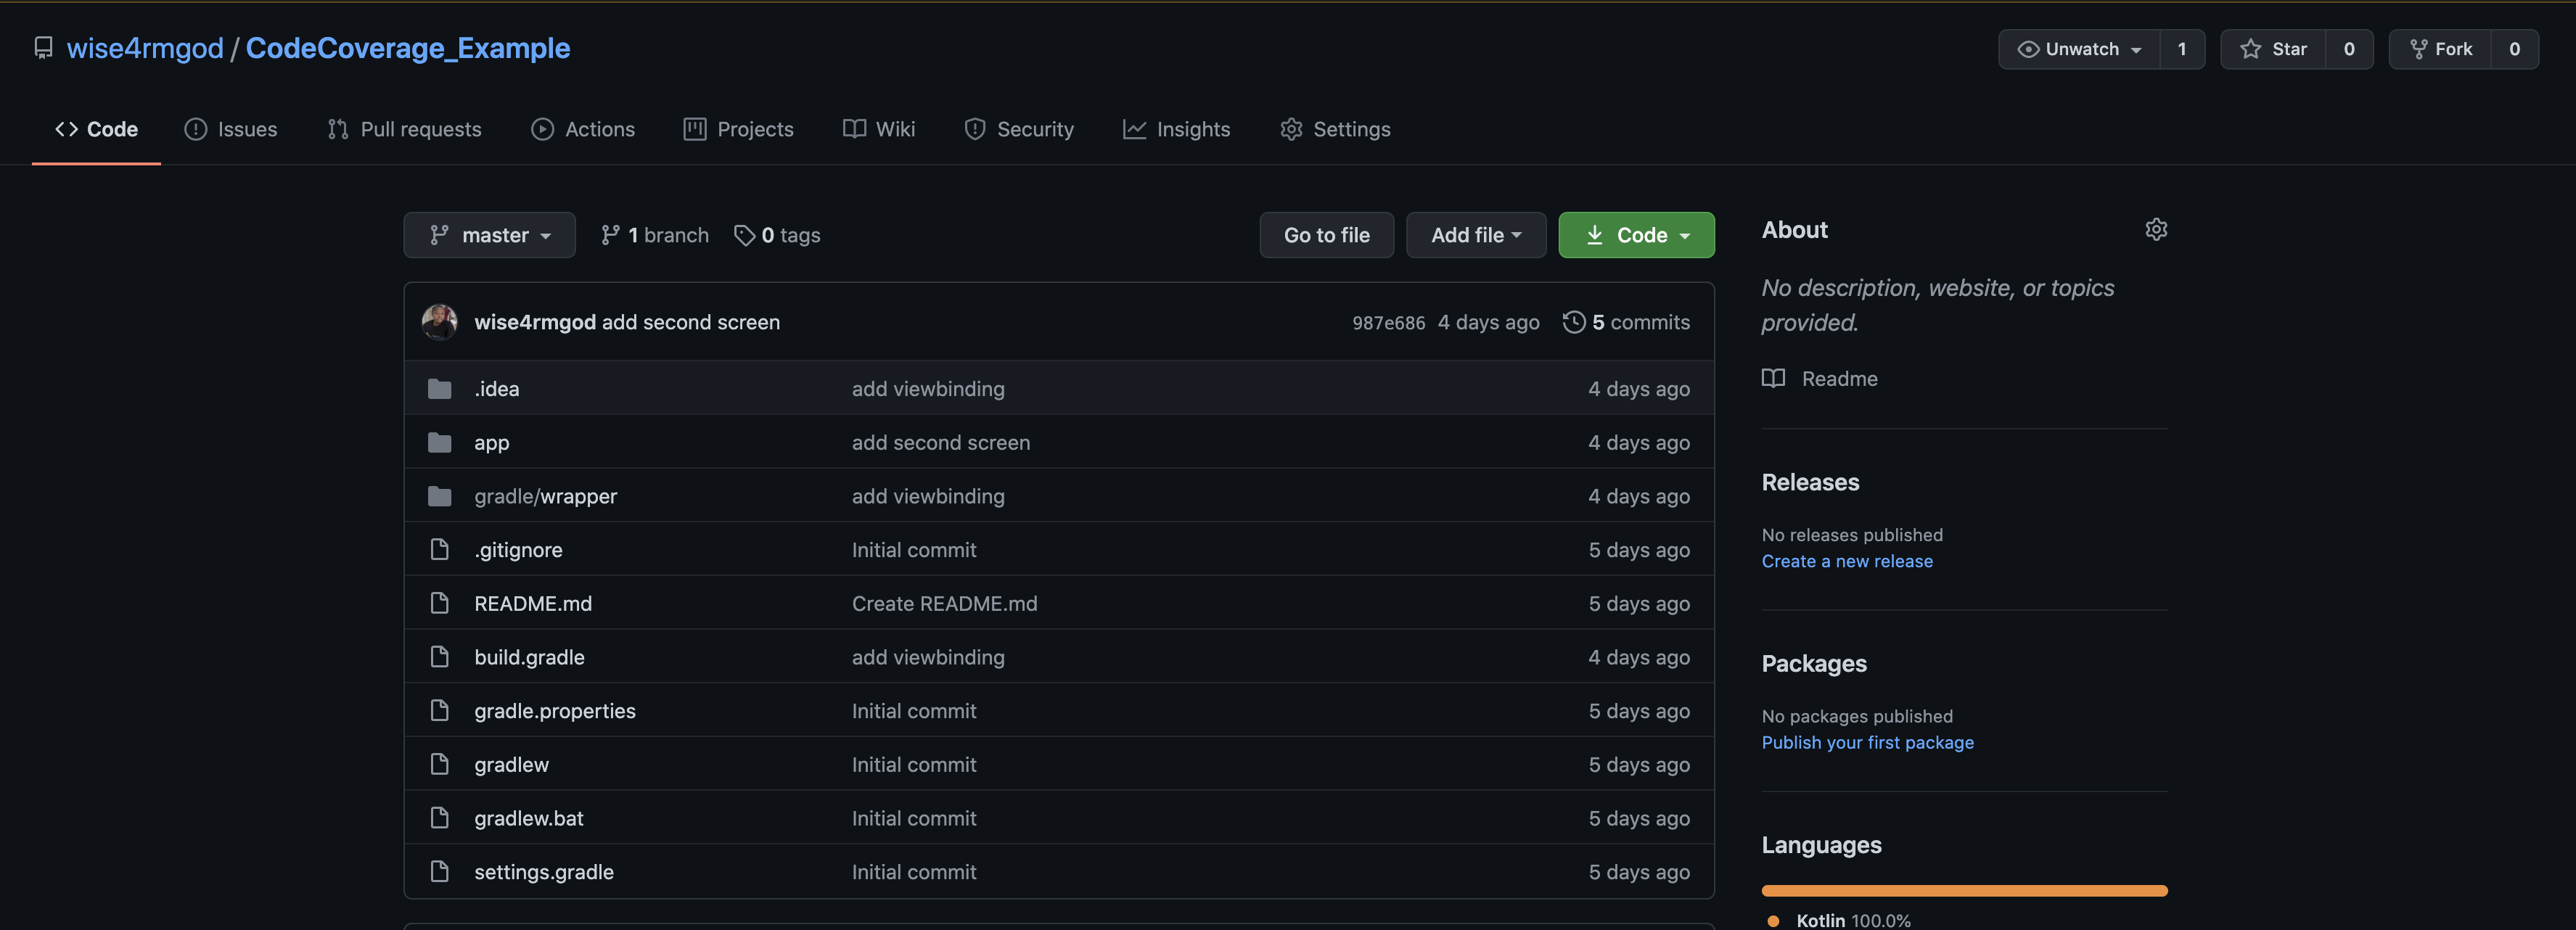
To add GitHub Actions to your workflow, click the Actions tab at the top of your repository window.
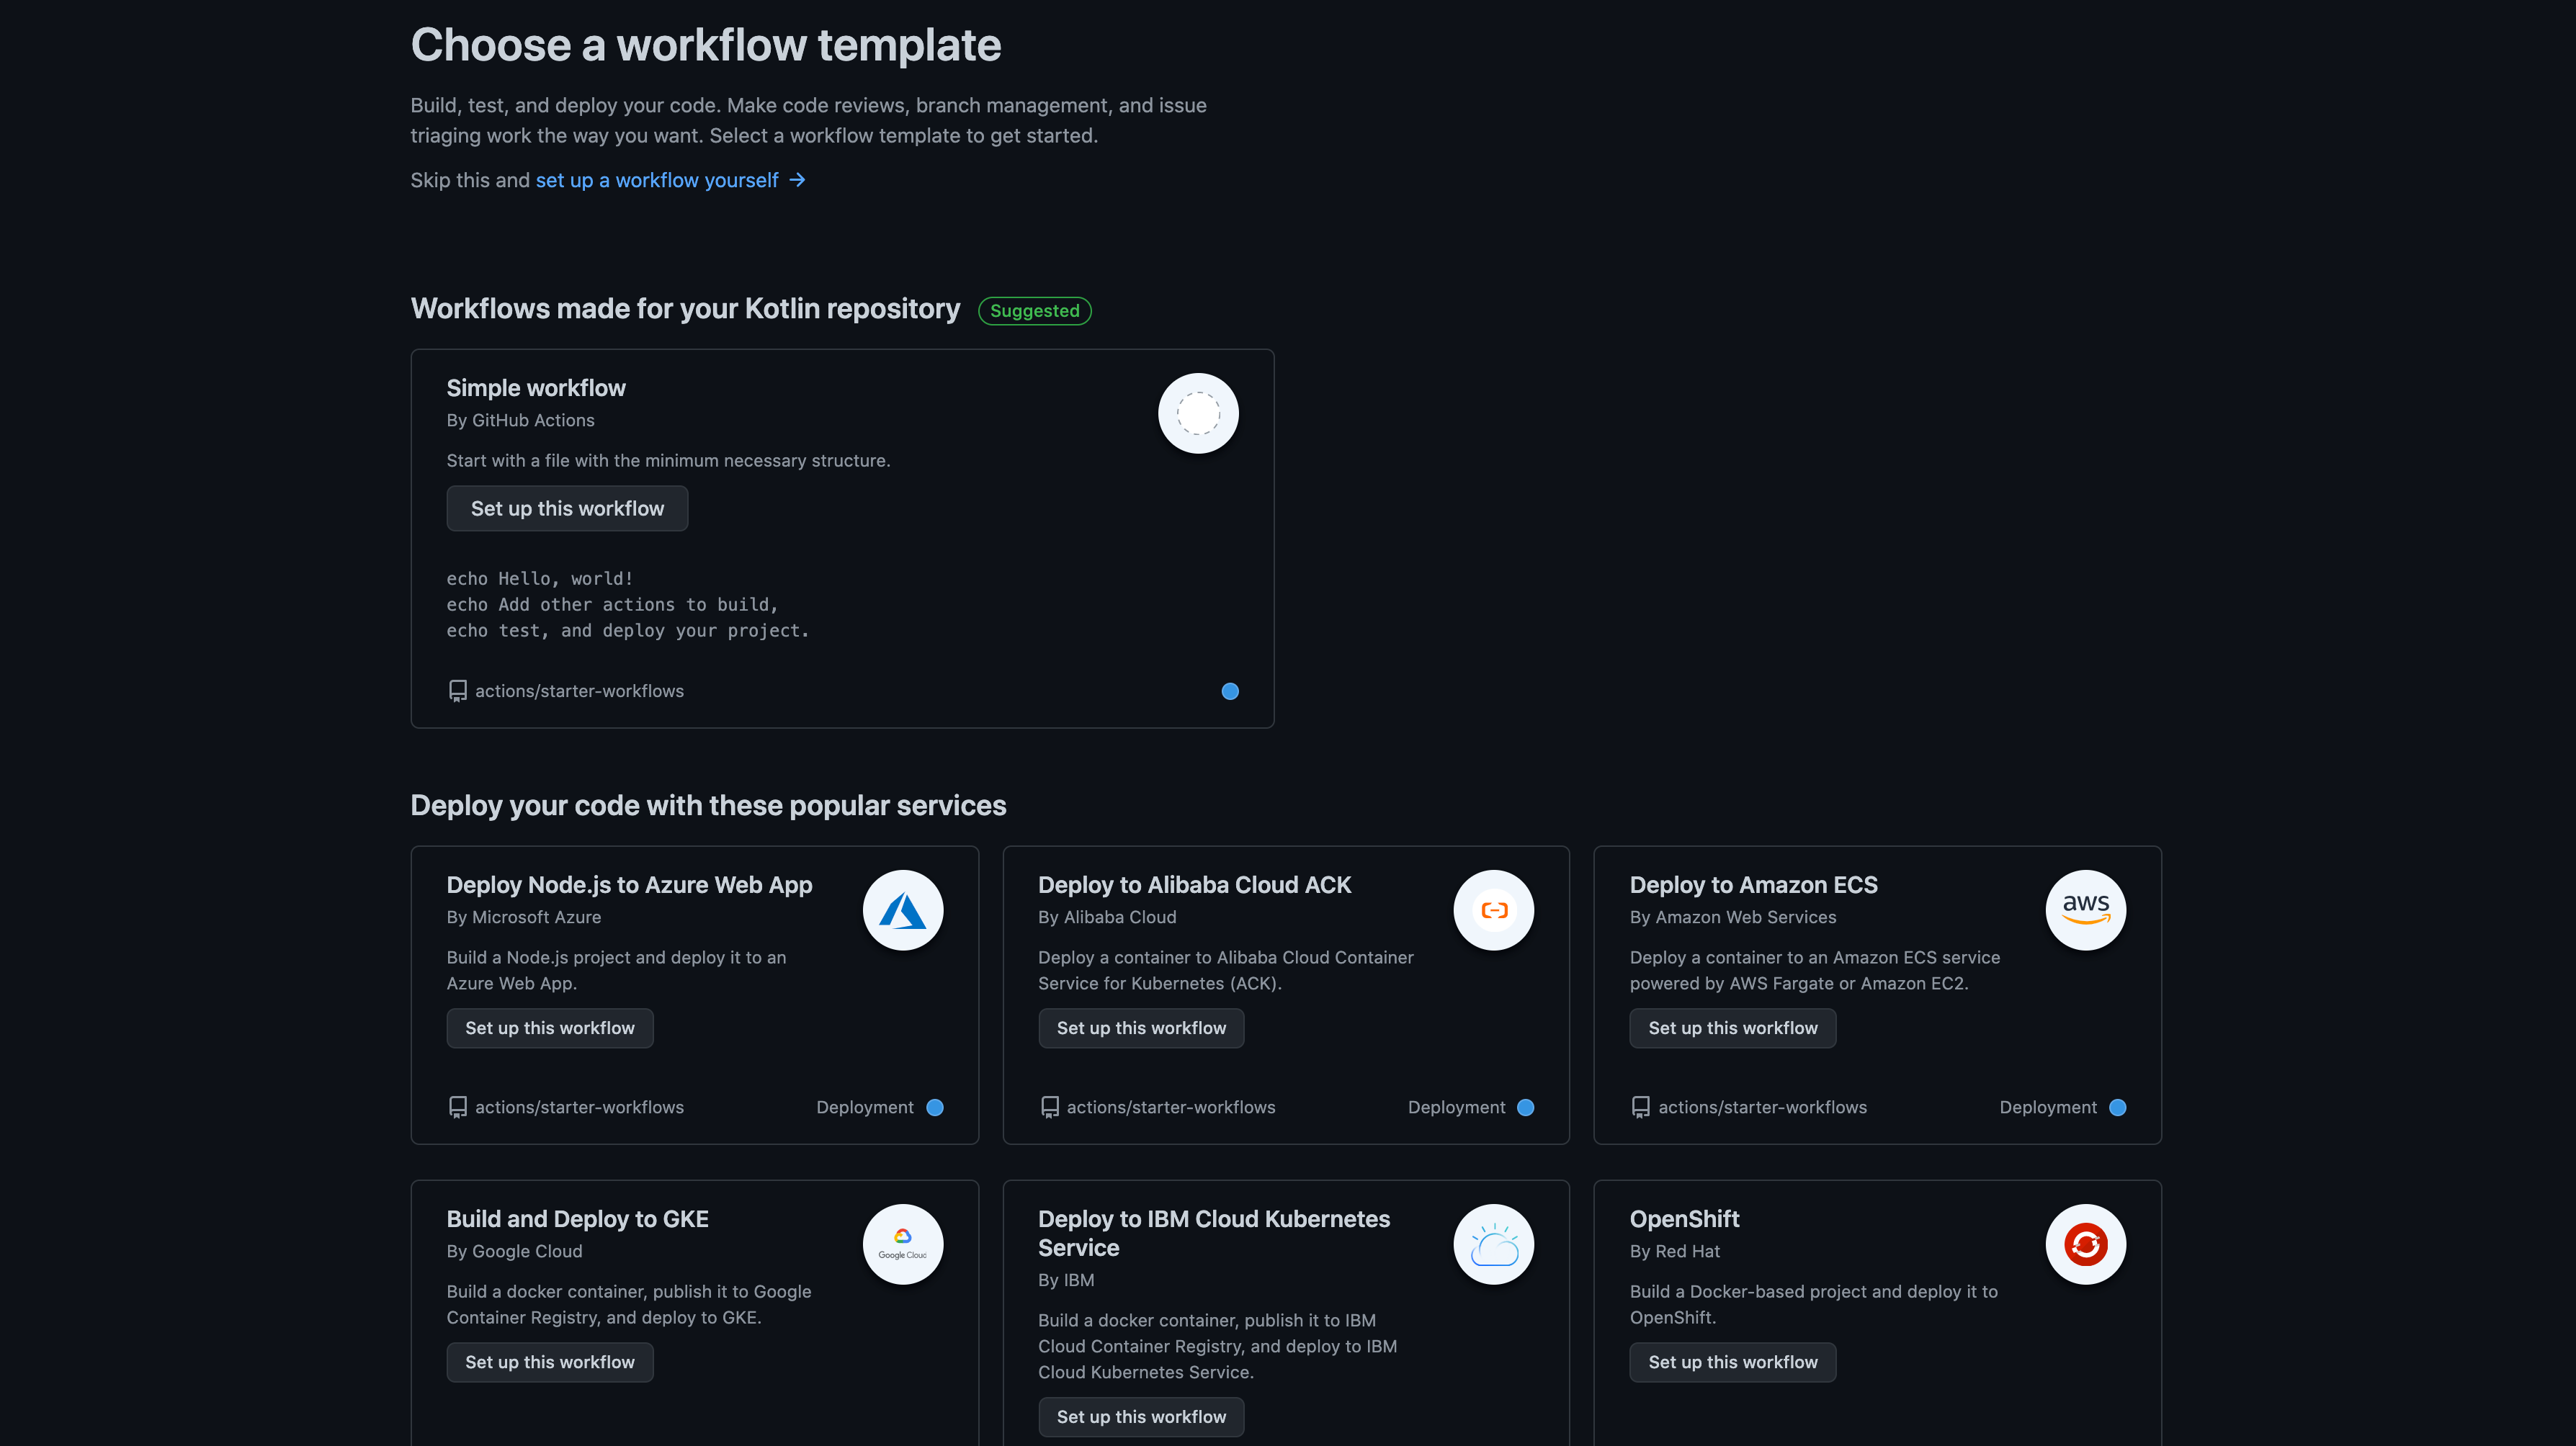
Select a workflow template from the list that matches your programming language or tool.
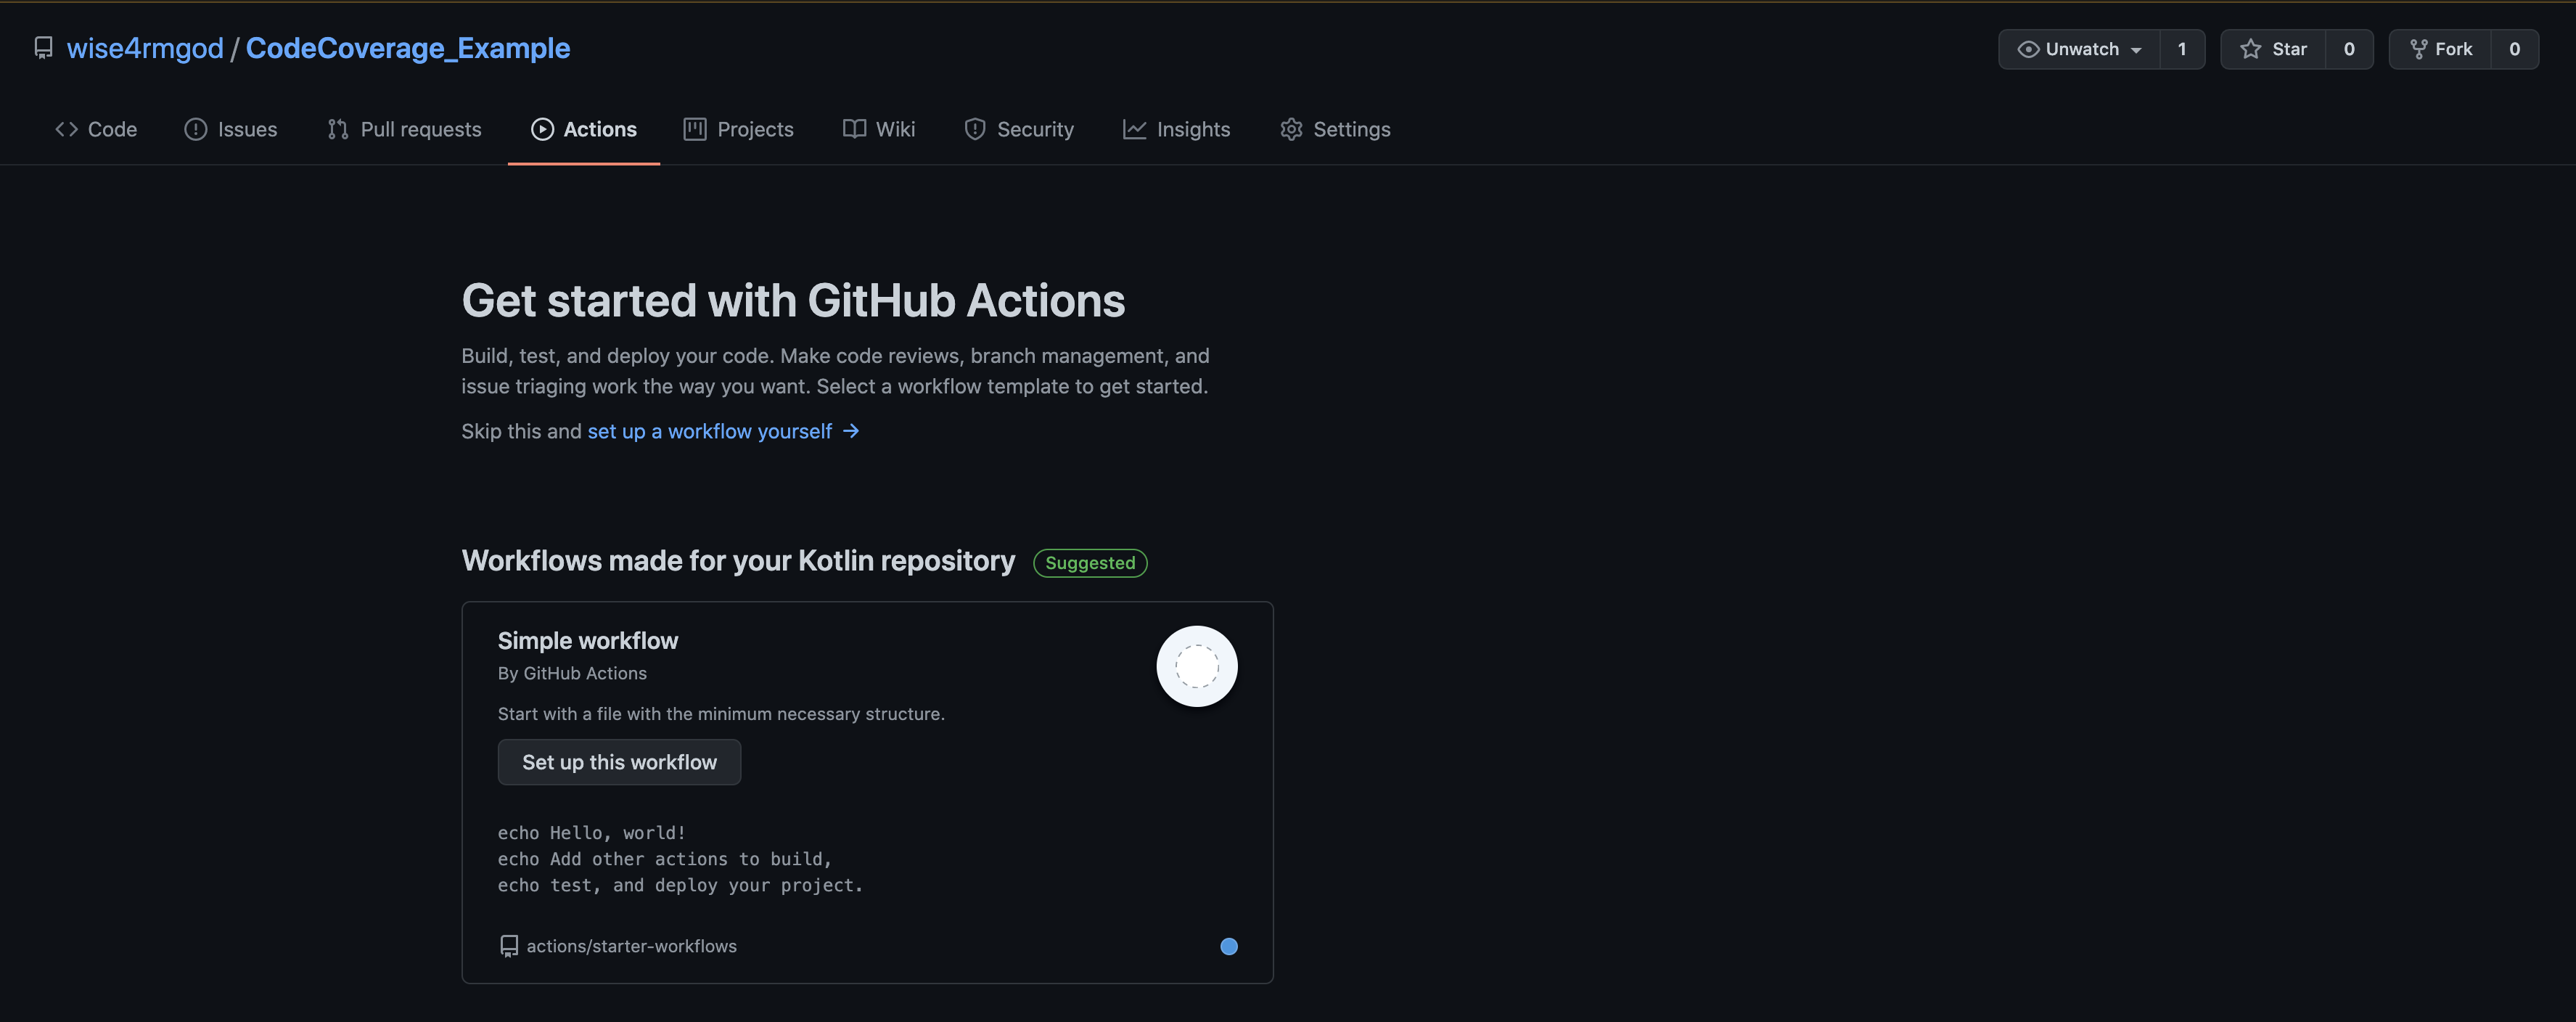
Click Set up this workflow to add Github Actions to your project.
Click Start commit.
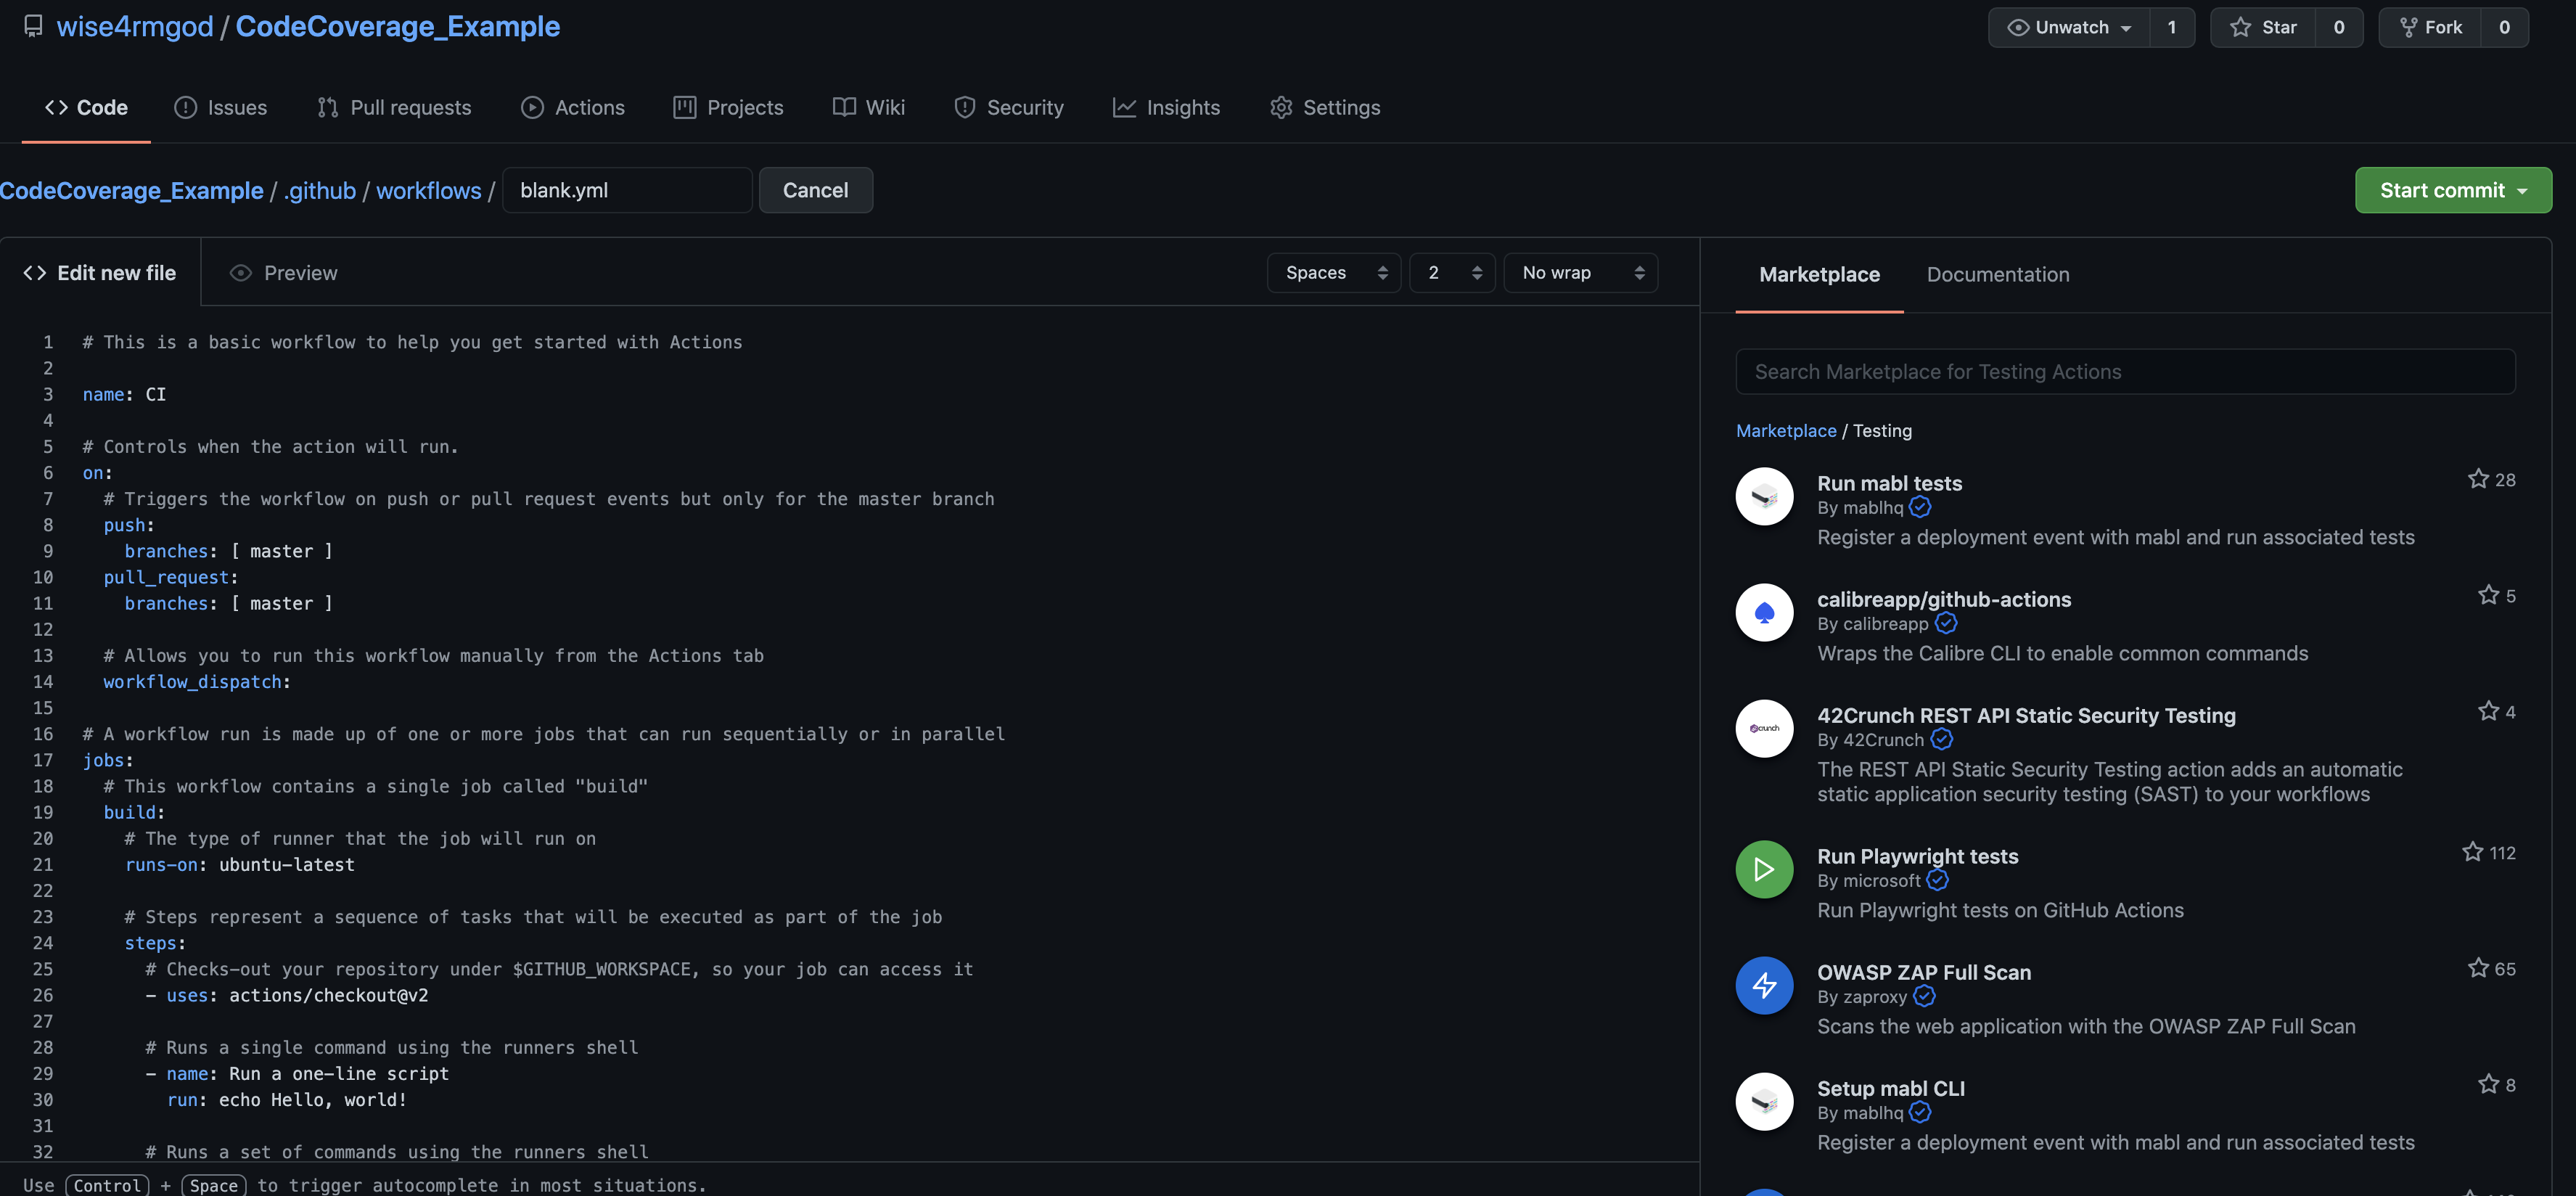
Then name your file and click Commit new file to commit to the main branch or create a new branch.
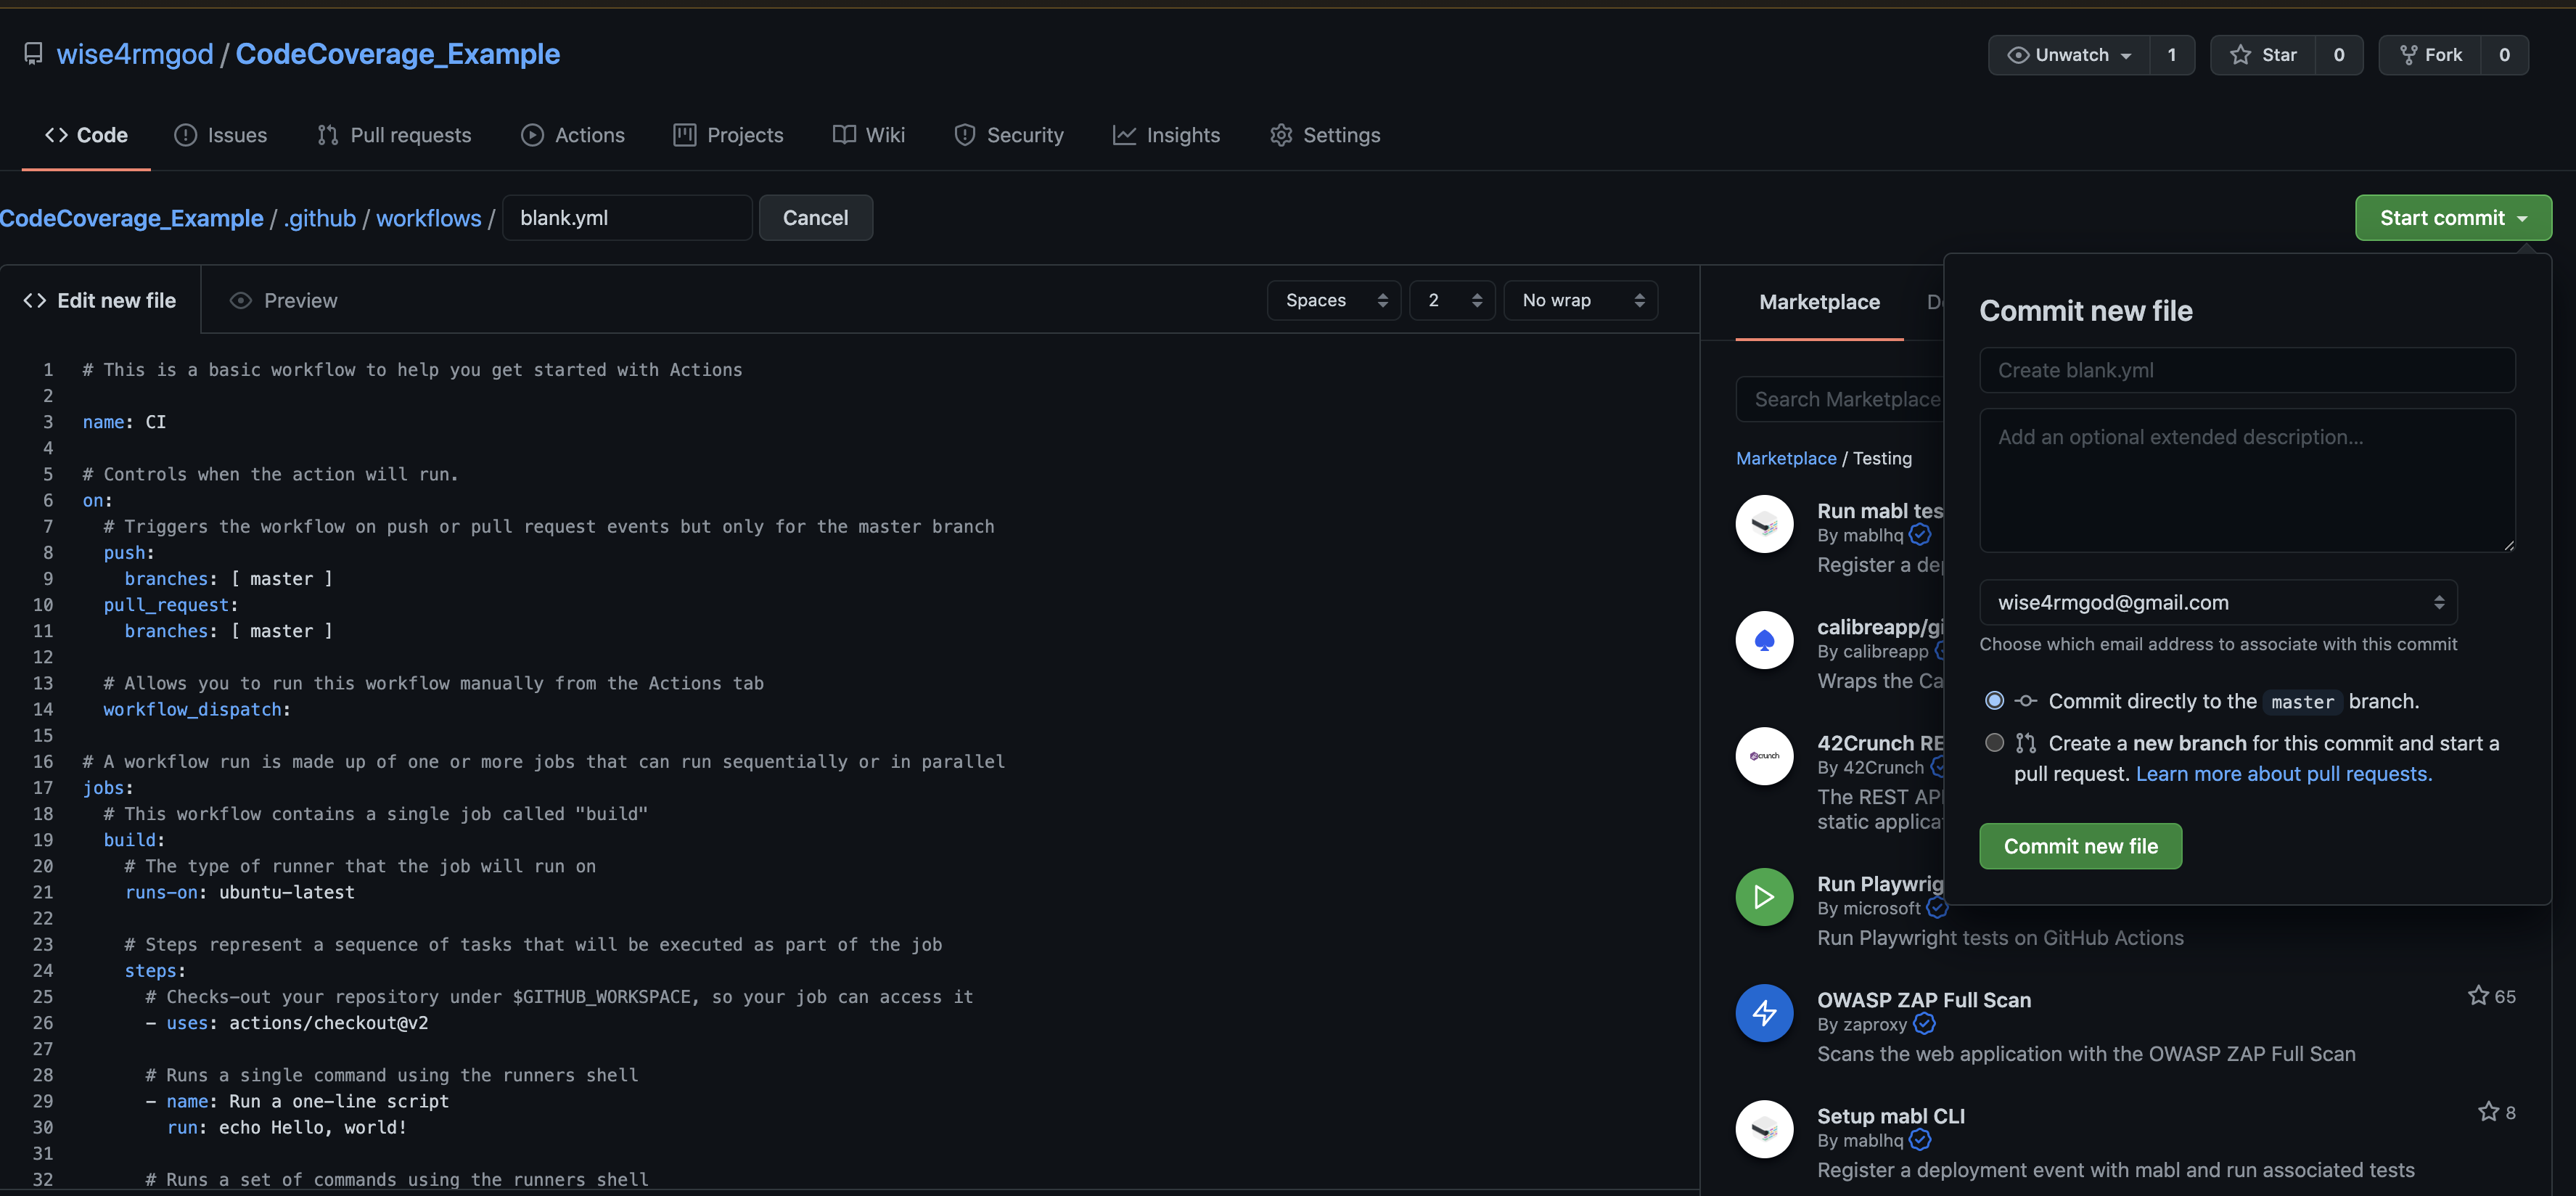
You can decide to edit the GitHub Actions workflow before committing your new file, but for this tutorial, commit the default workflow to the master branch and modify it later.
Next, let’s integrate the Codecov plugin into your project in GitHub so you can push a test report to Codecov. First, navigate on your browser to https://github.com/apps/codecov.
Click Install > Select your GitHub profile > Only select repositories. Select your desired repositories, then click Install.
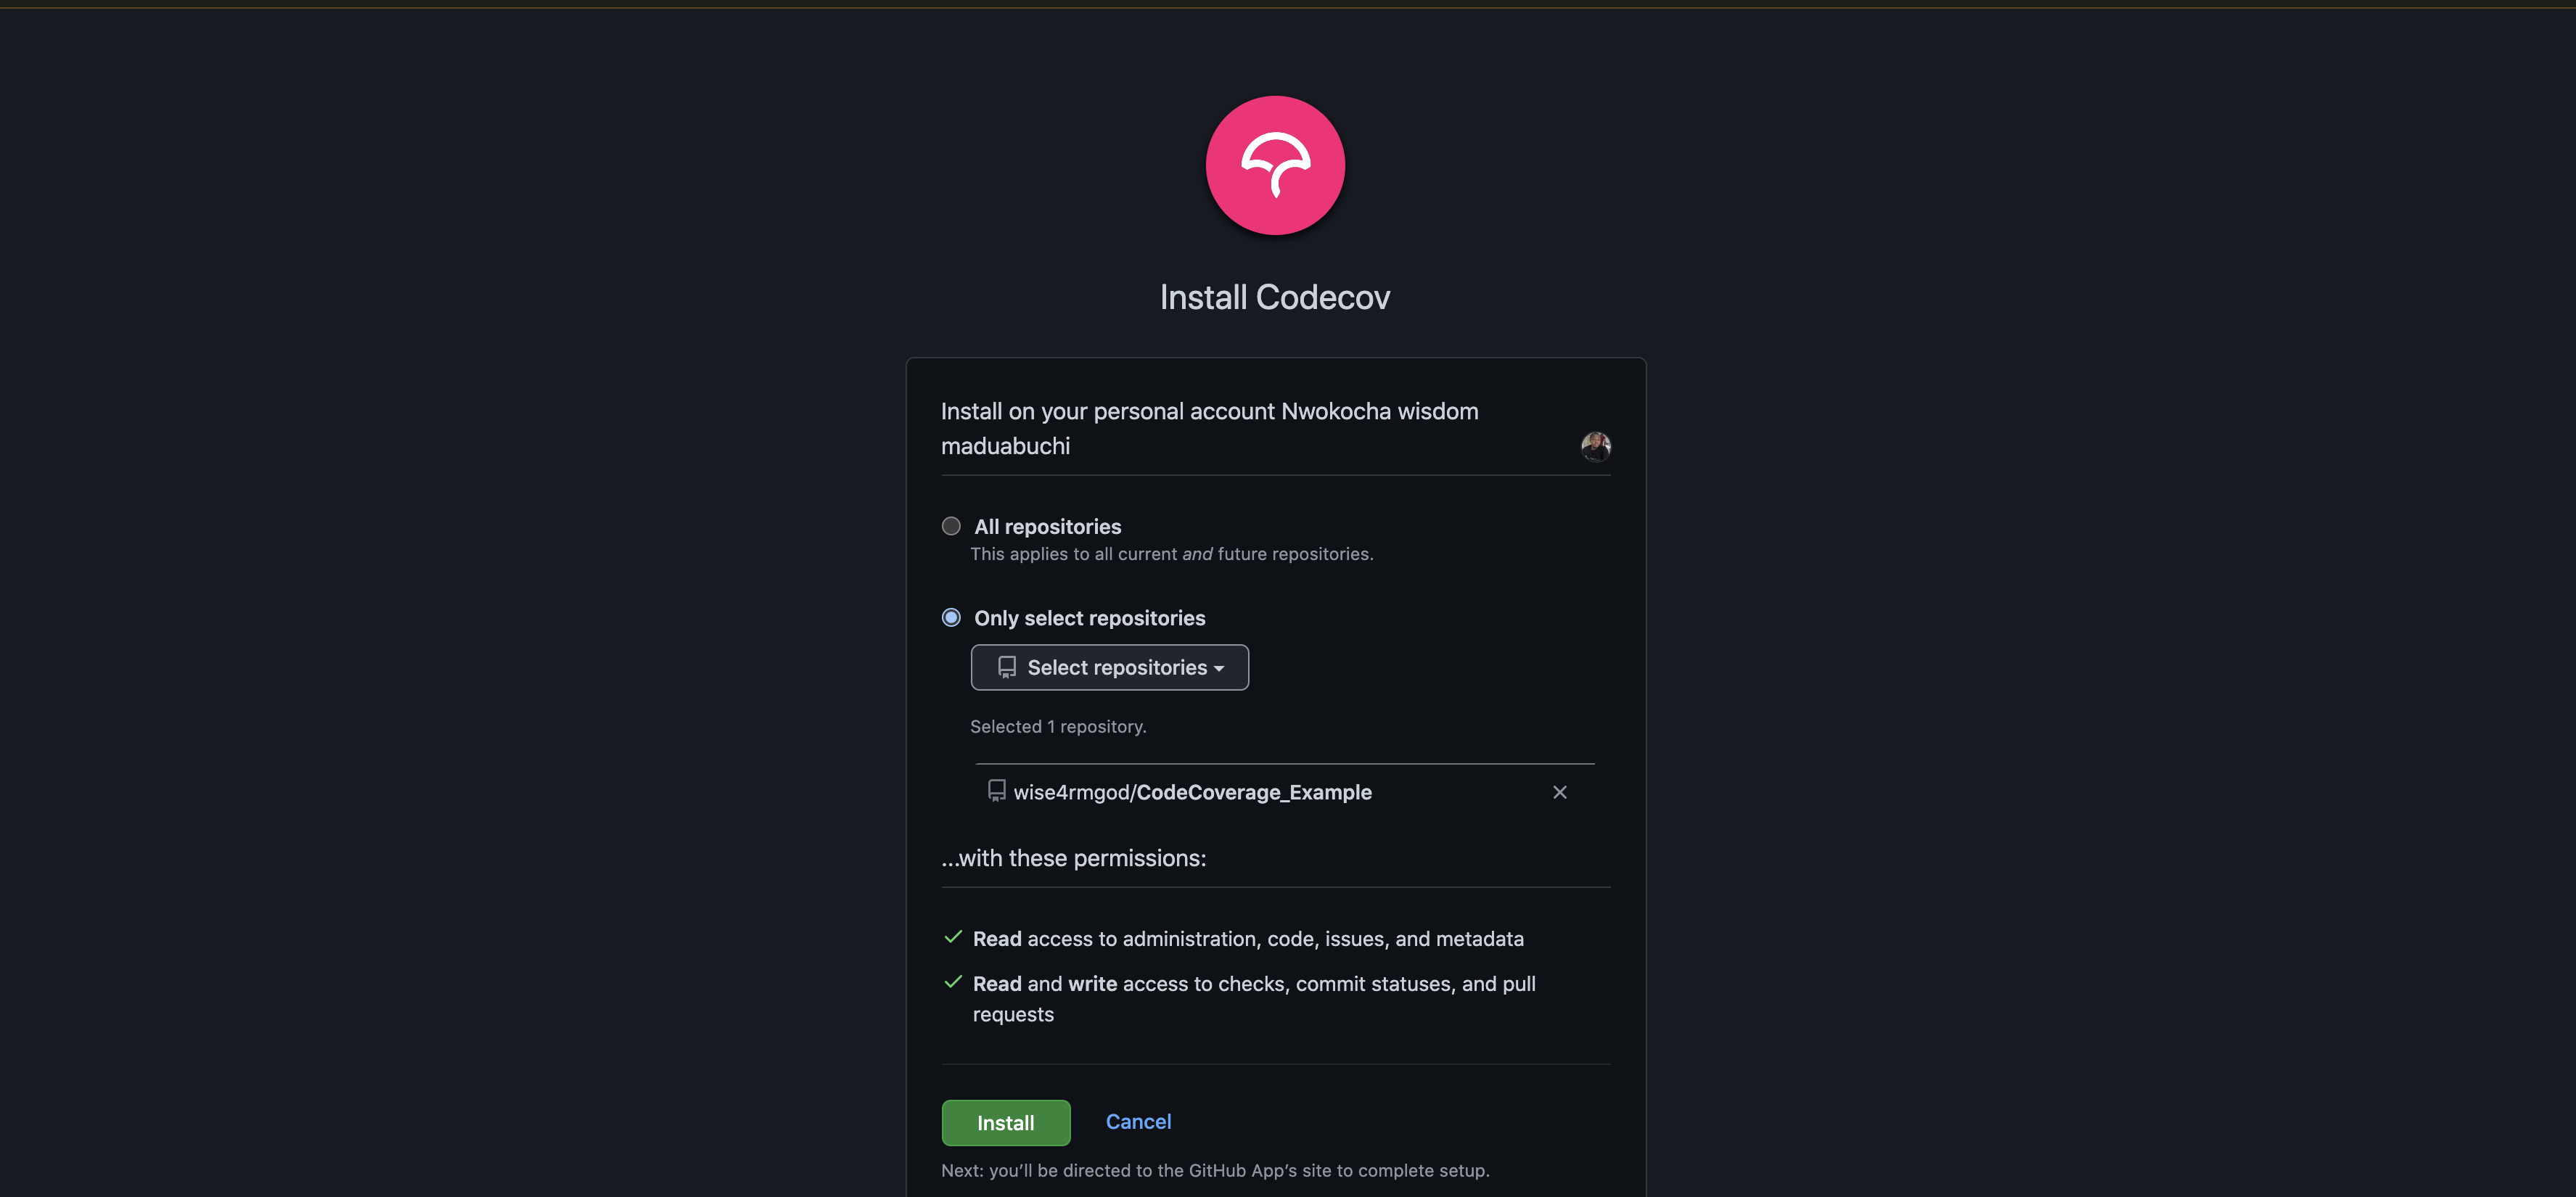
Note that you should choose Only select repositories because you want Codecov to be installed only on one repo, rather than all your repos on Github.
With your selections made, you will see a Welcome to Codecov message. To access your Codecov dashboard, click the Login with GitHub icon.

Click Add repository to see a list of your repos. Select the repo whose code you want covered. Note that when using GitHub Actions with Codecov, you’ll need a unique upload token only if your repo is private. The token is required to identify which project the coverage belongs to.

Before pushing your code coverage report to Codecov, take note of the report formats Codecov supports:
- .xml (Cobertura XML, JaCoCo XML, etc.)
- .json (Erlang JSON, Elm JSON, etc.)
- .txt (LCOV, Gcov, Golang)
For this tutorial, you’ll need the JaCoCo XML report format.
To automate the process of sending your code coverage report to Codecov, follow these steps:
- Add a YAML file in the root of your project. The name of the file and extension should be
codecov.yml.
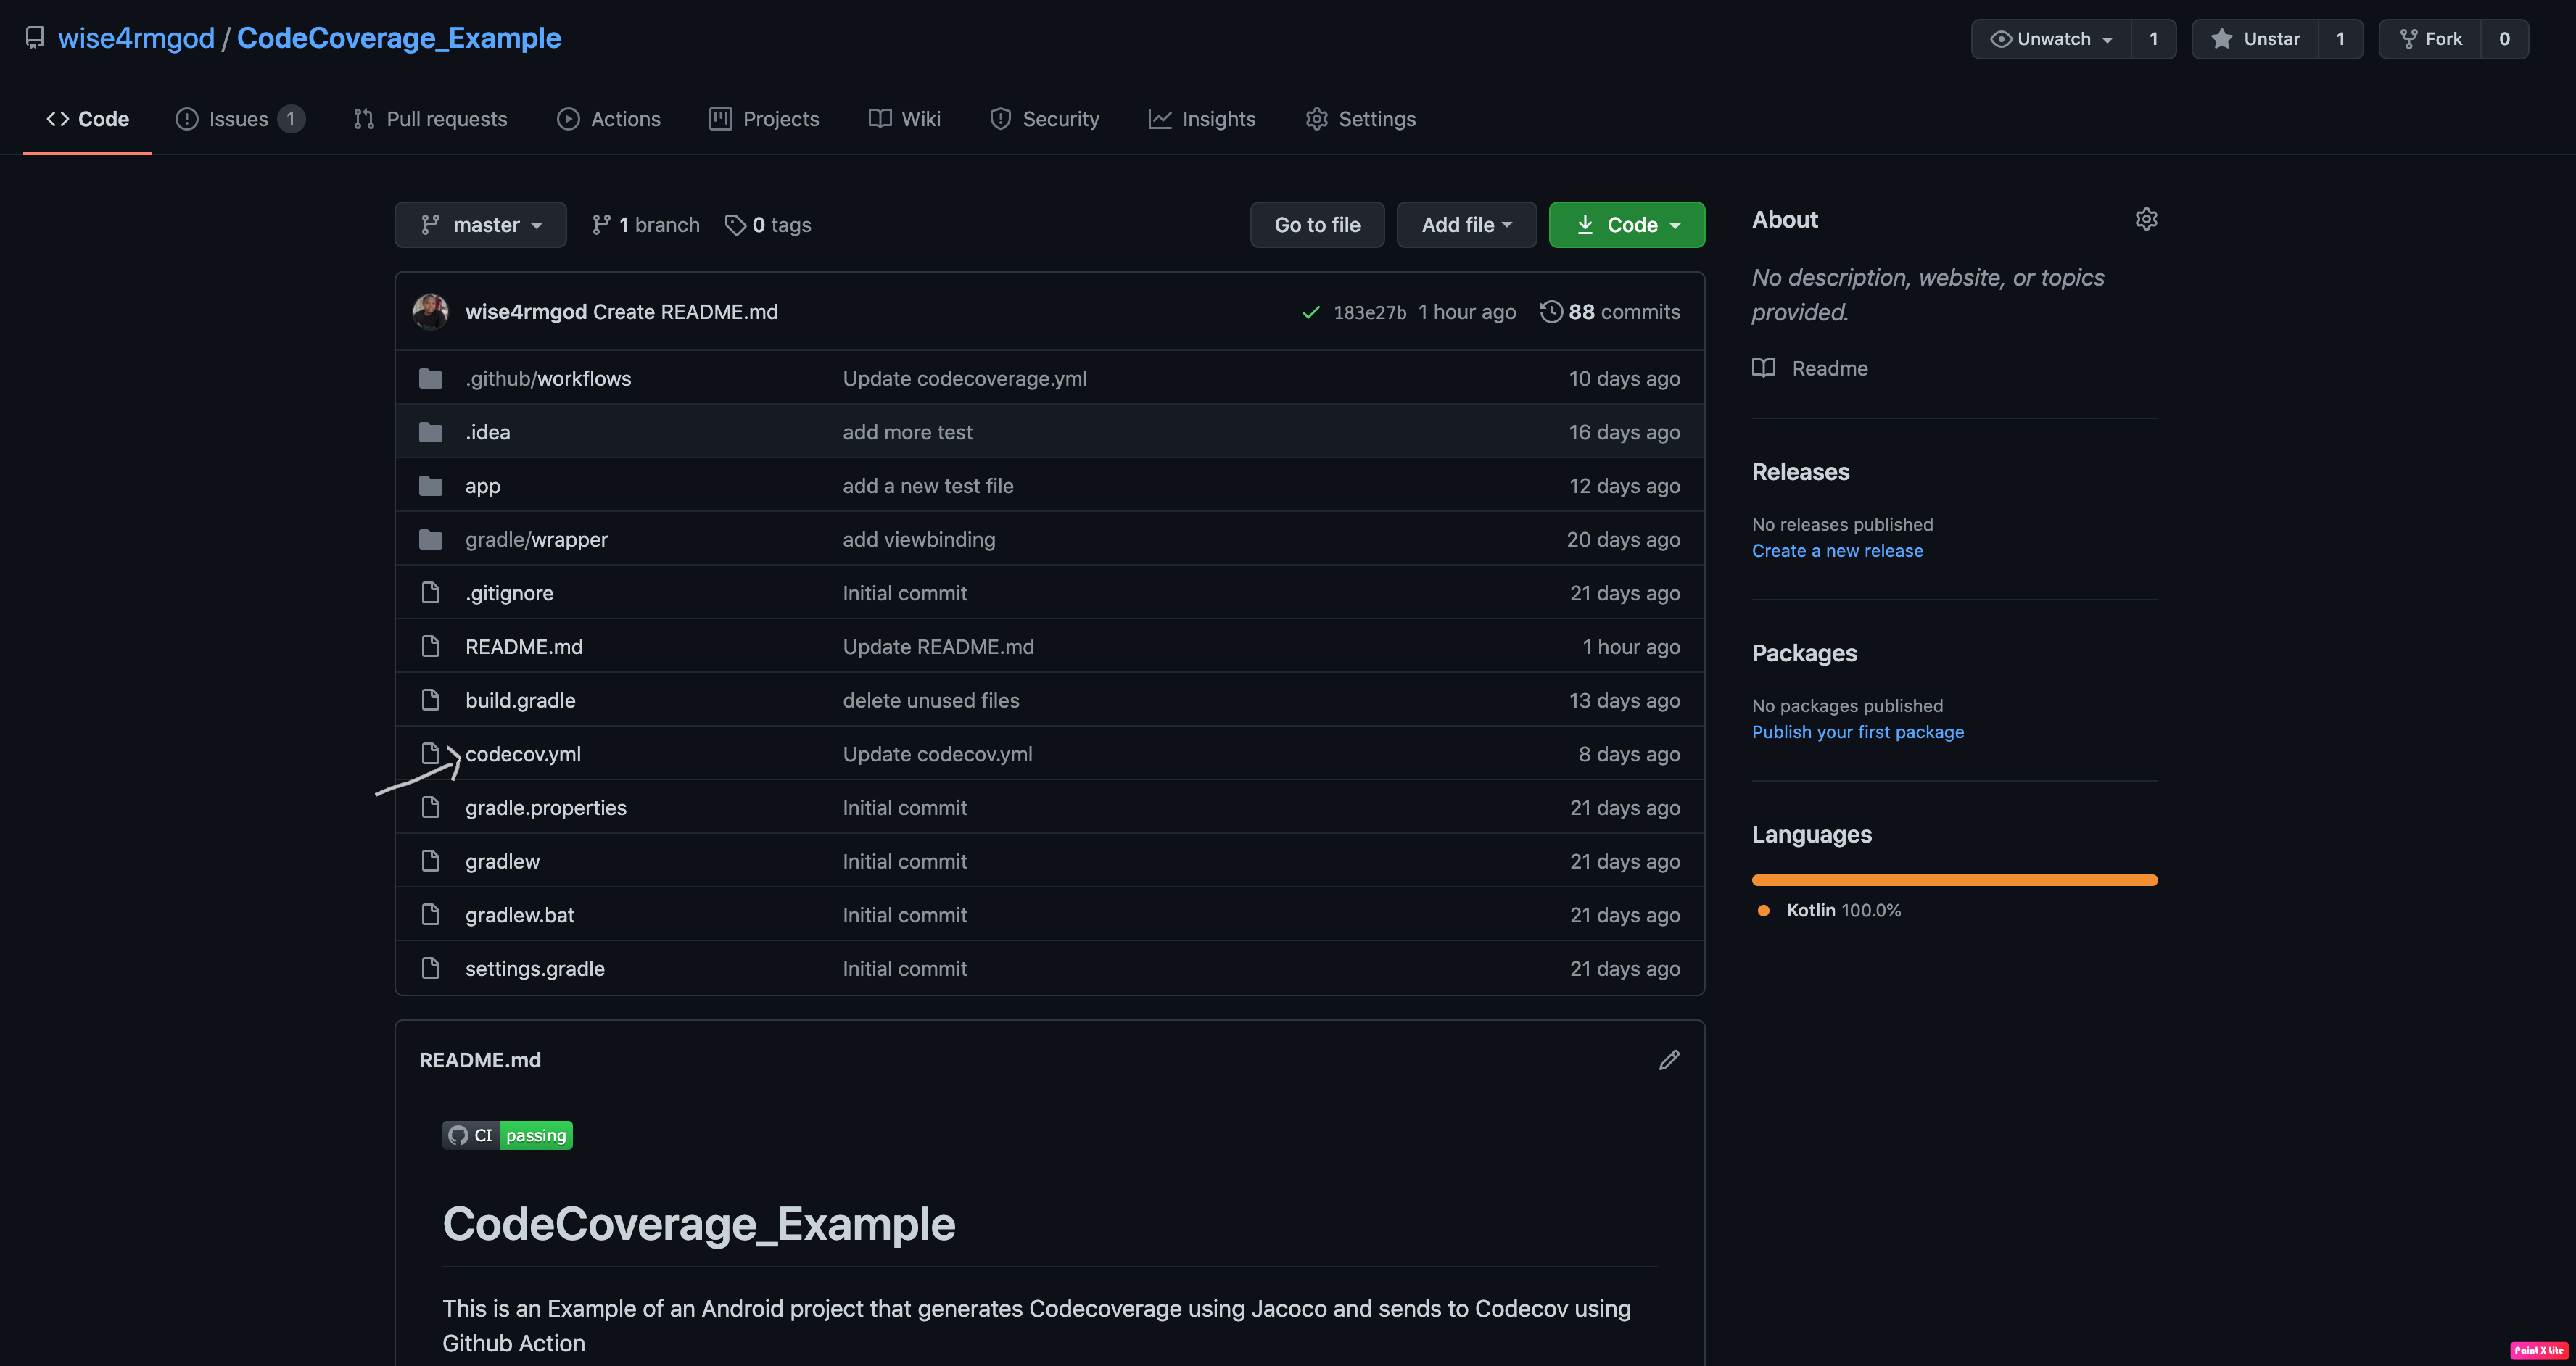
- Add the following workflow in your GitHub action .yml file. Note that where you see
CodeCoverage_Example, replace it with your project name.
{
    "fixes": [
        "/home/runner/work/CodeCoverage_Example/CodeCoverage_Example>/::"
    ],
    "codecov": {
        "disable_default_path_fixes": true
    }
}
name: CI

# Controls when the action will run.
on:
  # Triggers the workflow on push or pull request events but only for the master branch
  push:
    branches: [ master ]
  pull_request:
    branches: [ master ]

# A workflow run is made up of one or more jobs that can run sequentially or in parallel
jobs:
  # This workflow contains a single job called "build"
  build:
    # The type of runner that the job will run on
    runs-on: macos-latest

    # Steps represent a sequence of tasks that will be executed as part of the job
    steps:
      # Checks-out your repository under $GITHUB_WORKSPACE, so your job can access it
      - uses: actions/checkout@v2

       # Execute unit tests
      - name: Unit Test with Android Emulator Runner
        uses: ReactiveCircus/android-emulator-runner@v2.14.3
        with:
            api-level: 29
            script: ./gradlew connectedCheck

       # run: ./gradlew testDebugUnitTest

      - name: generate report
        uses: actions/upload-artifact@v2
        with:
          name: report
          path: app/build/reports/coverage/debug


      - name: Download Test Reports Folder
        uses: actions/download-artifact@v2
        with:
          name: report
          path: app/build/reports/coverage/debug

      - name: Upload Test Report
        uses: codecov/codecov-action@v2
        with:
          files: "app/build/reports/coverage/debug/report.xml"
You can now commit your changes and wait for your build to finish. If the build is successful, you’ll see a green checkmark beside the commit name, and red if it’s not successful.

Click Update codecoverage.yml to see the workflow.
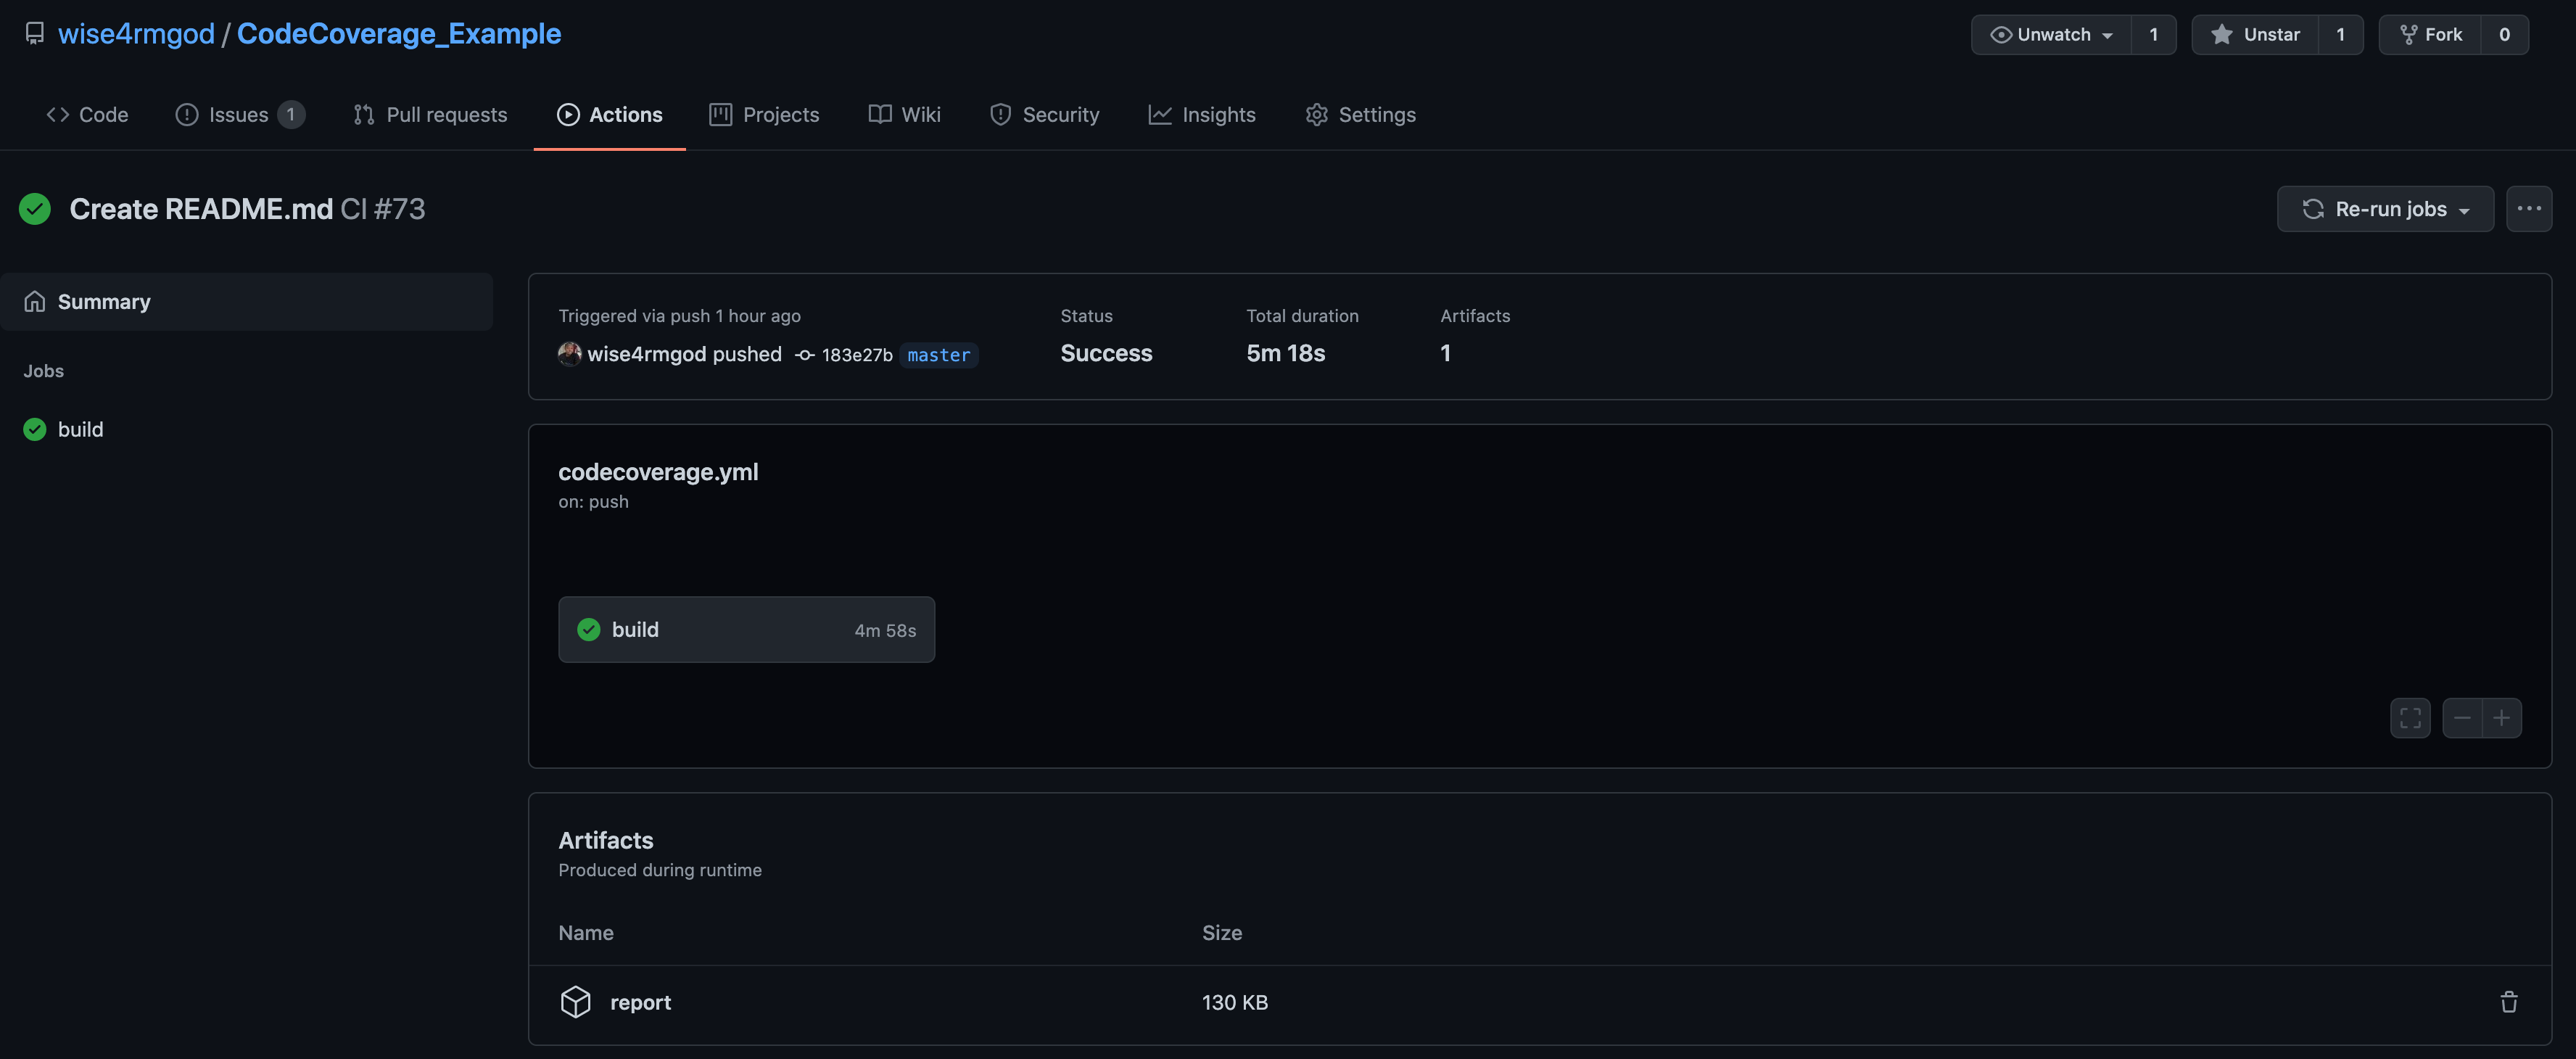
Click build to see the logs.
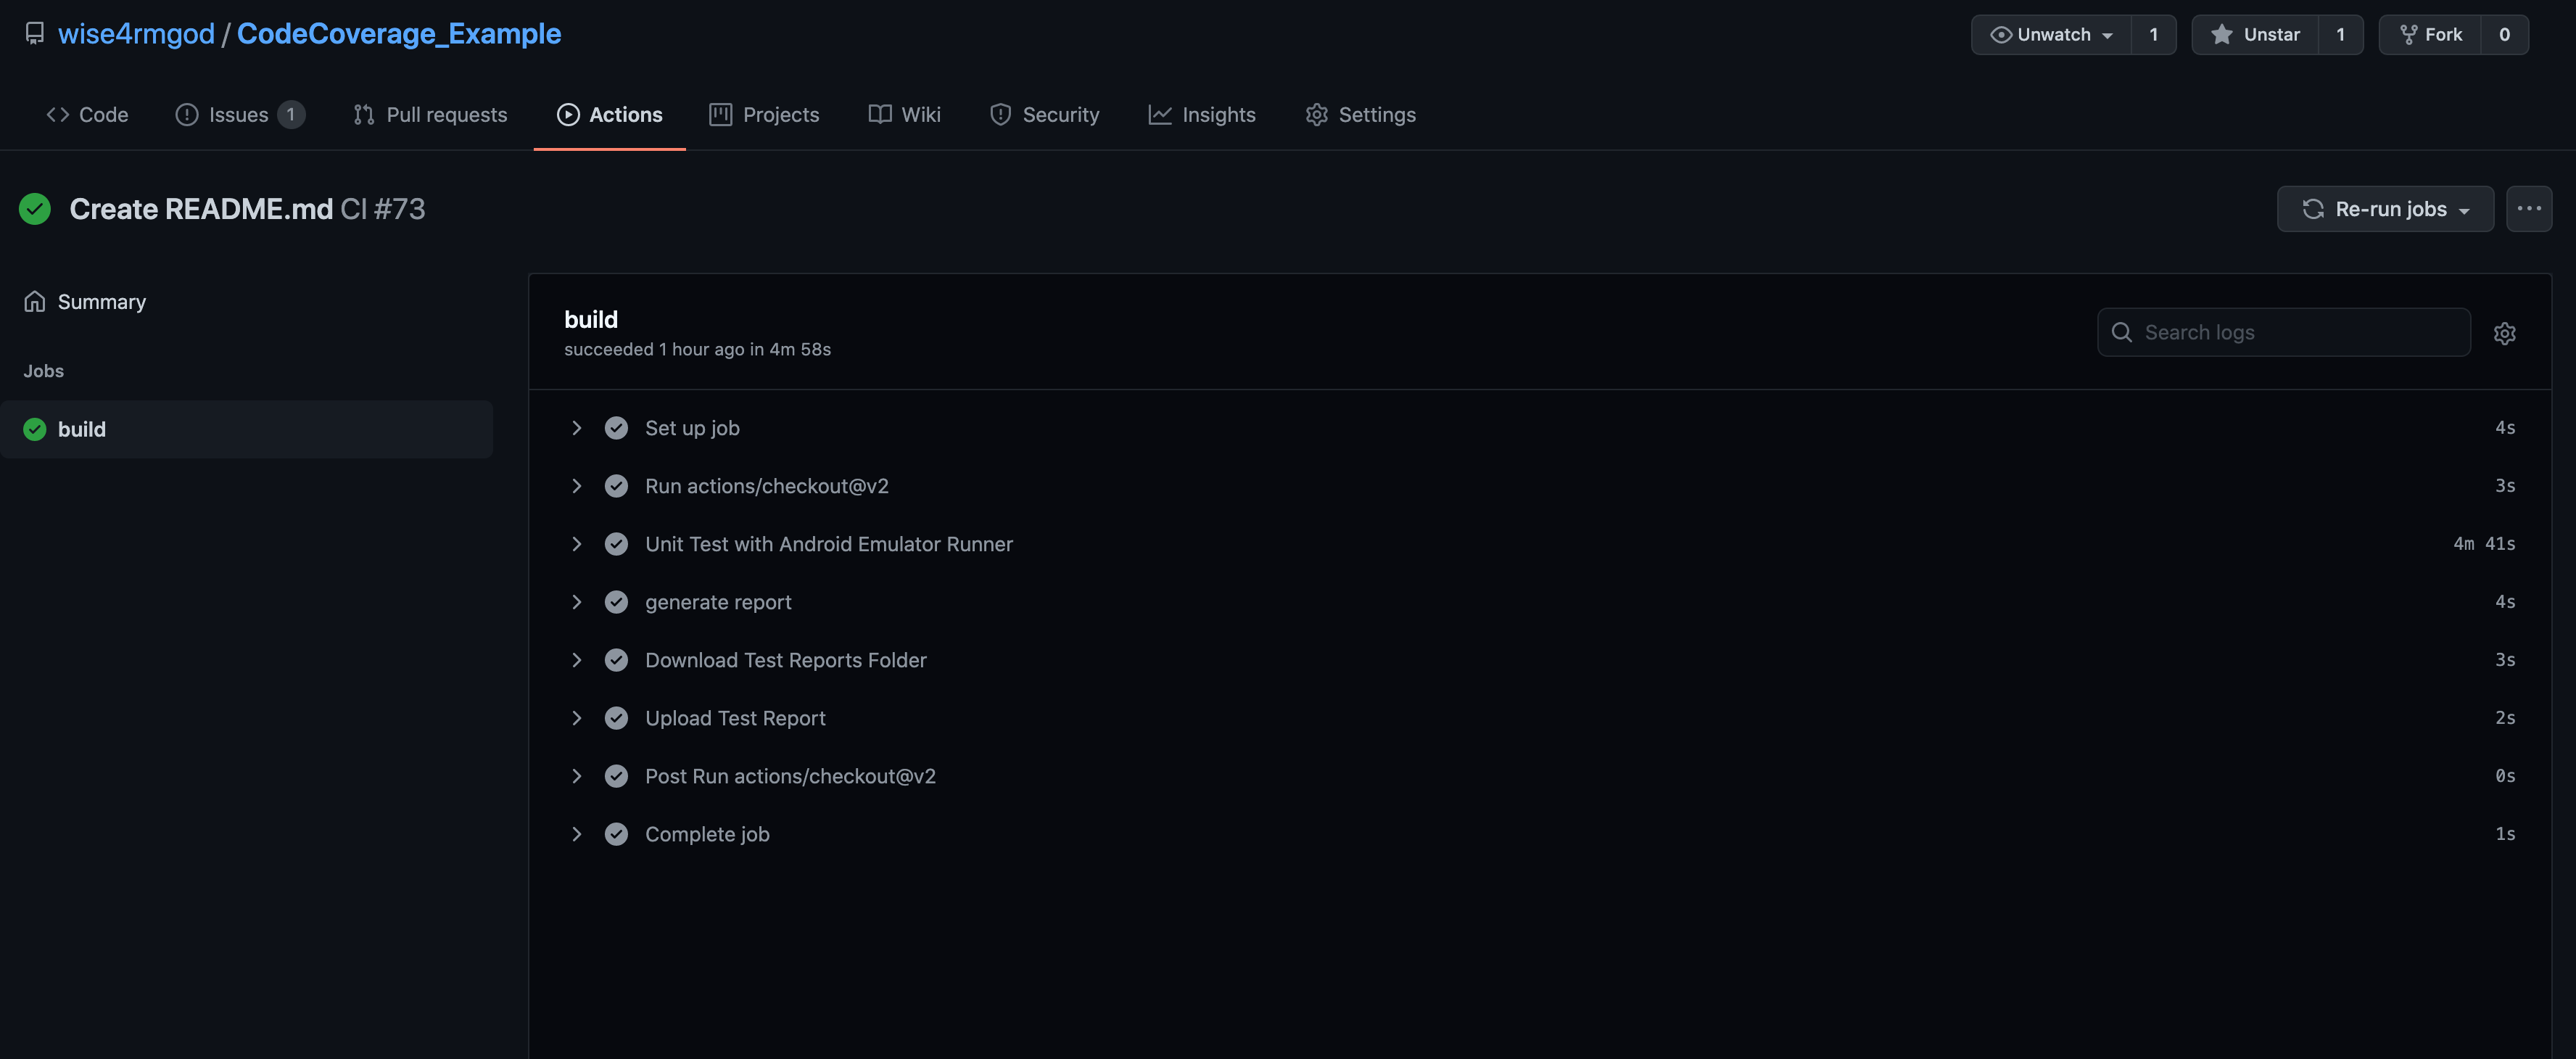
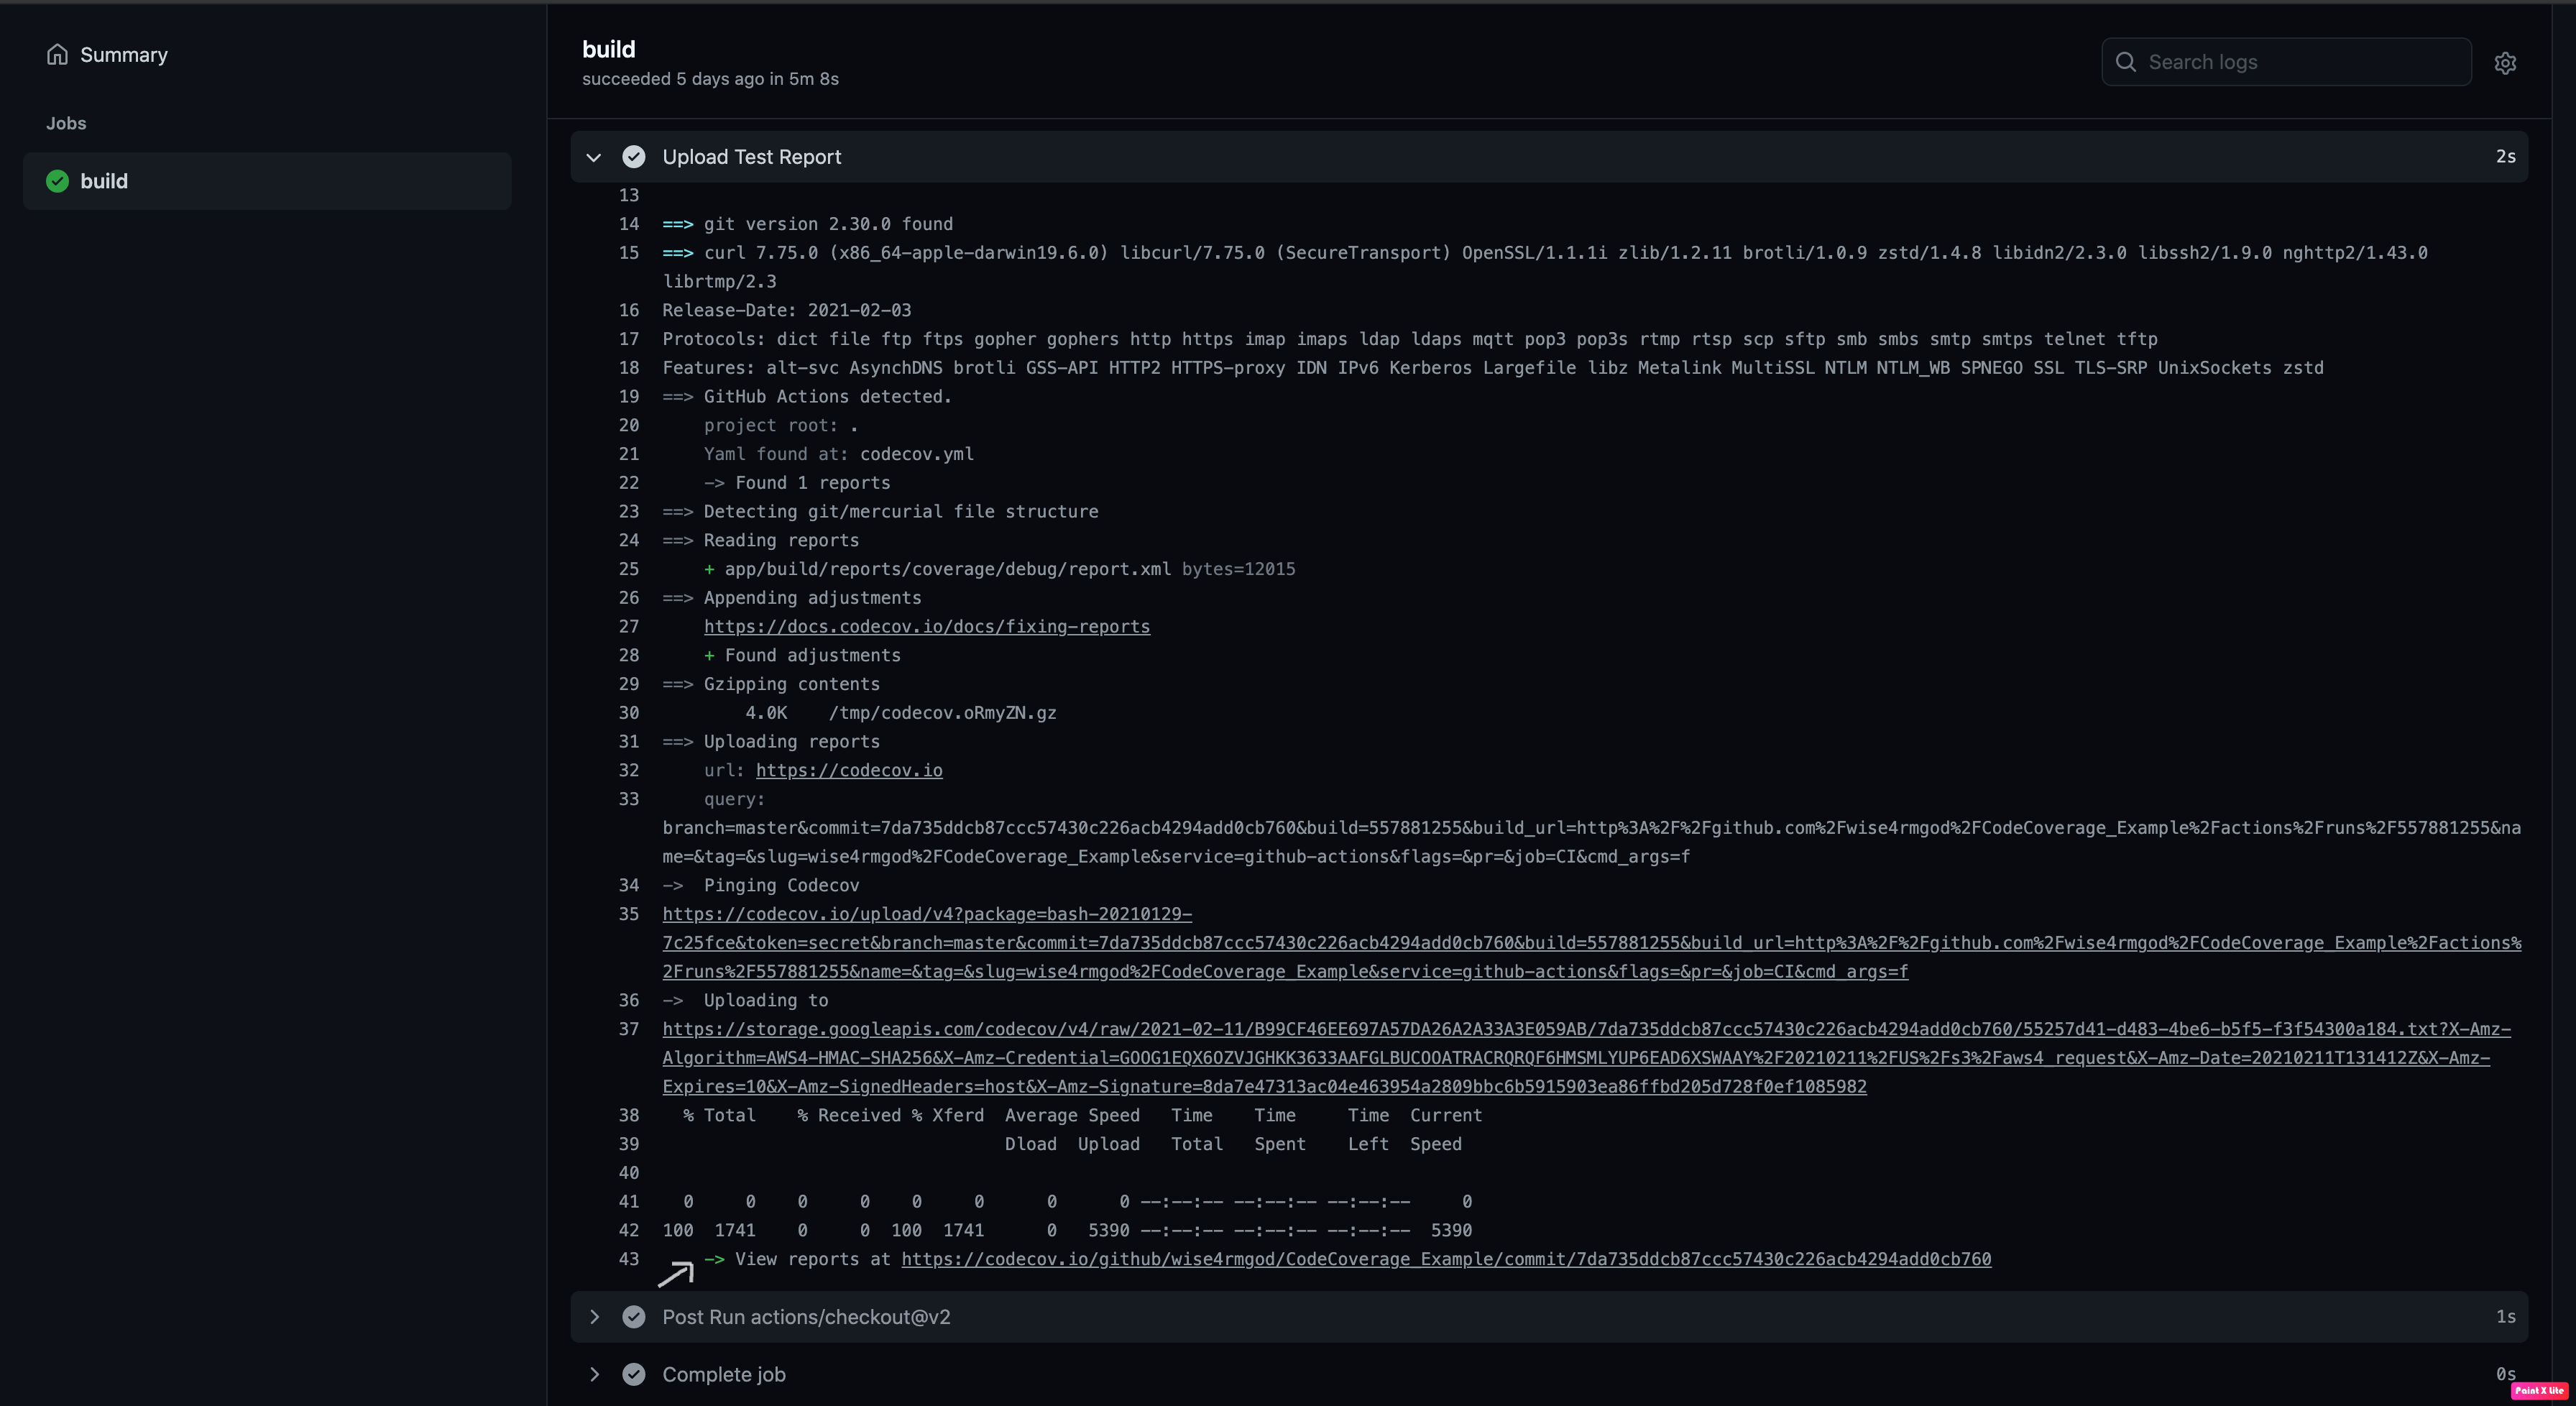
Click Upload Test Report to see the code coverage upload to Codecov logs.

On the bottom of the screen, click the URL after View report at: to be able to see your code coverage on the Codecov platform.

Conclusion
Code coverage is the measurement of how much of your source code your tests actually touch. In Android development, you can generate test coverage reports locally using JaCoCo, and then remotely store them using Codecov.
You can automate the process of generating and sending your code coverage to any code coverage storage platform. Codecov makes it easy to send your code coverage, supports many programming languages and frameworks, supports lots of code coverage report formats, and can be integrated into many CI/CD platforms, like GitHub Actions and Bitrise.
