Measuring PHP Code Coverage with PHPUnit and GitHub Actions
Writing test cases takes time, but it has always been an important aspect of maintaining a project in the long run, whether or not you follow test-driven development (TDD).
Test cases help ensure that code does what it is supposed to do, keeping quality high and making maintenance easier. They help ensure that things don’t break when changes occur, and they’ll also let you know if a new change is going to have a ripple effect that will impact something elsewhere in your codebase.
To write these tests effectively, you need to measure code coverage—a metric that determines what percentage of the code is covered by test cases. This is beneficial for the following reasons:
- Benchmarking testing progress: You’ll know exactly how much code is covered by test cases. This way, you can ensure that whenever new code is written, there are enough test cases to let you know if any new code is breaking the old code.
- Ensuring new code is tested: When you write new code, you need to know if it is covered by tests or not. Code coverage gives you a quantitative report which can notify you if anything is not covered by test cases and thus prone to break, allowing you to write additional tests and avoid the risk of your code breaking silently.
- Testing notifications: You can be alerted if code coverage falls below a particular threshold, allowing you to take action to further minimize the risk of breakage.
In this tutorial, you’ll learn how to use Codecov to measure test coverage for unit tests written with PHPUnit on a project deployed using GitHub Actions:
- PHPUnit is the de-facto tool for writing tests in PHP. Here, you’ll look at simple PHP code and test cases.
- You’ll use GitHub Actions to achieve continuous integration (CI). It will run tests when a change is pushed, then generate and upload the code coverage report to Codecov. To keep things simple, this tutorial will stick with one
mainbranch and will run tests when pushing anything to that branch. - You’ll use Codecov to visualize and keep track of your code coverage.
If you’d like to follow along, the source code for the tutorial can be found in this GitHub repository.
Using PHPUnit for Tests and Code Coverage
Let’s get started!
In order to generate a report, you’ll use some simple PHP code for the PHPUnit base test cases. Here’s the very simple file structure:
.
+-- composer.json
+-- composer.lock
+-- src
|   +-- Calculator.php
+-- tests
|   +-- CalculatorTest.php
+-- phpunit.xml
To reproduce this structure, you’ll need to create a few files. First, create the file named src/Calculator.php using this code:
<?php
namespace App;

class Calculator
{
   public function __construct($operator){
       $this->operator = $operator;
   }

   public function evaluate($num1, $num2){
       $func = $this->operator;
       return $this->$func($num1, $num2);
   }

   public function add($num1, $num2){
       return $num1 + $num2;
   }

   public function subtract($num1, $num2){
       return $num1 - $num2;
   }


   public function multiply($num1, $num2){
       return $num1 * $num2;
   }

}
The App namespace mentioned in the code above is defined in the autoload section in the composer.json file, which is responsible for installing and autoloading dependencies. Here’s the content for the composer.json file:
{
   "require": {
       "phpunit/phpunit": "^9.5"
   },
   "autoload": {
       "psr-4": {
           "App\\": "src/"
       }
   }
}
To create the composer.lock file and install the dependencies in the vendor directory, simply run composer install.
Now you need to write test cases for the Calculator class. Create tests/CalculatorTest.php with the following code:
<?php

use PHPUnit\Framework\TestCase;
use App\Calculator;

class CalculatorTest extends TestCase
{
   public function testAddOperation(): void
   {
       $adder = new Calculator("add");
       $value = $adder->evaluate(2, 3);
       $this->assertEquals($value, 5);
   }

   public function testSubtractOperation(): void
   {
       $adder = new Calculator("subtract");
       $value = $adder->evaluate(2, 3);
       $this->assertEquals($value, -1);
   }
}
You can run the test cases by executing the following command:
./vendor/bin/phpunit tests
To run your tests with code coverage report generation, and in order to provide a file for test-related settings in the project, it’s best to create a phpunit.xml file. To do so, run the following command:
./vendor/bin/phpunit --generate-configuration
Although you can simply generate an HTML-based code coverage report on your own system, the goal in this tutorial is primarily to execute the test cases and generate a code coverage report to be stored in Codecov for better analysis. In order to do so, you’ll use GitHub Actions.
Using GitHub Actions and Codecov
GitHub provides a tool to perform any action on events that occur on GitHub, like push, create pull request, merge, and so on. This is made possible with GitHub Actions, which provides you with an isolated space where you can easily build and run your code, install dependencies, test your code, merge your branch into another branch, deploy your code, and much more.
In this section, you’ll be using GitHub Actions to install dependencies, test your code, and generate coverage reports that you’ll eventually take to Codecov. Again, for the sake of simplicity, you’ll be using one main branch and executing jobs on push events. You also won’t need to add each and every command at every step, as you’ll be using GitHub Actions that are already available.
Start by creating a file at the root of your project at .github/workflows/ci.yml, with the following code:
name: CI

on: [push]

jobs:
 build-test:
   runs-on: ubuntu-latest

   steps:
     - name: Checkout Code
       uses: actions/checkout@v2

     - name: Install composer and dependencies
       uses: php-actions/composer@v6

     - name: PHPUnit Tests
       uses: php-actions/phpunit@v3
       env:
         XDEBUG_MODE: coverage
       with:
         bootstrap: vendor/autoload.php
         configuration: phpunit.xml
         php_extensions: xdebug
         args: tests --coverage-clover ./coverage.xml

     - name: Upload to Codecov
       uses: codecov/codecov-action@v2
       with:
         token: ${{ secrets.CODE_COV_TOKEN }}
         files: ./coverage.xml
         verbose: true
The second line, on: [push] tells GitHub that the below mentioned jobs should execute on the push of any branch. Then, jobs/build-test/runs-on in the hierarchy specifies what OS this code should be executed on. After that, steps is a list of actions to perform. In this tutorial, you’ve specified actions that are already available in order to avoid having to write a complete job from scratch. As shown above, you can name your steps as desired with name keywords, while uses keywords specify the name of the action to use.
This job is based on four steps:
Checkout Codewill checkout code from the GitHub repository on the instance or container (whatever GitHub is using internally).Install composer and dependencieswill use already available actions to simplify things.- The
PHPUnit Testsaction will run tests with PHPUnit. Take note of the specifiedxdebugextension, which is required for generating code coverage. Inargs, you have the test directory (tests) along with the--coverage-cloverflag and the path where the XML file will be created. Clover is one of the formats widely accepted by tools like Codecov. Upload to Codecovis the final step, in whichcoverage.xmlwill be uploaded to Codecov. Take note of the specifiedtokenparameter. You’ll need to acquire the token from Codecov and add it here—or better yet, add it in your GitHub environment’s secret tokens and then specify it by name.
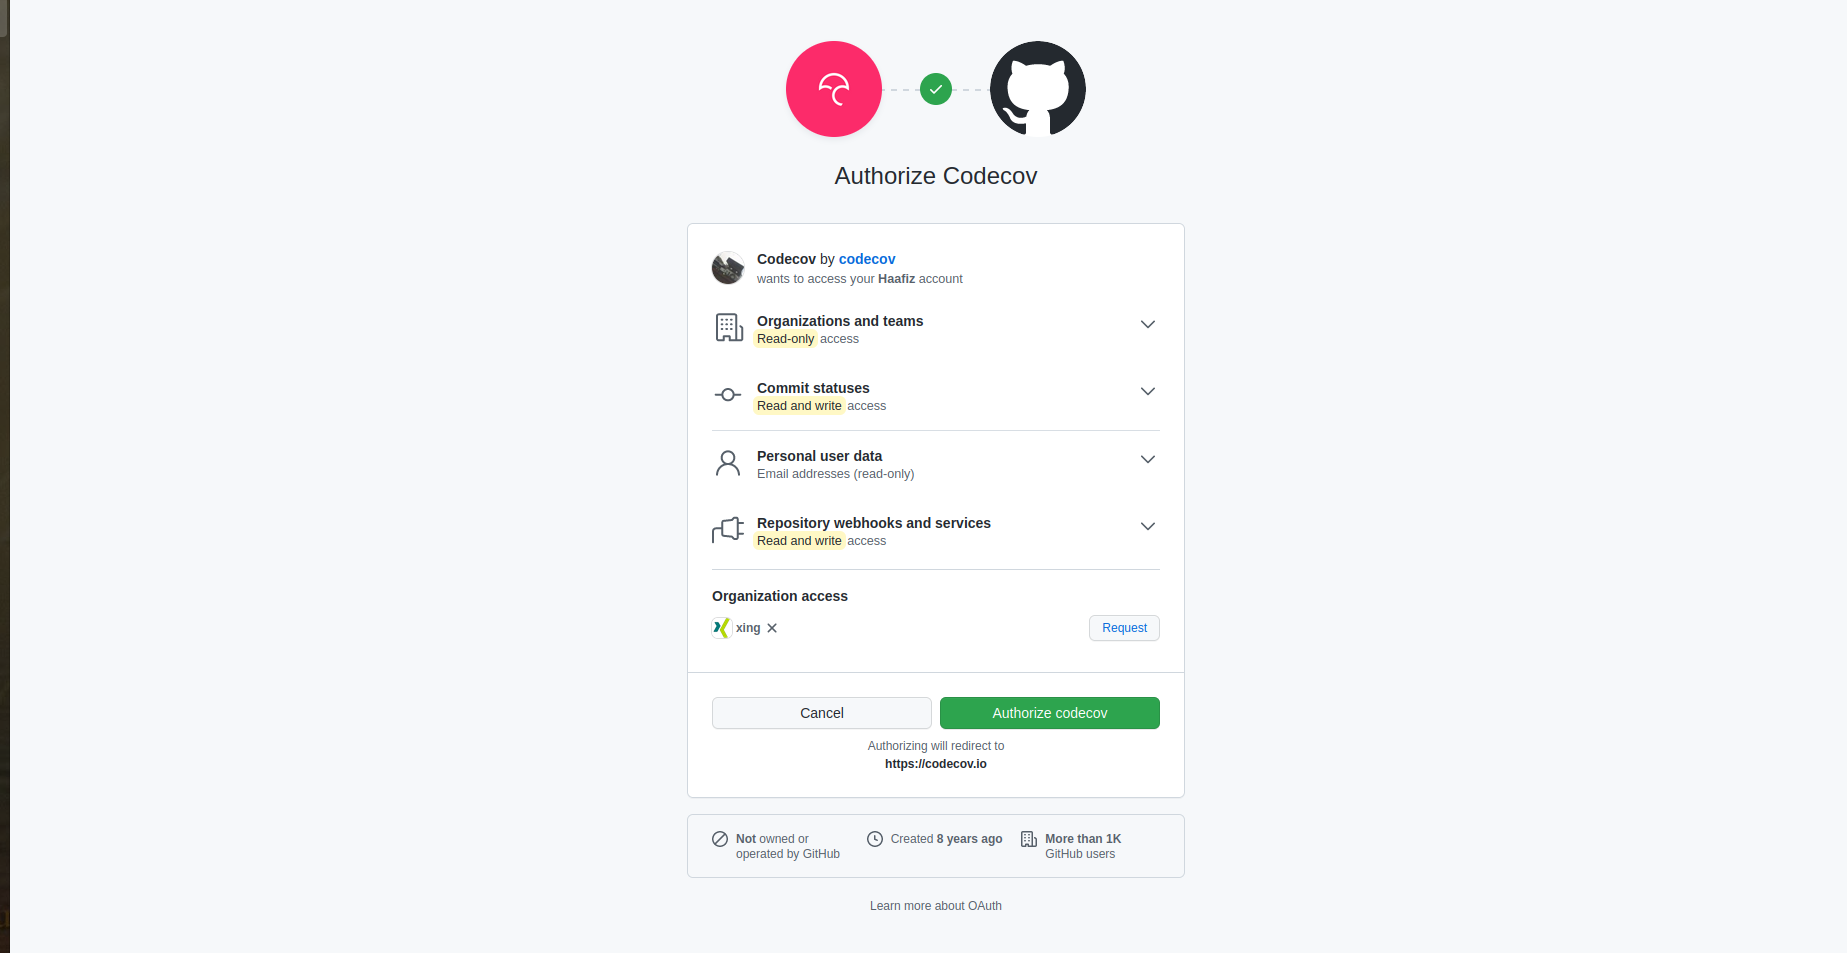
In order to acquire the token, you’ll need to access the Codecov login page and choose the option to sign in with GitHub. Codecov will then request access:
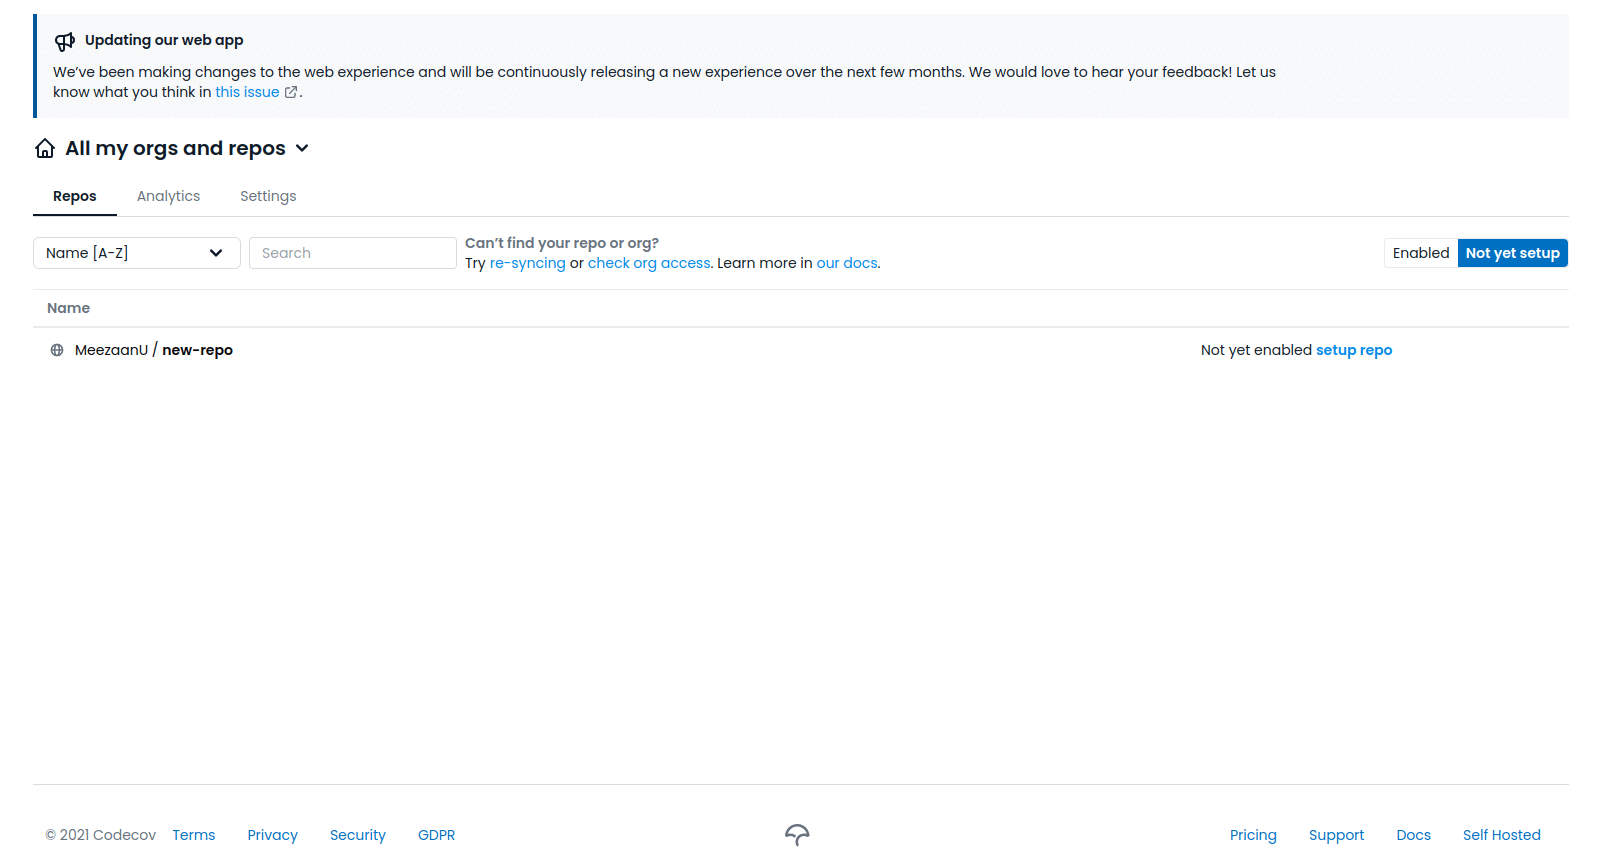
Once you are logged in and have given GitHub access to Codecov, go to Repos > Not yet setup.
Click the target repository’s name to view some outlined steps:
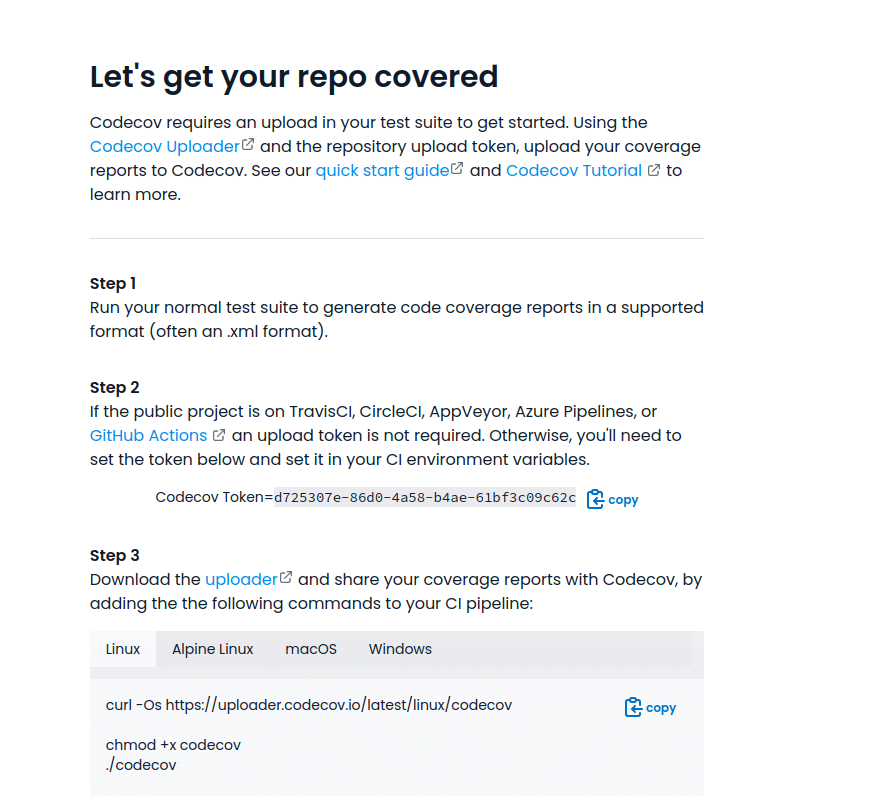
Copy the Codecov Token and add it in your ci.yml file, or even better, in your GitHub repository environment’s secret token by going to Settings > Secrets > Actions. The benefit of doing it this way is that your token will be automatically encrypted.
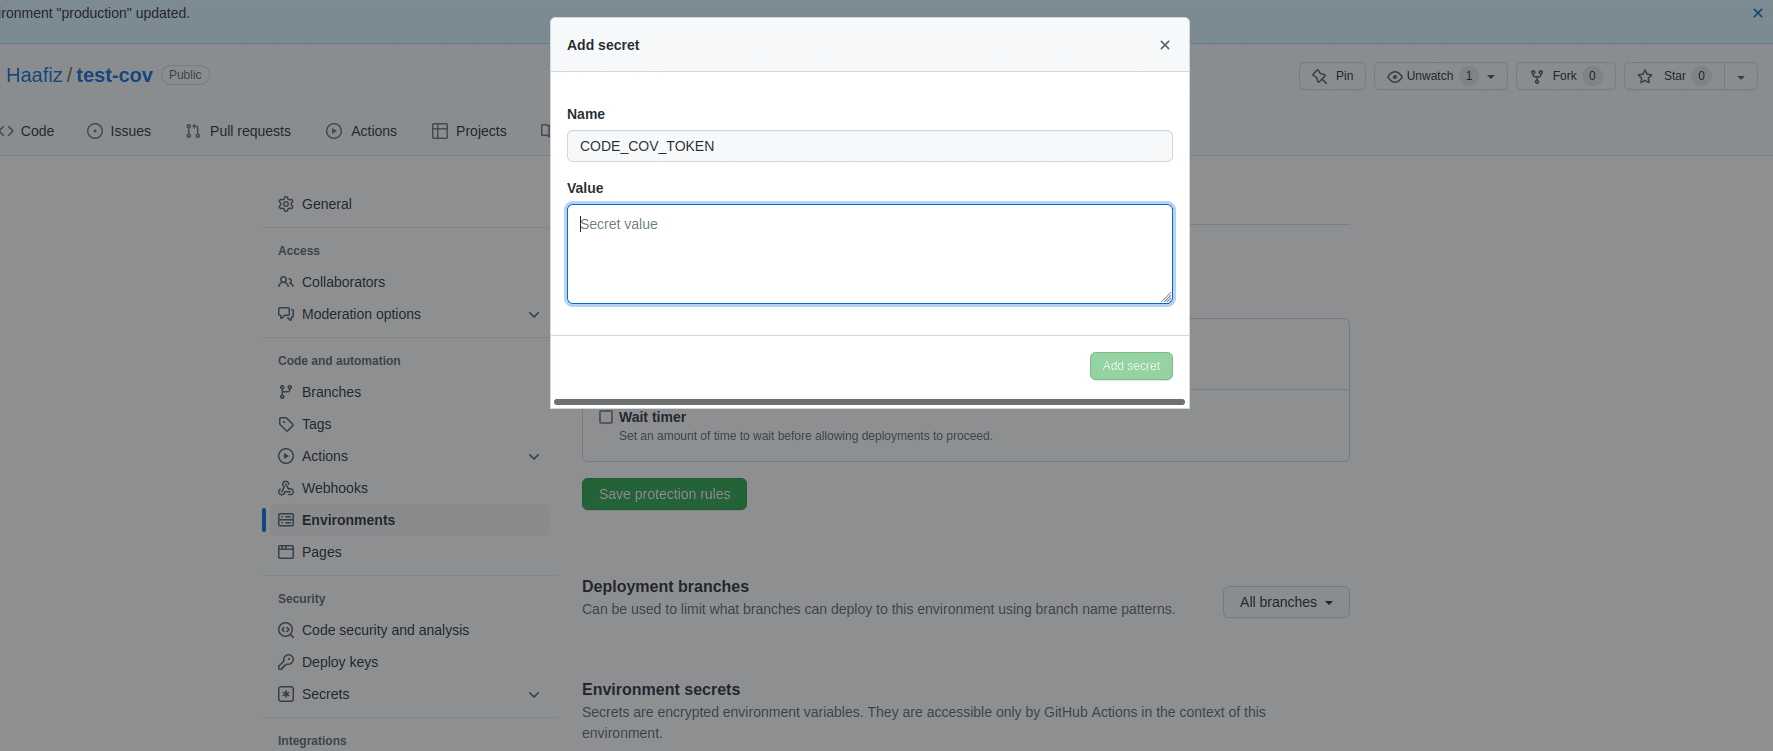
Now you can go ahead and push your changes to the main branch in the GitHub repo. Once they’re pushed, the actions you’ve set up will run. You can view them on GitHub under your repository’s Actions tab:
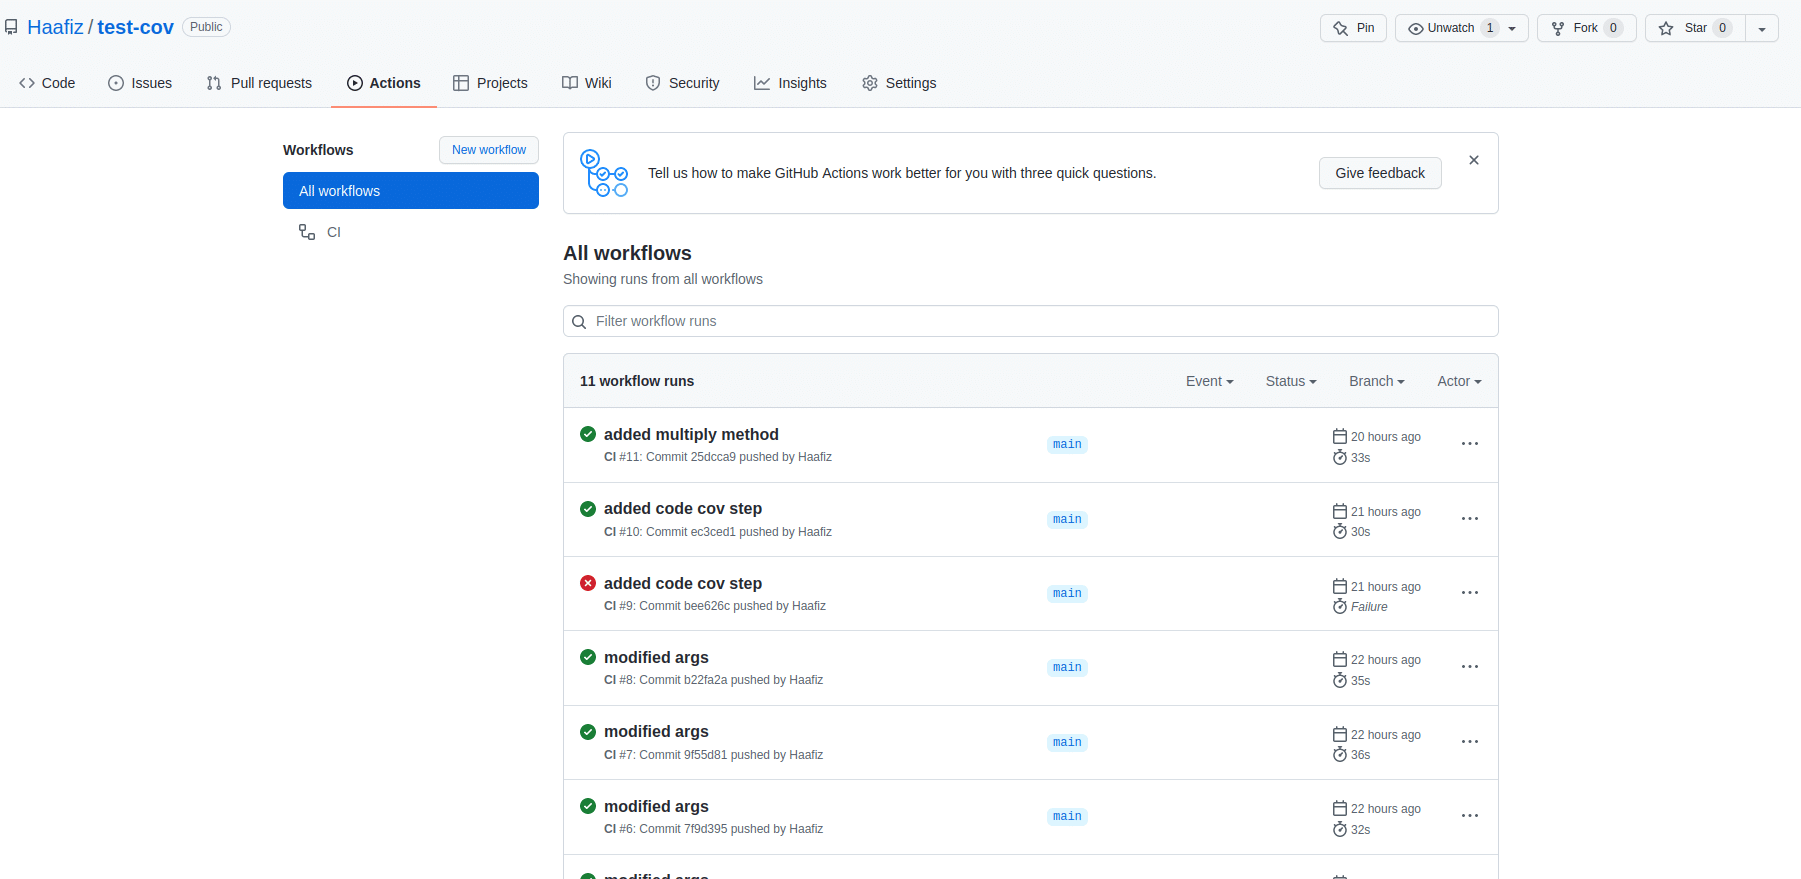
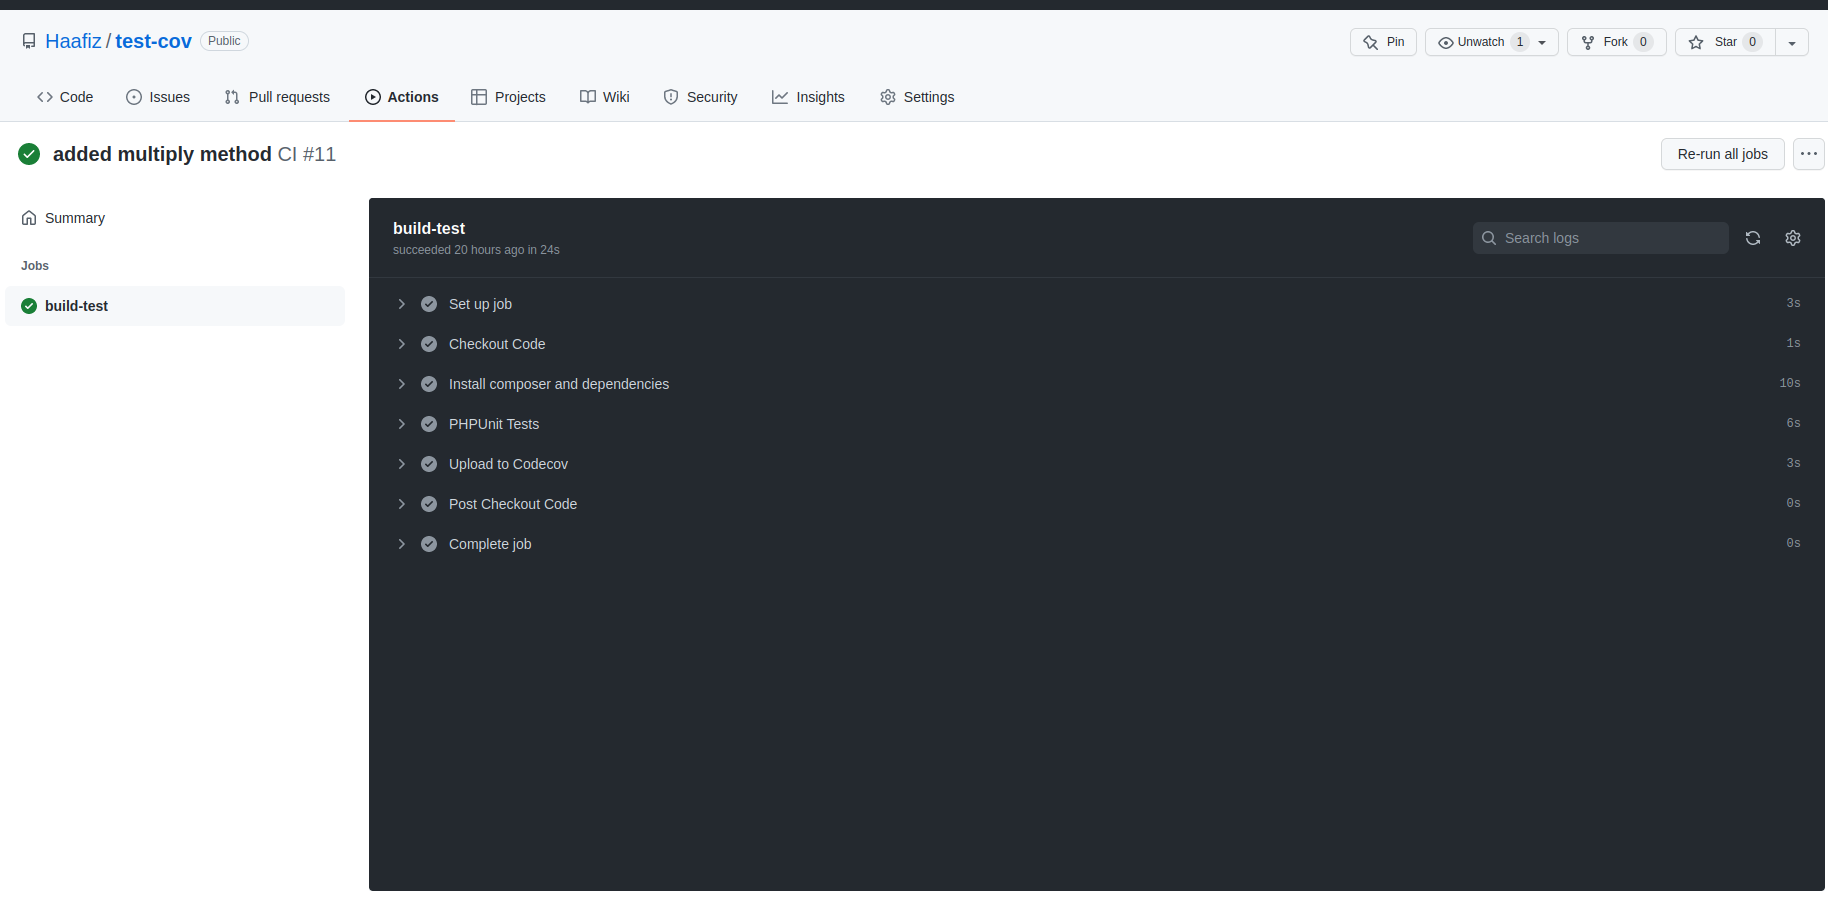
Try opening one of the workflow runs and then select build-test. You will see all of the executed actions, along with their execution time:
To explore further, you can select Upload to Codecov and get the resulting URL from line 65, as pictured here:
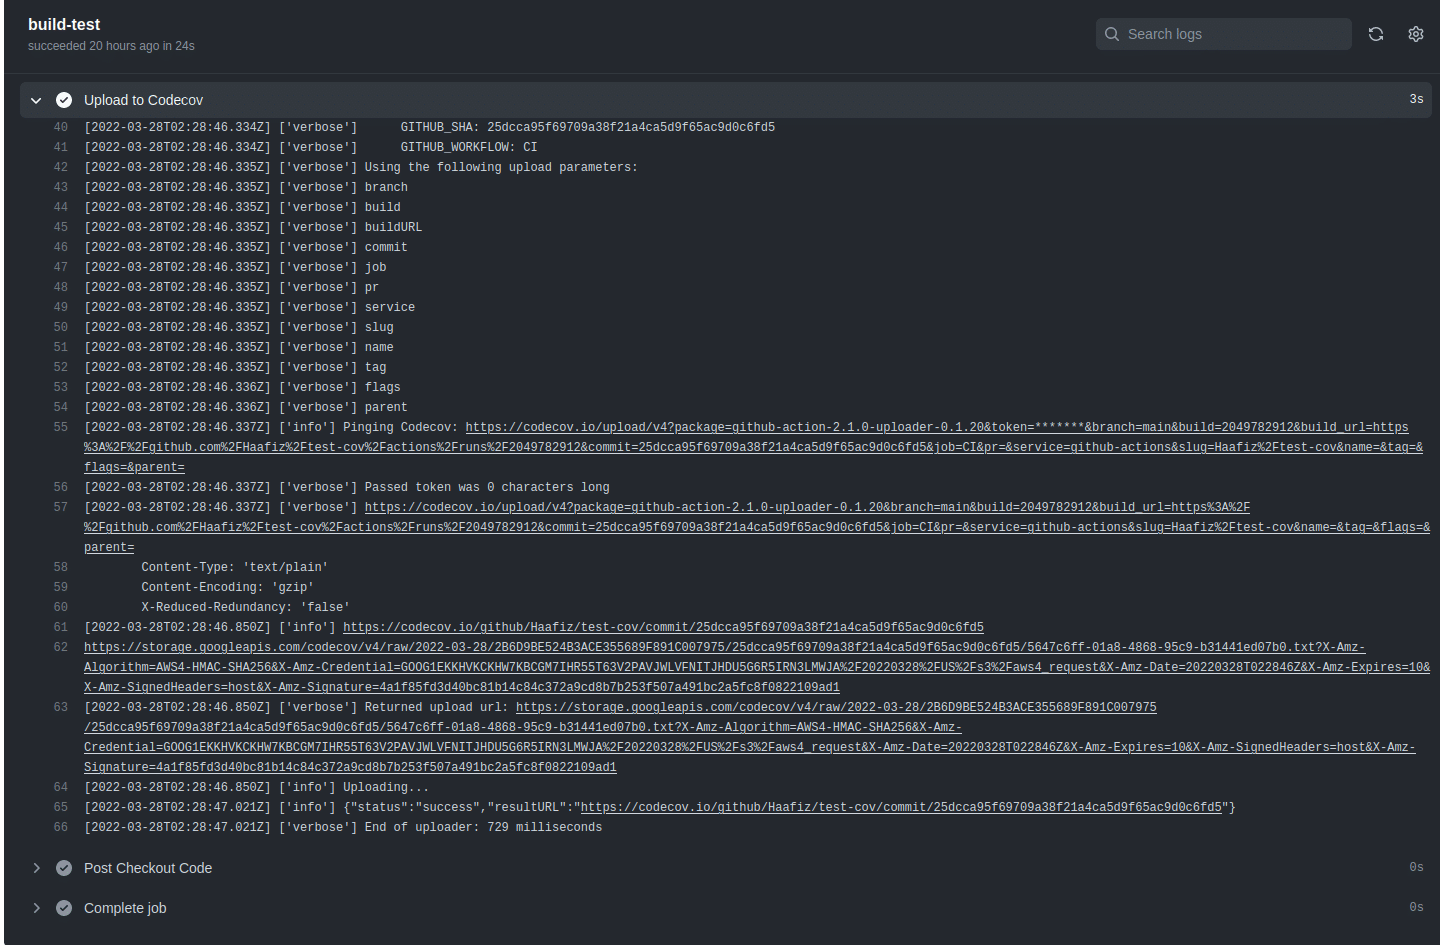
Access that URL to see the code coverage report based on your last commit. Based on the example above, this was a multiply function:
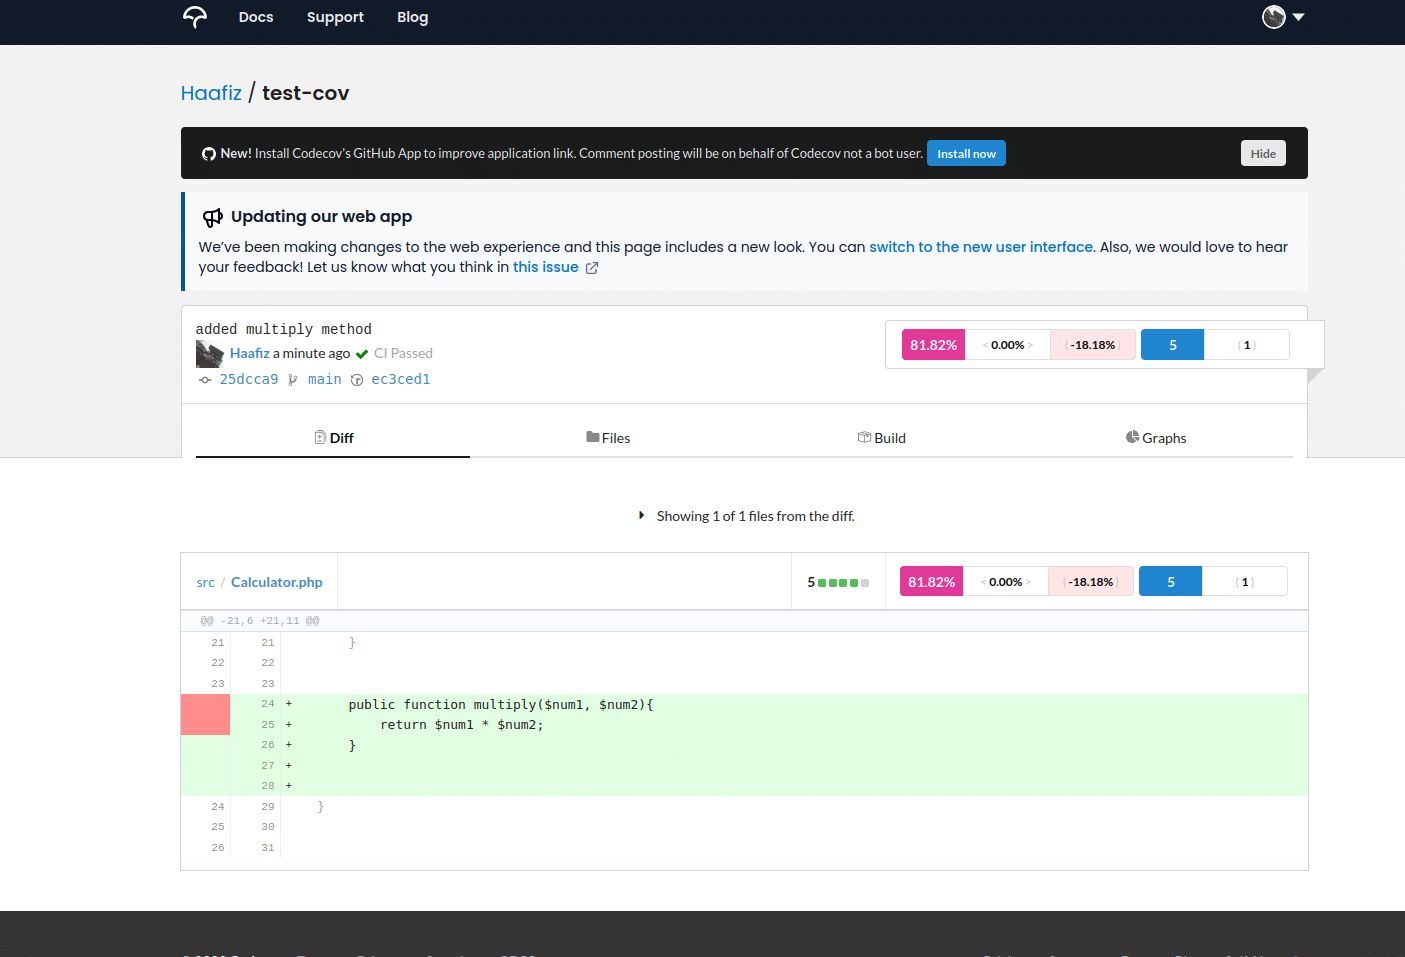
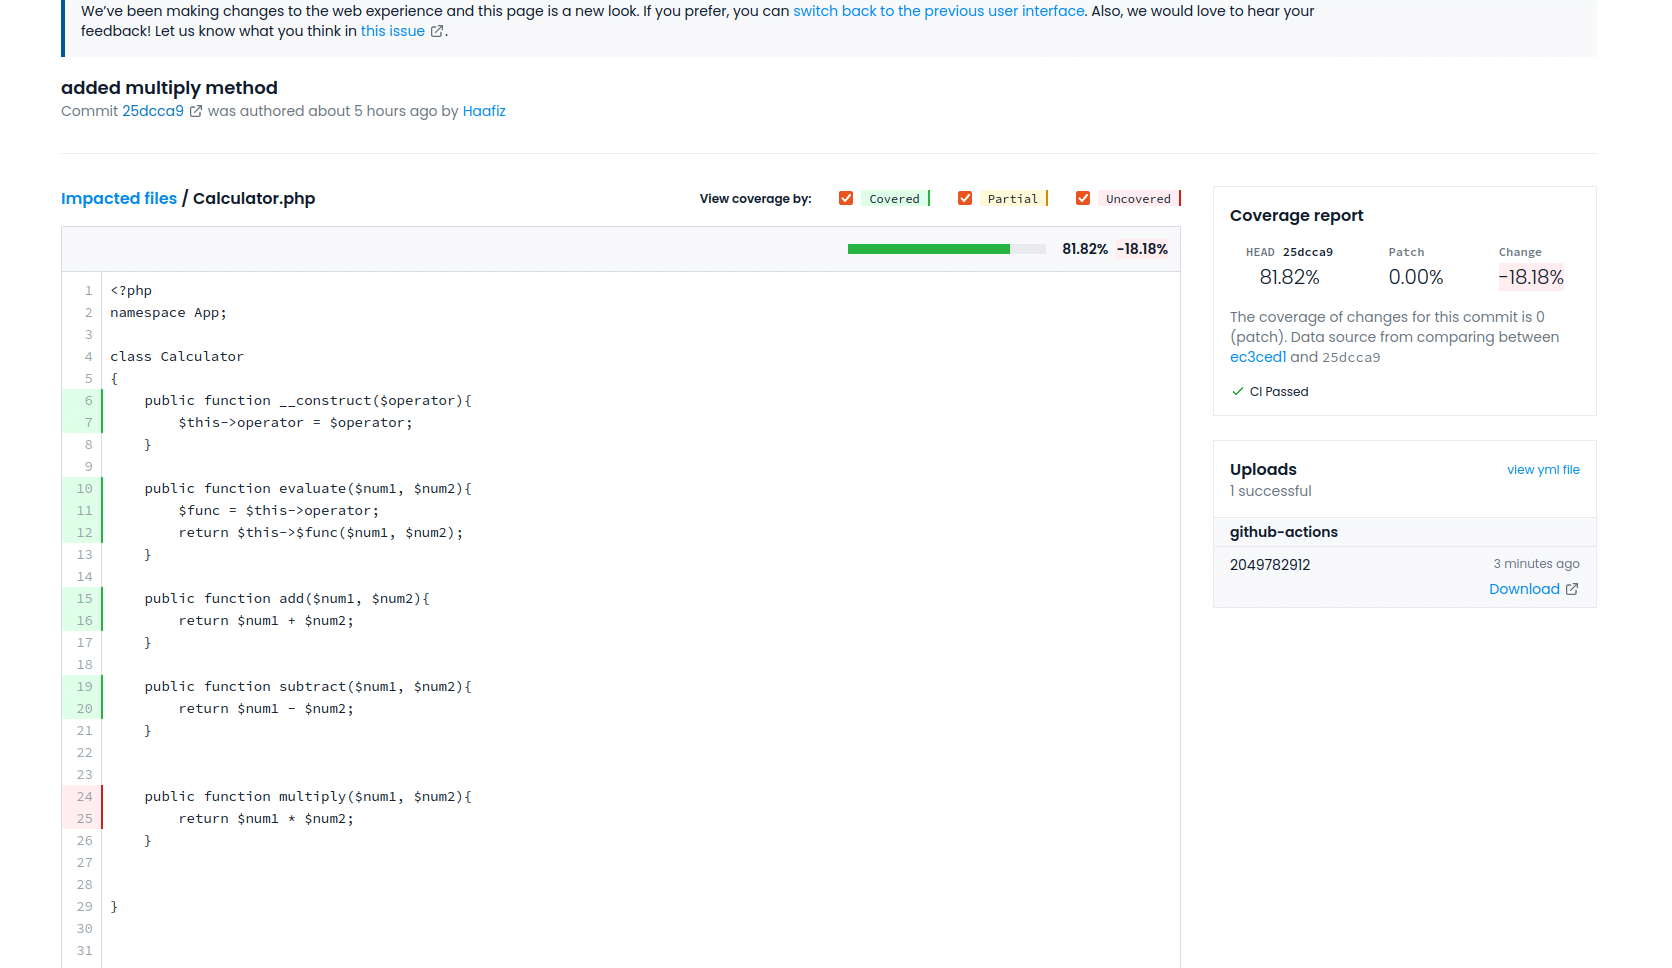
In this specific example, the report shows code coverage as 81.82 percent rather than 100 percent, because the multiply method was intentionally added into the code at the last commit but a test case wasn’t written to see any code that wasn’t covered.
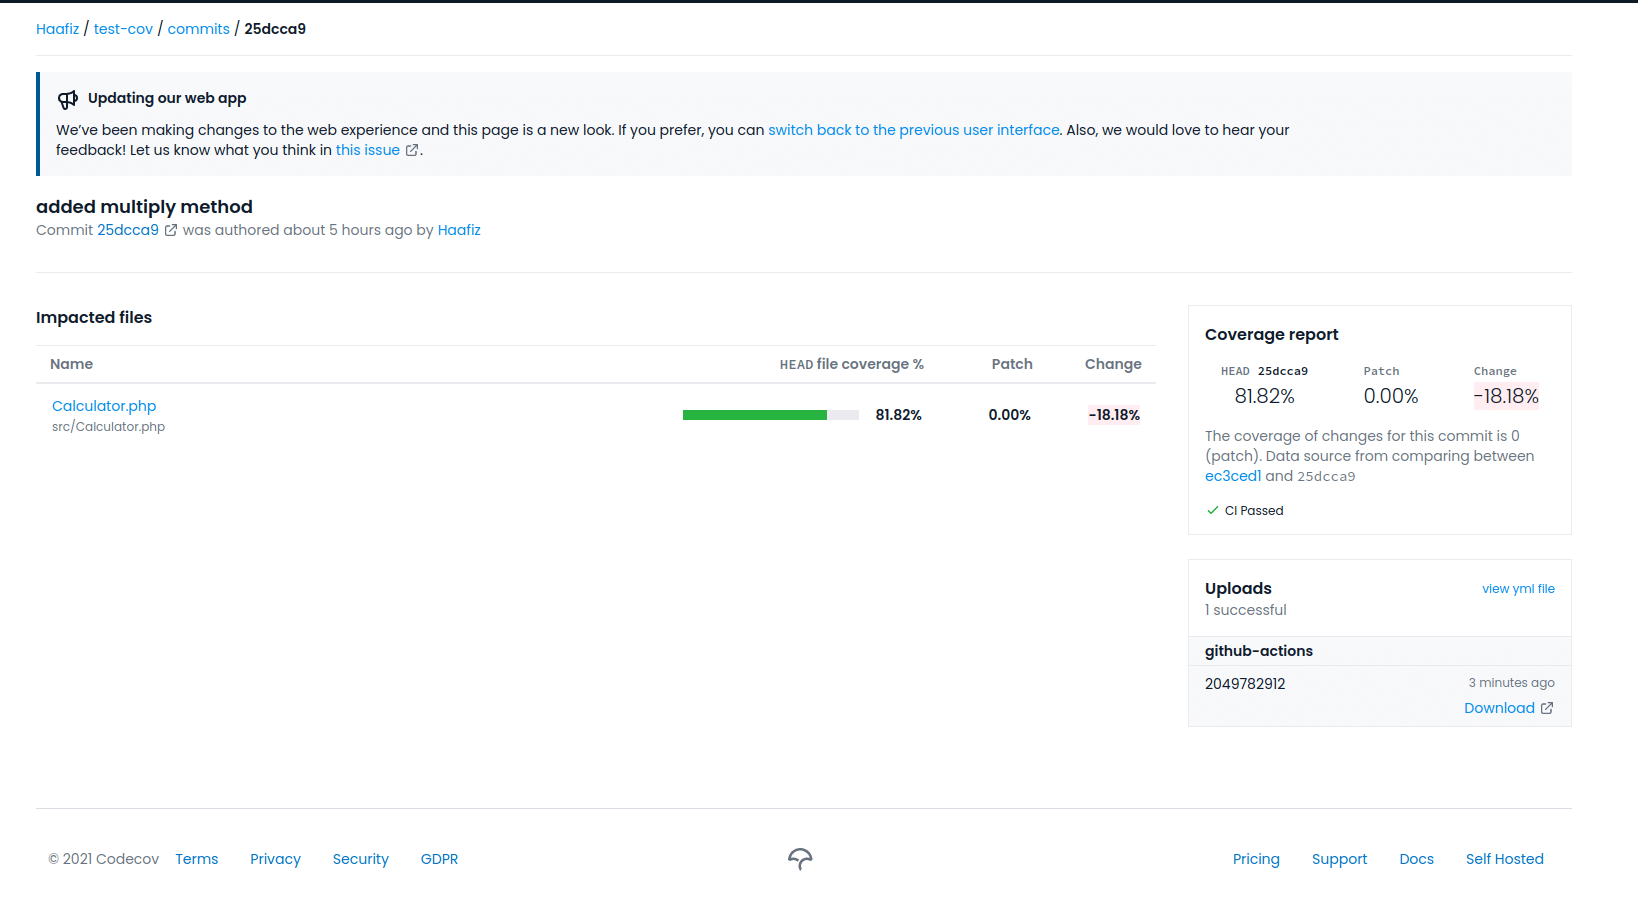
Feel free to explore Codecov for other great features. For instance, you can click a link to view Codecov’s new user interface, which nicely presents files modified by recent commits:
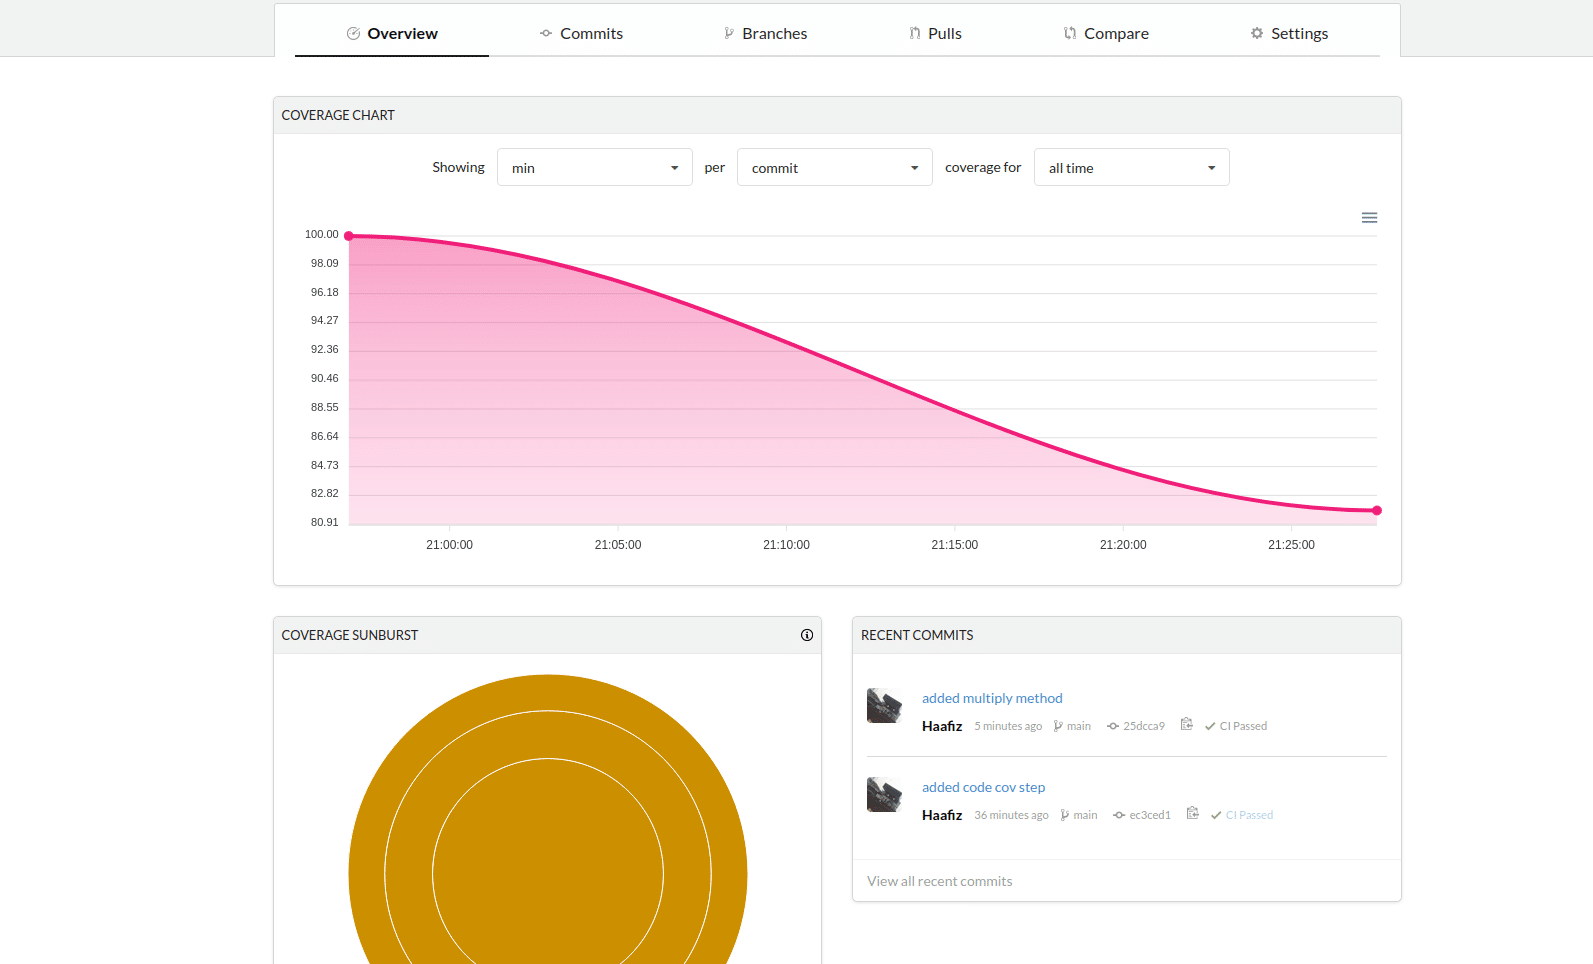
One of Codecov’s best features is its overall reporting dashboard. It can show your entire per-commit history of code coverage and provide a great visualization of how it has changed over time. This is ideal in helping you identify when and why any decreases in code coverage may have occurred.
Conclusion
In this tutorial, you ran test cases via PHPUnit, and you explored some features of GitHub Actions, including how it can be used for executing your test cases on the fly every time you push your code. While you can write your own commands, GitHub Actions provides a variety of available actions to make things easier. It also provides secure storage for environment variables so you don’t have to worry about encrypting anything yourself. Finally, you saw how Codecov can be used to gather actionable insights from your code coverage reports.
Codecov goes above and beyond regular PHPUnit HTML-based reports, storing and presenting your reports by commits and time in a user-friendly format. It provides source code monitoring, support for a huge variety of languages and CI/CD integrations, and static checks for ensuring the quality of merges. To learn more about how Codecov can help you deploy with confidence, schedule a demo today.
