When you’re working on a long, or ongoing project, quality can start to slip as your codebase gets more and more complex. One of the best ways to ensure your code quality stays high over time is to monitor your test coverage, also known as code coverage.
Code coverage is the measure of how much code is executed during testing. Simply put, it’s the percentage of lines of code that have a test that executes against it. A program with high code coverage has been thoroughly tested and has a lower chance of containing software bugs.
Codecov, a code coverage tool available for GitHub, GitLab, and Bitbucket. We calculate the coverage ratio by examining which lines of code were executed while running the unit tests. Codecov is language agnostic and dedicated to working in a developer’s workflow without disruptions or without adding complexities to the already existing ecosystem.
It’s the perfect tool for code coverage in a Scala environment, and in this article, we’ll teach you how to set it up and generate coverage reports every time changes are pushed using GitHub Actions and Codecov.
Step 1: Running Tests Locally
As a software engineer, you have probably learned over time that just because your code compiles does not mean that it’s correct and does all it’s meant to do. That is why you write unit tests.
You will start by writing unit tests for a simple Scala program that prints “Hello world,” and another that does a simple arithmetic addition.
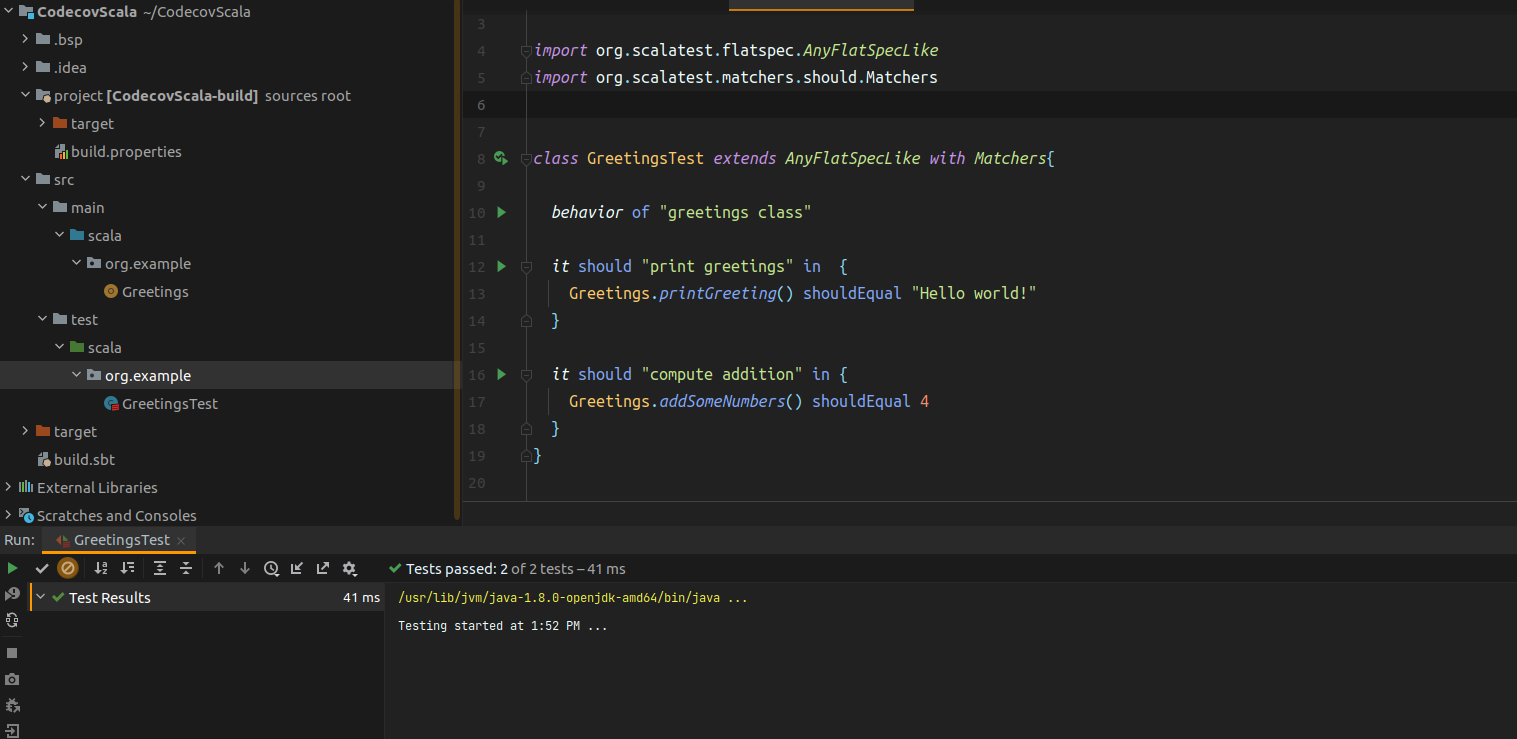
Create a new package in the directory src/test/scala and call it org.example. Under the package, create a Scala class named GreetingsTest where you will add the unit tests for your Greetings.scala class. Add the following code snippet:
class GreetingsTest extends AnyFlatSpecLike with Matchers {

  behavior.of("greetings class")

  it should "print greetings" in {
    Greetings.printGreeting() shouldEqual "Hello world!"
  }

  it should "compute addition" in {
    Greetings.addSomeNumbers() shouldEqual 12
  }

}
Create a new package in the directory src/main/scala and call it org.example, like you did for the unit tests above. Under the package, create a Scala object named Greetings where you will write your Greetings.scala class. Add the code snippet below:
object Greetings {

  def main(args: Array[String]): Unit = {
    val greetings = printGreeting()
    val addition = addSomeNumbers()

    println(greetings + " The addition is " + addition)
  }

  def printGreeting(): String =
    "Hello world!"

  def addSomeNumbers(): Int =
    6 + 6

}
Before you run your unit tests, you will need to set up library dependencies for the tests to be executed. In your build.sbt file, add the code snippet below that will add dependencies for your unit tests:
name := "CodecovScala"
import com.typesafe.sbt.SbtNativePackager.Universal
scalaVersion := "2.13.1"
version := "1.0"

libraryDependencies += "org.seleniumhq.selenium" % "selenium-java"            % "3.141.59"
libraryDependencies += "commons-io"              % "commons-io"               % "2.8.0"
libraryDependencies += "org.scala-lang.modules" %% "scala-parser-combinators" % "1.1.2"
libraryDependencies += "org.scalatest"          %% "scalatest"                % "3.2.8" % Test
libraryDependencies += "org.scalamock"          %% "scalamock"                % "5.1.0" % Test

enablePlugins(JavaAppPackaging)

mappings in Universal += {
  file("resources/chromedriver") -> "resources/chromedriver"
}
name here is your project name—you could call it anything. Make sure you use the current stable version of Scala to avoid issues when running your program.
In your command line, run the command sbt clean test to test your setup.
sbt clean test
You should be able to see the coveted green checkmarks that mean your tests just passed.
Great! You have accomplished your first task. Now let’s head over to GitHub and set up your GitHub Actions workflow.
Step 2: Configuring GitHub Actions
In today’s fast-paced environment, it’s absolutely essential to automate code testing and delivery. That’s where GitHub Actions come in. GitHub Actions ensures that after tests are passed, delivery of your code is automated, thus reducing the time it takes you to deliver updates to your application, and in the long run allows you to focus on the code itself.
To set up GitHub Actions for your Greetings.scala project, head over to GitHub and create a repository for it.
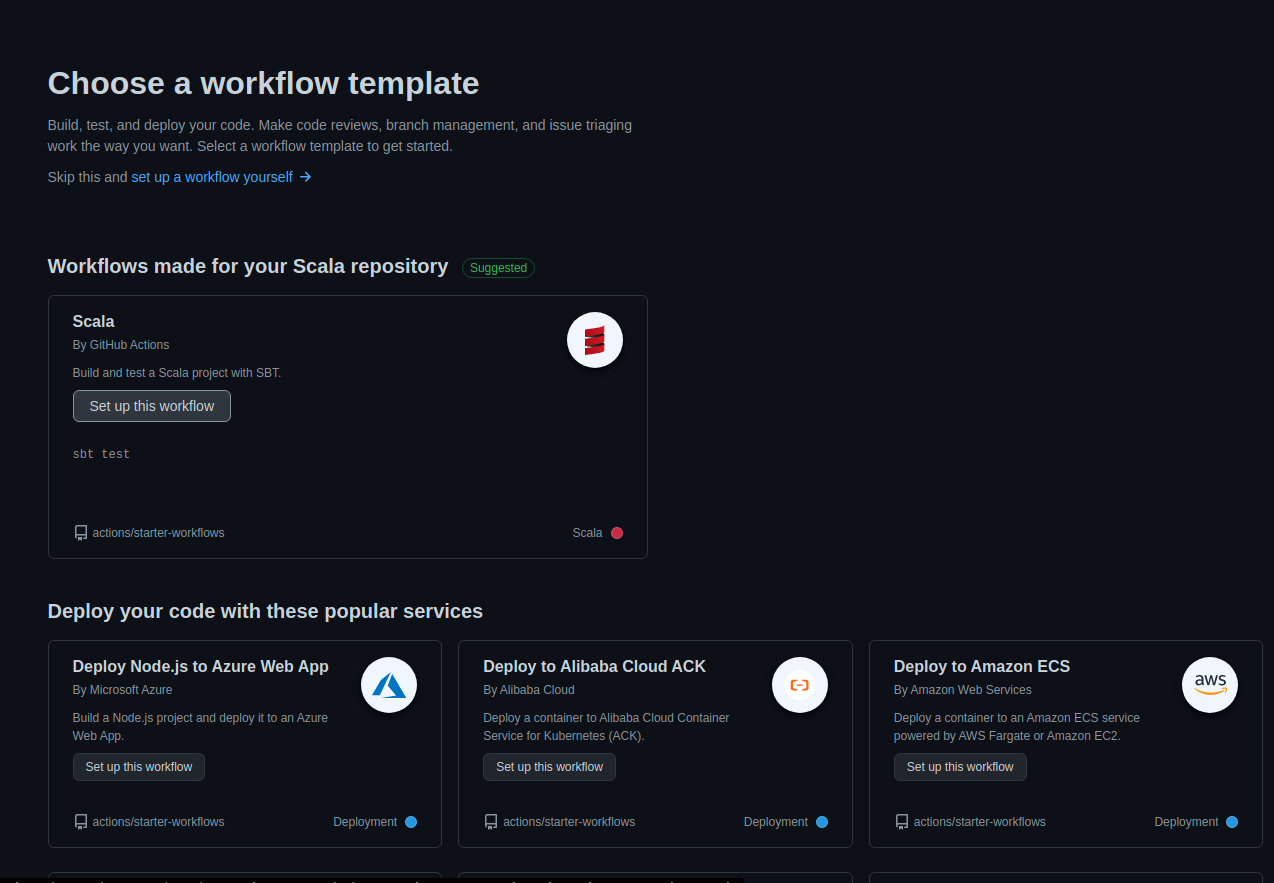
Click the Actions tab at the top of your repository. You will notice a huge list of workflow templates. This means that you don’t need to write your workflows from scratch.
For this tutorial, select the Scala workflow.
GitHub Actions will run your workflow build automatically. If all went well, you should see a successful clean build.
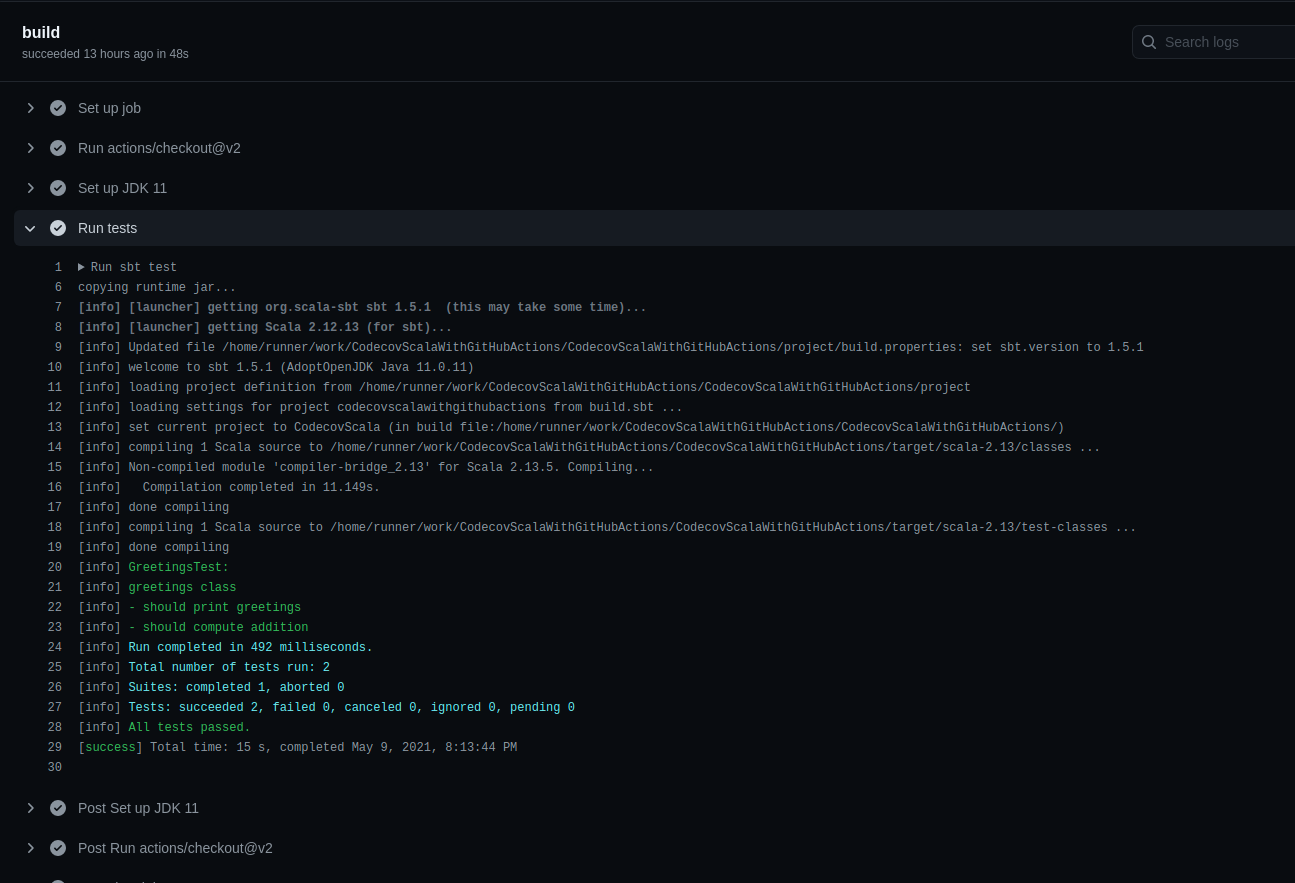
As you can see, your Greetings.scala class has been tested and passed. Sometimes you will want this result displayed on your repository whenever commits are pushed. You can achieve that by creating a badge in your README.md. To do that, click the three-dotted settings icon to reveal a drop-down menu. Select Create status badge.
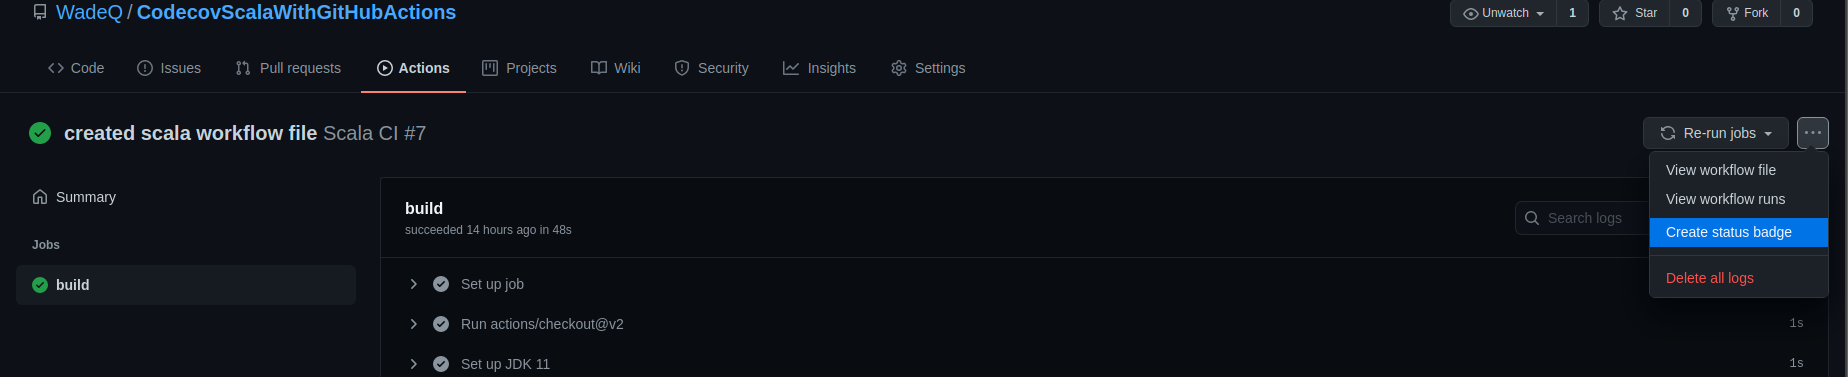
Copy the Markdown text in the box and paste it inside your README.md. You should be able to see your badge emblazoned with passing text inside it.
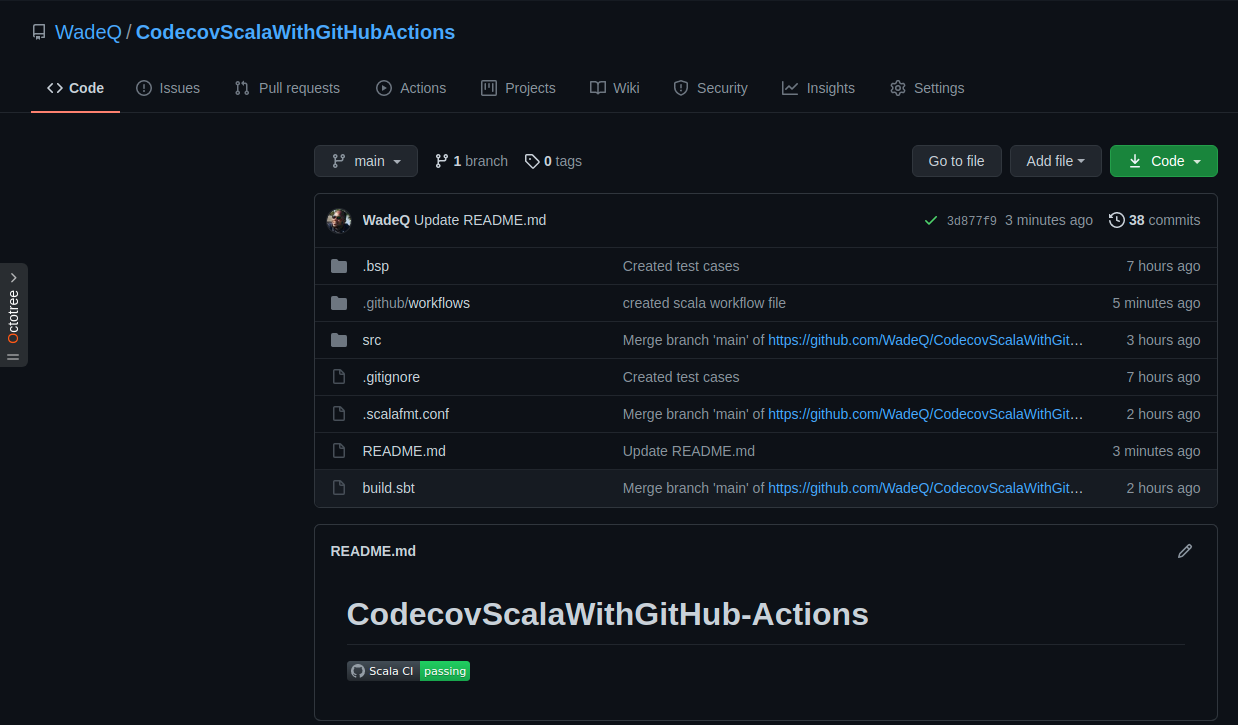
Looks great, huh? Look what you’ve achieved already! You’ve written unit tests for your Scala project and used GitHub Actions to automate your delivery work.
Step 3: Setting Up Codecov for Code Coverage Reporting
You may recognize that in TDD (Test Driven Development), your low-level design is improved, as well as giving you confidence when writing code. The result of great unit tests is when you have efficient code coverage.
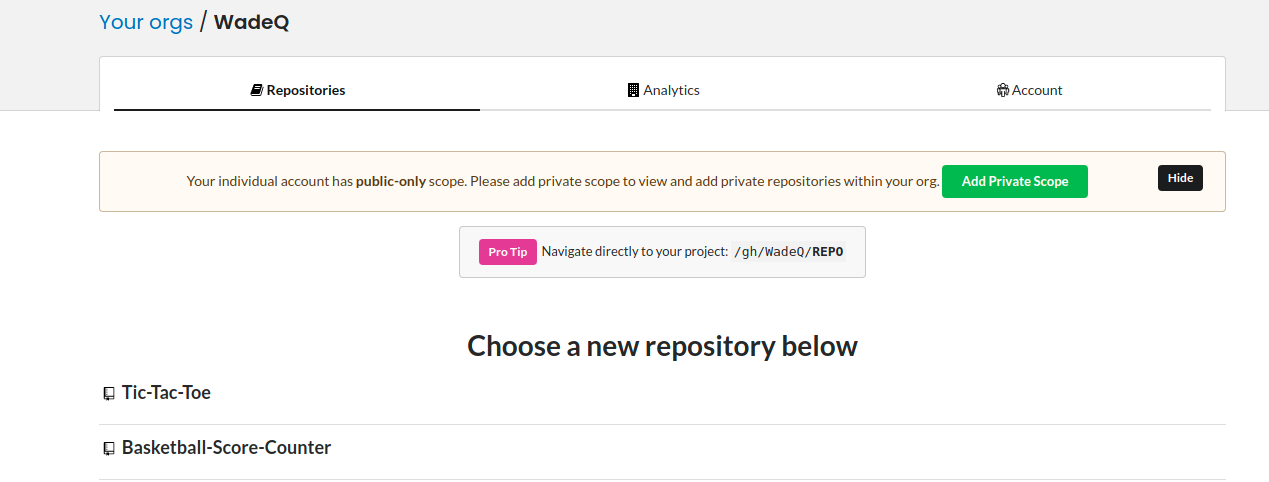
To set up Codecov for code coverage in your project, head over to the Codecov website and register using your GitHub account. Then, select your repository.
That’s it! Now you need to set up your project to be able to send coverage reports to Codecov. To do that, head over to your IDE and add a few code snippets.
In your project directory, create a file named plugins.sbt and add the following dependencies.
addSbtPlugin("org.scoverage"    % "sbt-scoverage"       % "1.7.2")
addSbtPlugin("org.scalameta"    % "sbt-scalafmt"        % "2.4.2")
addSbtPlugin("com.typesafe.sbt" % "sbt-native-packager" % "1.8.1")
Run the command below to run tests with coverage:
sbt coverageReport
You should see coverage reports printed next to your Greetings.class.
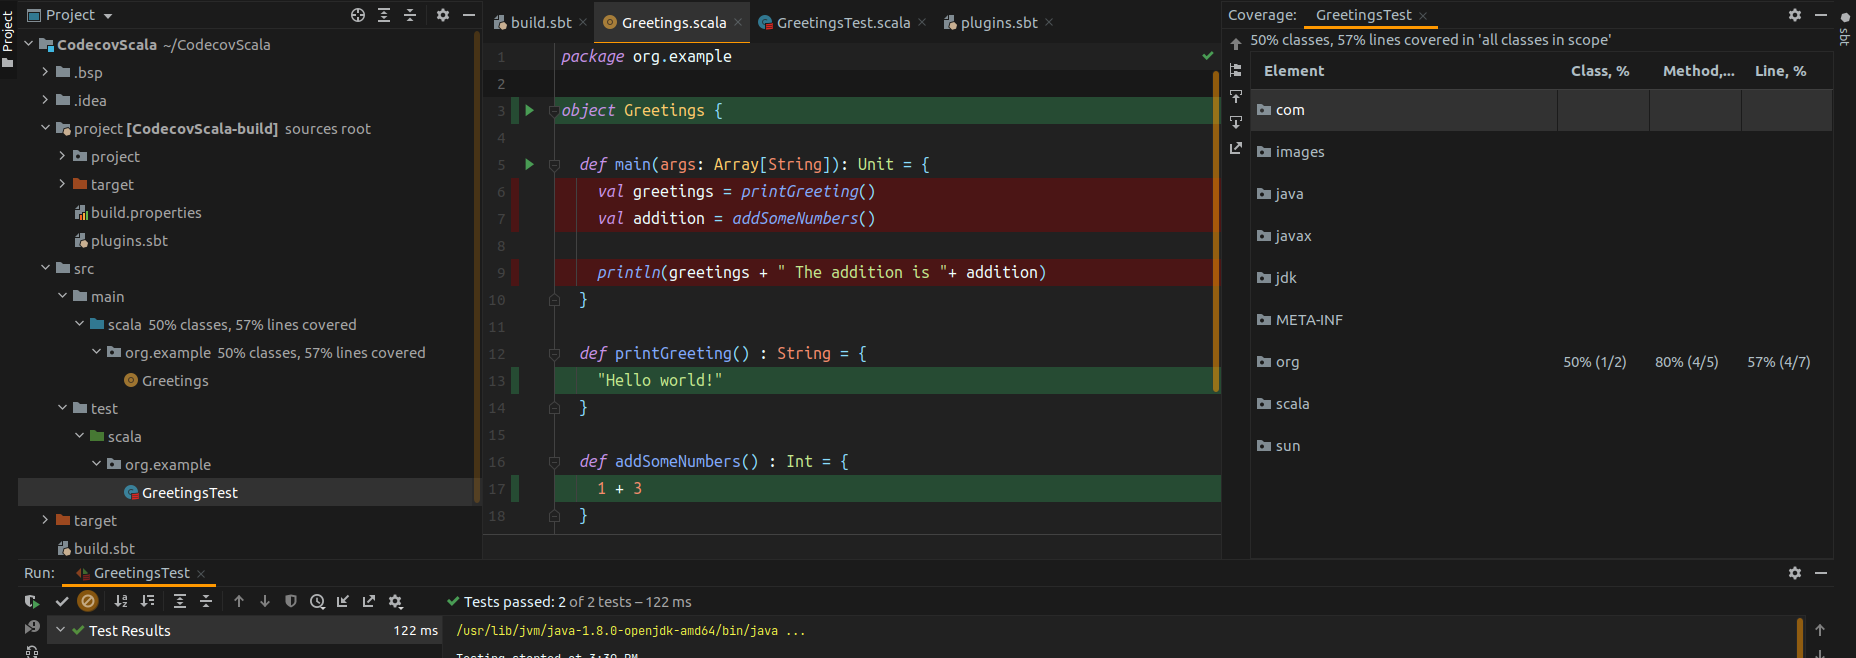
From the above report, you can see that your report metrics are not 100 percent because the print statements have not been covered by your test coverage. This gives you valuable insights about your code and what actions to proceed with and if they are important to test or not. In this case, there is almost zero need to test print statements.
In your root project directory, when you created the GitHub Actions workflow, a file was created under directory .github/workflows/scala.yml. You will need to add a few code snippets to the scala.yml file to upload these test coverage results to Codecov.
In your scala.yml file, add the workflow snippet below:
name: Scala CI

on:
  push:
    branches:
      - main
      - development
  pull_request:
    branches:
      - main
      - development

jobs:
  build:
    runs-on: ubuntu-latest
    steps:
      - uses: actions/checkout@v2
      - name: Run tests
        run: sbt coverage test
      - name: Coverage Report
        run: sbt coverageReport
      - name: "Upload coverage to Codecov"
        uses: "codecov/codecov-action@v2"
        with:
          fail_ci_if_error: true
Here, you are defining a job called build that is going to run unit tests and generate a coverage report.
In the build job, we define three steps:
- One to run the test with coverage
- One to generate the coverage report
- One to upload the coverage to Codecov
To test the whole workflow, push a new branch with the scala.yml file and create a new pull request targeting the development branch. Once the PR is open, the workflow will start. A successful build will result in the image below in your GitHub Actions.

The code coverage report will be uploaded to Codecov and represented by a badge as a percentage to give you valuable insights on how much code was covered during tests.

Your code coverage reports should aim at scores above 80 percent to be considered satisfactory. In a real-life production application, that’s an important metric to consider.
Conclusion
Congratulations! You learned how to set up code coverage in a Scala application and generate code coverage reports every time changes are pushed using GitHub Actions, uploading the reports to Codecov. You also learned how to write unit tests for your Scala application and set up the whole workflow for continuous delivery.
You’ve just scratched the surface of code coverage, and there is much more to learn, both about the concept and the Codecov tool.