In this tutorial, we will set up a project that uses Codefresh Pipelines to send coverage reports to Codecov. You will learn how to do the following:
- Set up a Codefresh Pipeline
- Utilize Codefresh’s platform to integrate with Codecov for coverage reports send coverage reports to Codecov
- Read coverage reports on Codecov’s UI
To get started with this tutorial, you will need a Codefresh and Codecov account. We will be using Codecov’s example python repository, which you can clone into a GitHub account. You should still be able to follow along with your own repository if it is already running tests and collecting coverage.
Intro to Codefresh
Codefresh is an enterprise GitOps platform specifically for Kubernetes applications. It allows you to build, test, integrate, and deploy your product with unlimited scalability, speed, advanced caching, parallel steps and pipelines, in addition to providing end-to-end GitOps support.
Codefresh also provides Argo CD, Argo Rollouts, Argo Workflows, and Argo Events for the enterprise with the Codefresh DevOps Platform for Argo. This will enable teams to manage and monitor Argo at an enterprise scale. This includes:
- Simplifying blue/green and canary deployments.
- A GitOps dashboard connecting you to your deployments, commits, tests, tickets, logging, and more.
- Monitoring for configuration drift.
- Current and desired state views for environments.
- One-click Argo bootstrapping and installation through Codefresh.
- Management and monitoring of multiple Argo CD installations.
Step 0: Setting up the example repository
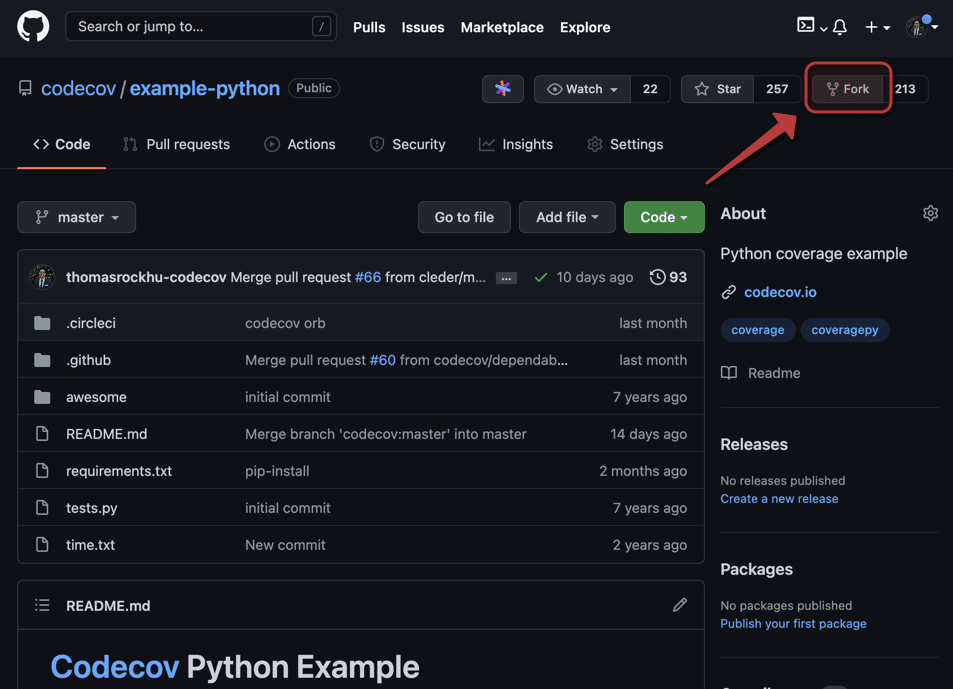
For users following along with our example repository, you can fork it by going to https://github.com/codecov/example-python and clicking on Fork in the top right.
You may then be given the choice to choose which organization to clone the repository. We recommend choosing your own user account.
You can then sign into Codecov and enable the repository. Go to https://codecov.io/gh/{{ YOUR USERNAME }} and look for your repository in the Not yet setup section.
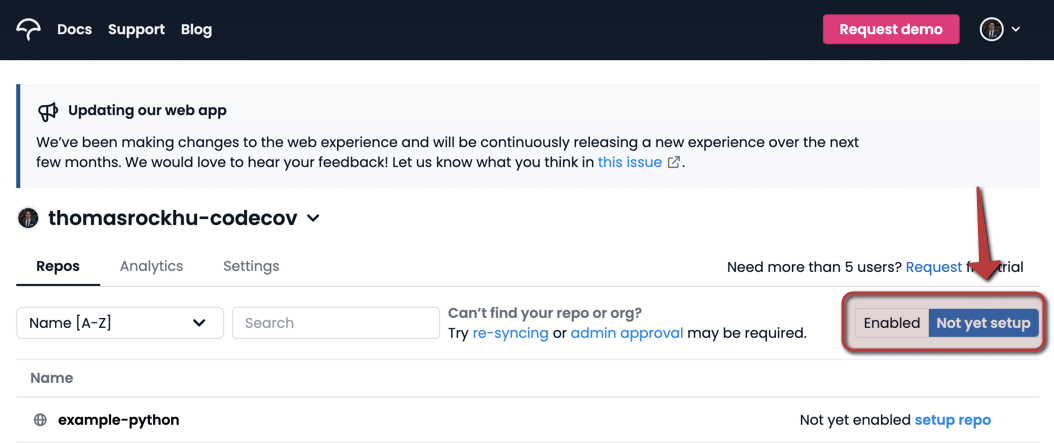
If you are having trouble seeing the repository, you can try clicking re-syncing or follow instructions on granting GitHub oauth application authorization.
When you find the repository, click setup repo to activate it.
Step 1: Getting your Codecov token
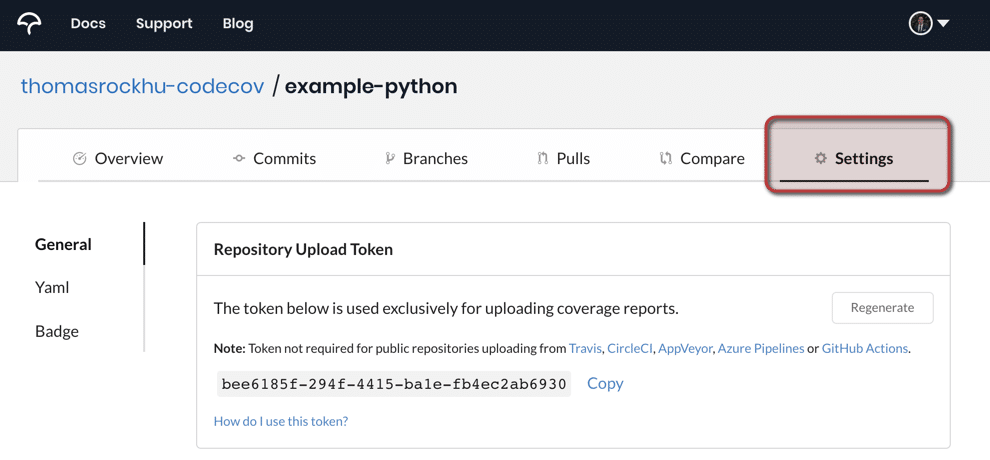
After activating, you should be on the repository dashboard page. You should see the Codecov token located at step 1. Click Copy to copy the token. This token is used to verify and authenticate uploads to Codecov.
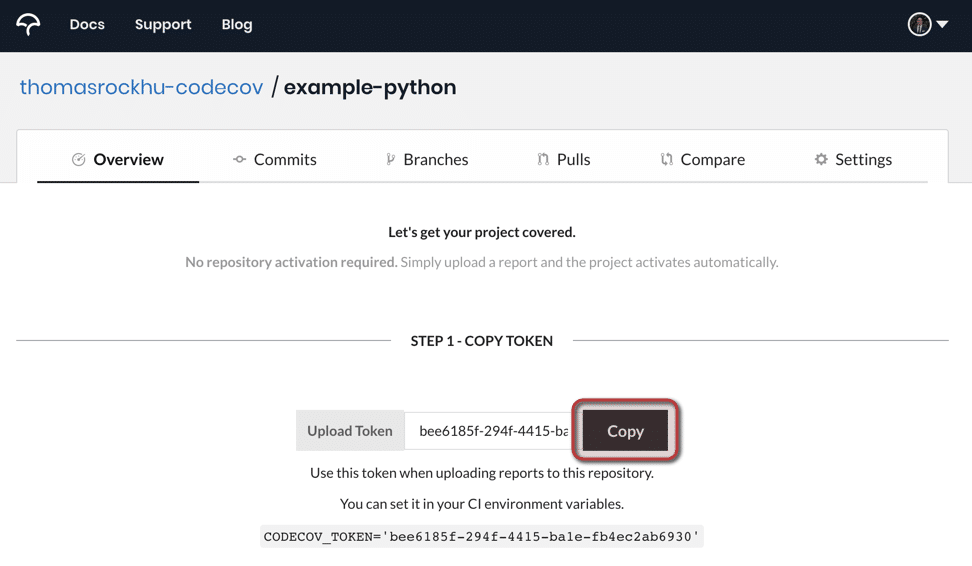
If you already have uploaded coverage reports to Codecov, you can find the token in the Settings tab.
Step 2: Integrating Codecov with Codefresh
With the token in hand, head over to Codefresh. If you haven’t created a Codefresh account yet, you will need to do so to continue this tutorial.
First, go to your account settings on the navigation bar
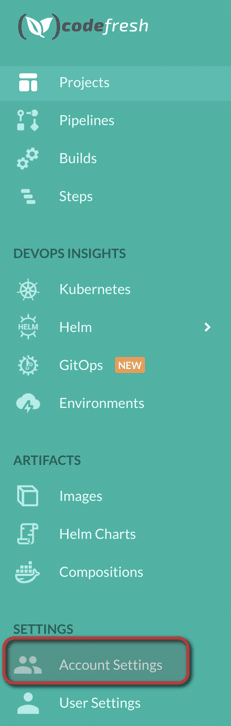
.
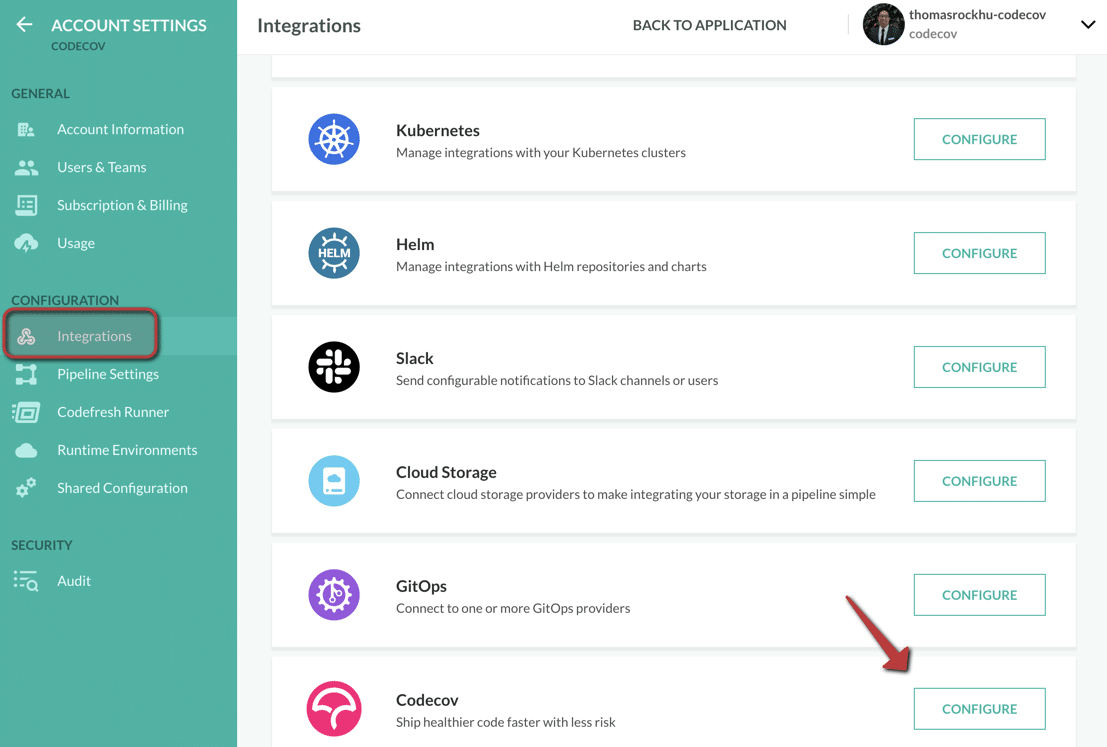
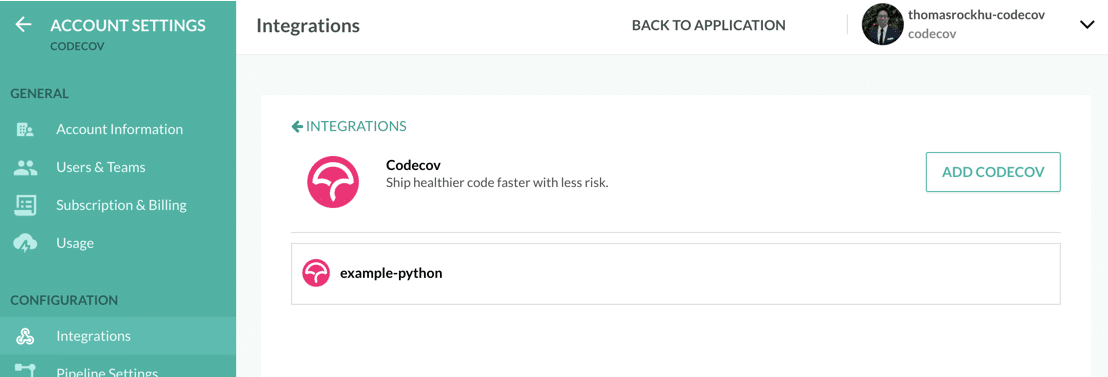
Then, click on Integrations on the same navigation bar. Scroll down until you see Codecov, and click Configure.
Click Add Integration to copy over the Codecov token.

You will need a separate integration for each repository you set up. We recommend filling the Integration Name field with this name of the repository. You should copy the Codecov token into the Token field. When done, click Test connection and Save.
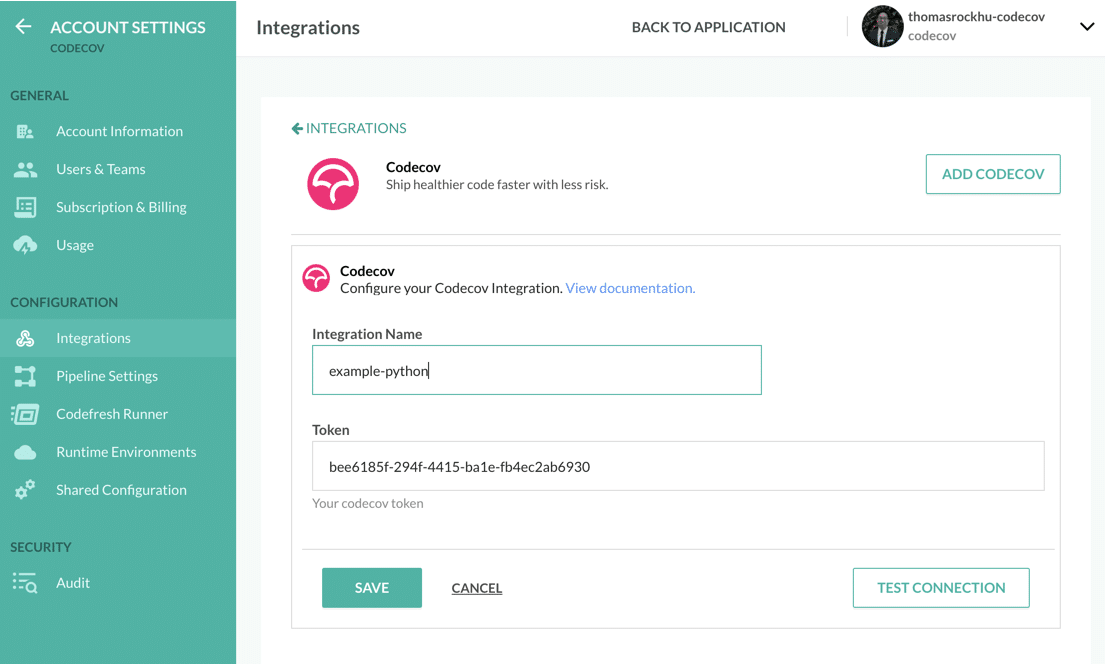
You should see the integration saved in the dashboard.
Step 3: Creating a Codefresh Pipeline
Navigate back out of Account Settings and click into Pipelines. You can also go directly at https://g.codefresh.io/pipelines/all/
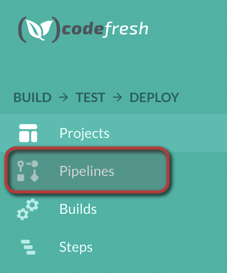
.
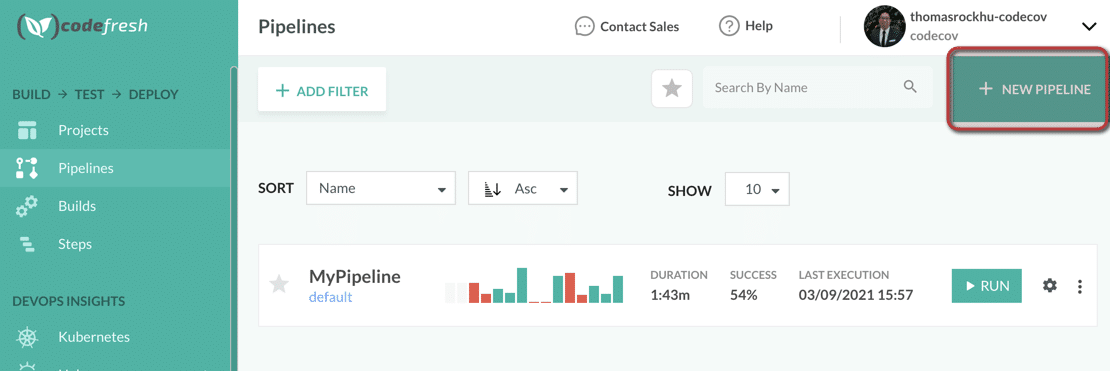
Select New Pipeline to create a new pipeline.
Pipelines do not necessarily have to be tied to a repository and have flexible naming. You will likely need to create a default project, but you can name your pipeline whatever makes sense for your project. For this tutorial, we recommend adding a git repository. When you are finished, click Create
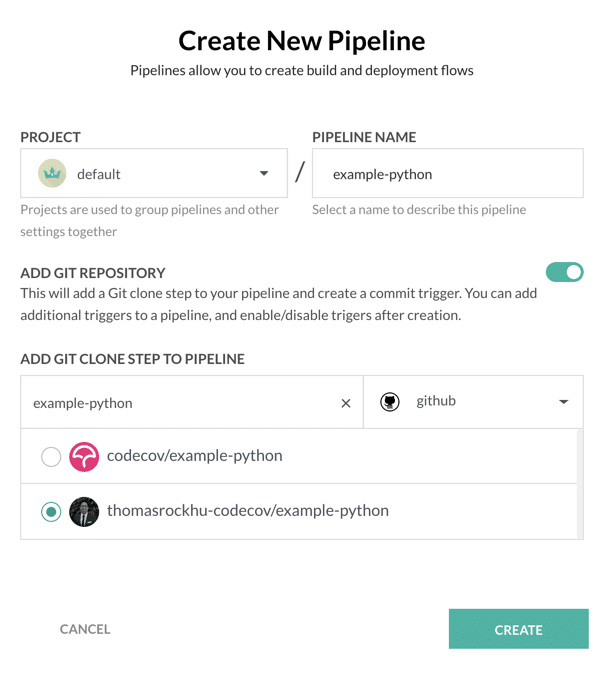
You should now be taken to a screen to set up the workflow.
Step 4: Setting up the Codefresh pipeline with Codecov
The default YAML in display should look like this:
# More examples of Codefresh YAML can be found at
# https://codefresh.io/docs/docs/yaml-examples/examples/
version: "1.0"
# Stages can help you organize your steps in stages
stages:
- "clone"
- "build"
- "test"
steps:
clone:
title: "Cloning repository"
type: "git-clone"
repo: "thomasrockhu-codecov/example-python"
# CF_BRANCH value is auto set when pipeline is triggered
# Learn more at codefresh.io/docs/docs/codefresh-yaml/variables/
revision: "${{CF_BRANCH}}"
git: "github"
stage: "clone"
build:
title: "Building Docker image"
type: "build"
image_name: "thomasrockhu-codecov/example-python"
working_directory: "${{clone}}"
tag: "${{CF_BRANCH_TAG_NORMALIZED}}"
# If you have a Dockerfile in the repo you can use
# dockerfile: 'Dockerfile'
dockerfile:
content: "FROM python:onbuild\n WORKDIR /root/onboarding\n COPY . /"
stage: "build"
test:
title: "Running test"
type: "freestyle" # Run any command
image: "ubuntu:latest" # The image in which command will be executed
working_directory: "${{clone}}" # Running command where code cloned
commands:
- "ls"
stage: "test"
You will need to change test step of the yaml to read:
  test:
    title: "Running test"
    type: "freestyle" # Run any command
    image: "python:3.9-slim" # The image in which command will be executed
    working_directory: "${{clone}}" # Running command where code cloned
    commands:
      - pip install -r requirements.txt
      - coverage run tests.py
      - coverage xml
    stage: "test"
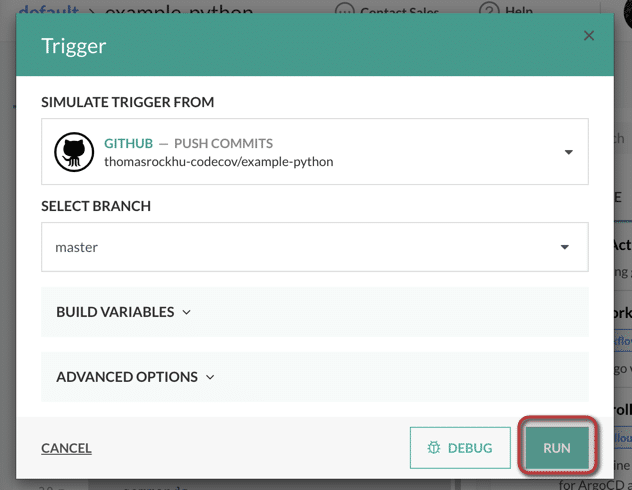
Note: Only the image and commands sections have changed within the ‘test’ step. When you are finished, click Save and Run. You will be asked to trigger a run. The default settings should be good enough to run the pipeline.
You can view the output to confirm when the pipeline build has completed. You should see all three steps complete successfully. Clicking into the test step will show all tests have successfully passed.
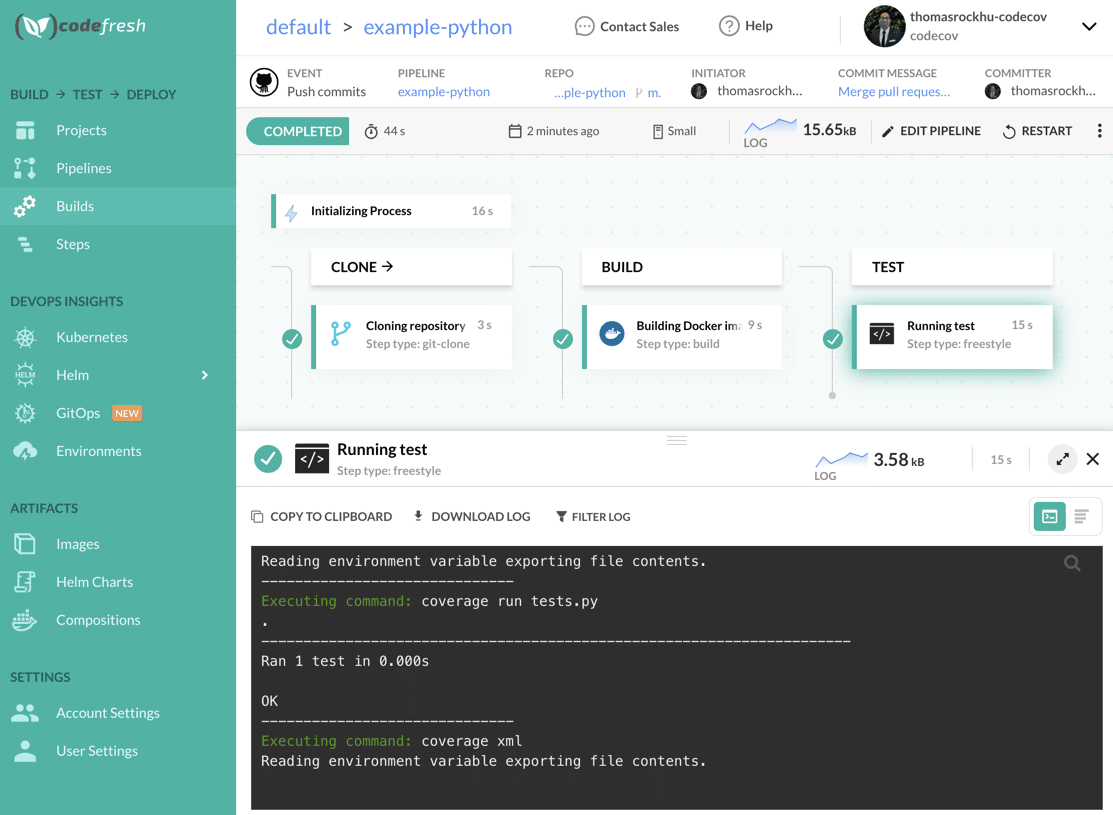
We will now need to upload coverage reports to Codecov.
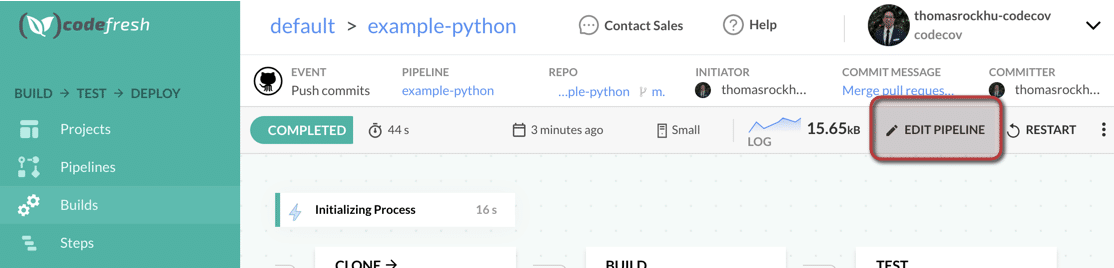
Step 5: Uploading coverage reports to Codecov
Click to edit the pipeline
In the right section, you can search for the Codecov step in the Marketplace.
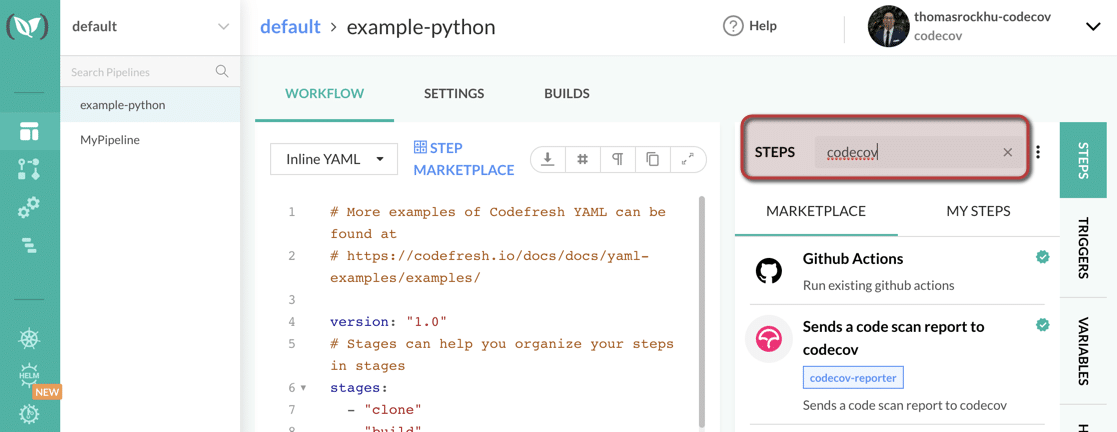
Clicking the codecov-reporter step will open a modal to copy the step.
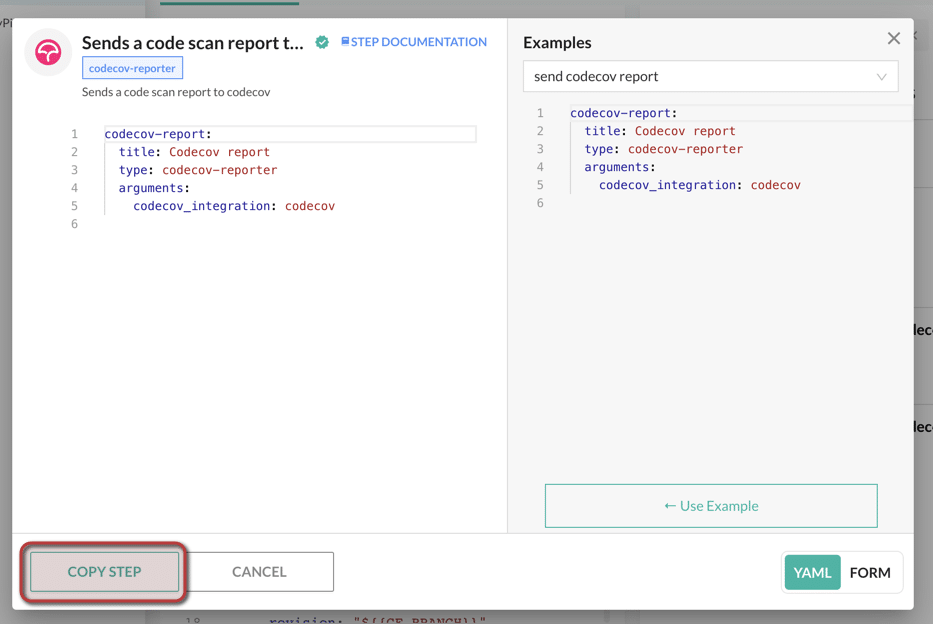
After copying, click Cancel to leave the modal. Paste the step into your pipeline YAML, and note that the code may need to be indented properly. Also, the codecov_integration should be replaced with the name created in step 2.
  codecov-report:
    title: Codecov report
    type: codecov-reporter
    arguments:
      codecov_integration: example-python
    stage: "test"
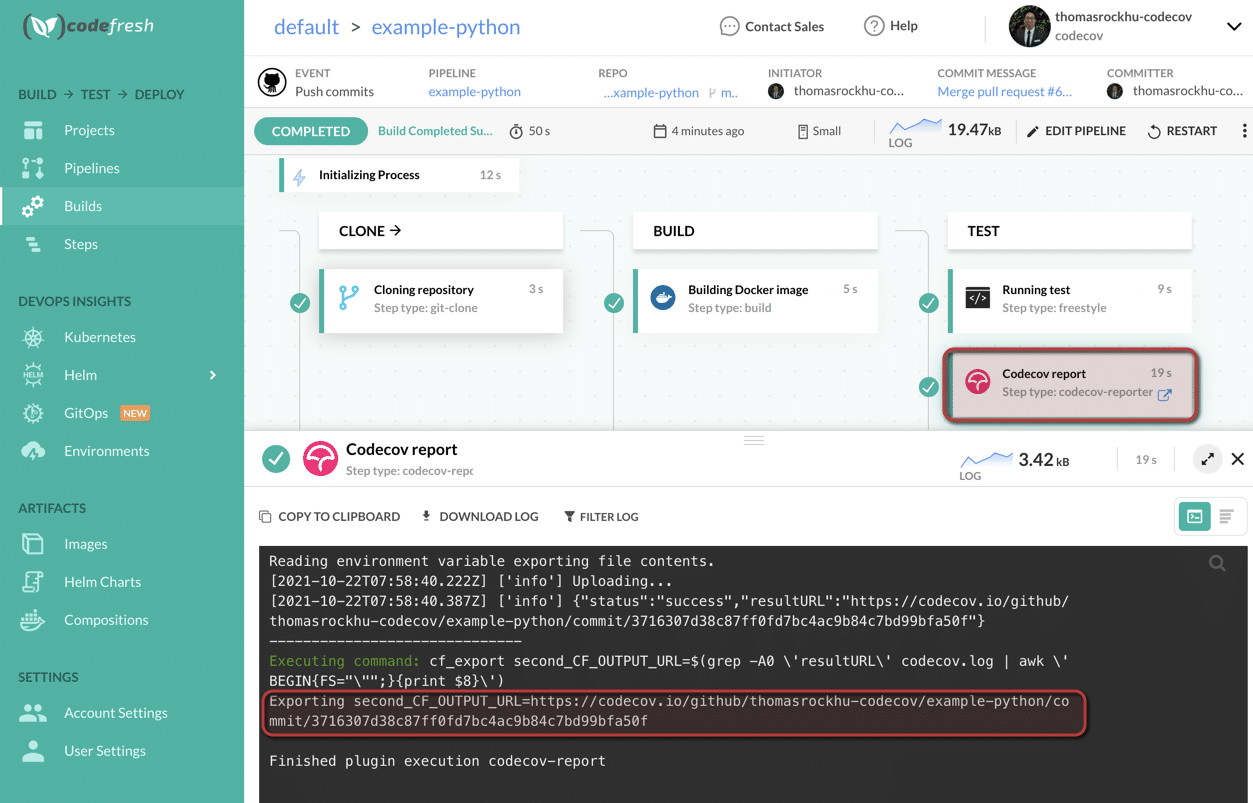
Click save and run the pipeline again. We should now see 4 steps in the pipeline. Click the Codecov report step when the pipeline has finished running.
In the console, you should see a line exporting second_CF_OUTPUT_URL. Copy that URL to view coverage reports on Codecov.
Step 6: Viewing coverage data on Codecov
Navigating to the URL will land you on the commit page on Codecov. Note that since this is our first coverage report for our first commit, there is no diff to compare against. Clicking on the Files tab will show us the coverage for our files.
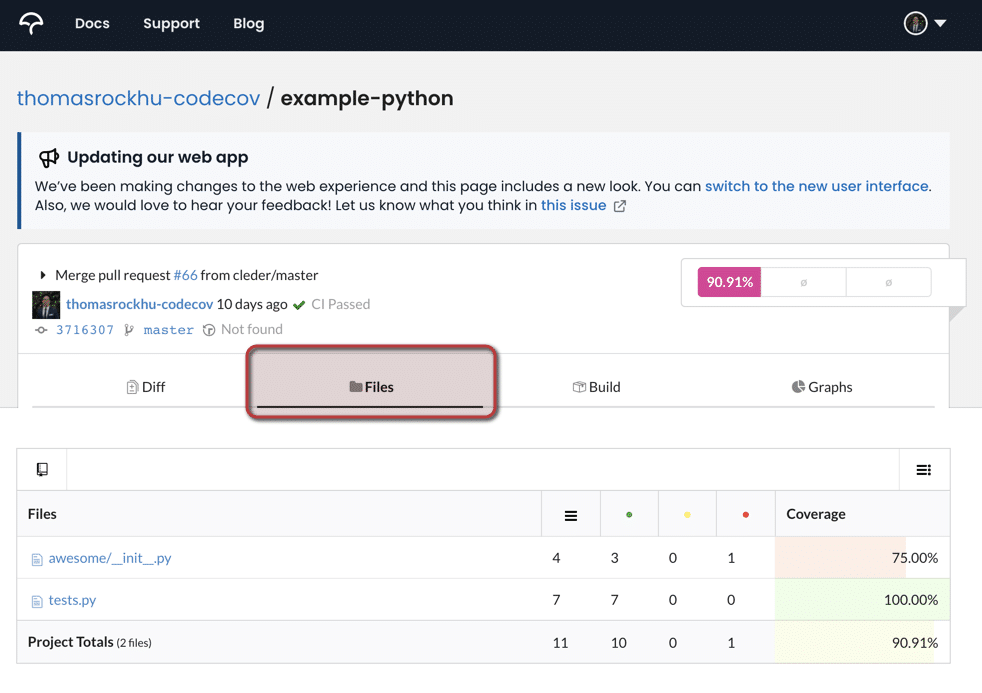
Opening awesome/__init__.py shows us that we have fully tested the smile function, while frown has remained uncovered.
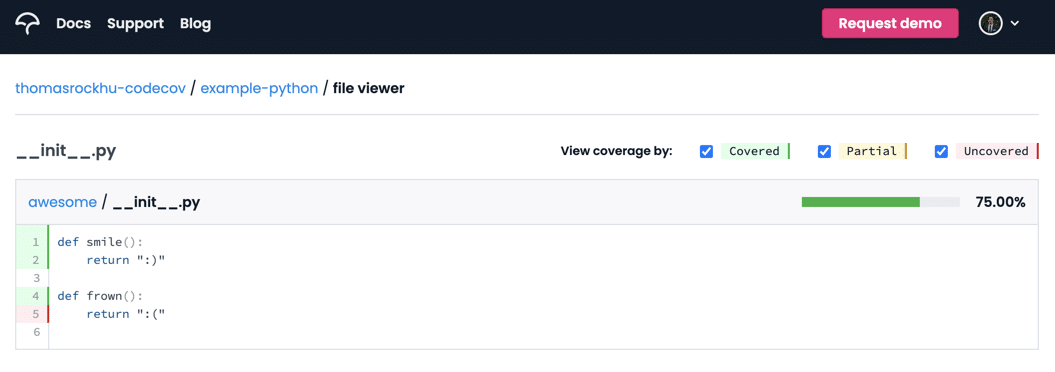
We can do better than just 75% for this file.
Step 7: Adding tests to increase code coverage
To cover the frown function, let’s add a test to our tests.py file. In your favorite IDE, update the file to read
import unittest

import awesome


class TestMethods(unittest.TestCase):
    def test_add(self):
        self.assertEqual(awesome.smile(), ":)")

    def test_frown(self):
        self.assertEqual(awesome.frown(), ":(")


if __name__ == '__main__':
    unittest.main()
Note the new test_frown function. Create a new branch and push the change to your git provider. Codefresh will automatically pick up the change and begin running your pipeline. You can view the tutorial pull request.
You will notice that when the Codefresh pipeline has completed that both Codecov and Codefresh add status checks
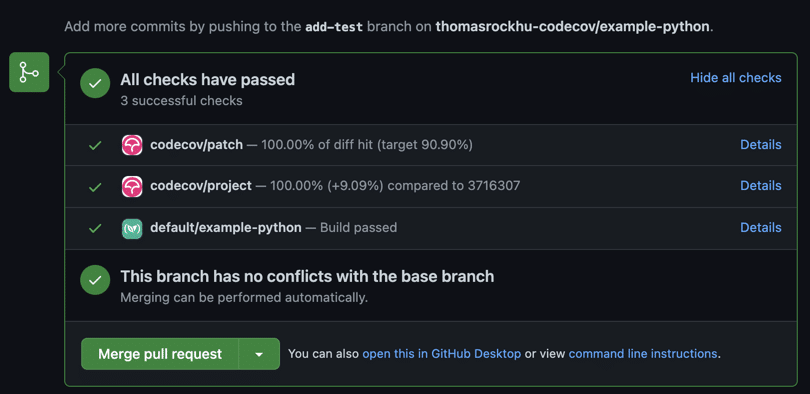
The codecov/project status tells us that we have covered 100% of the codebase. The codecov/patch status tells us that all new code is also 100% covered. You can read more about statuses in our documentation.
You will also notice that Codecov has added a comment that details coverage change information. This is useful for the author and reviewers of the PR.
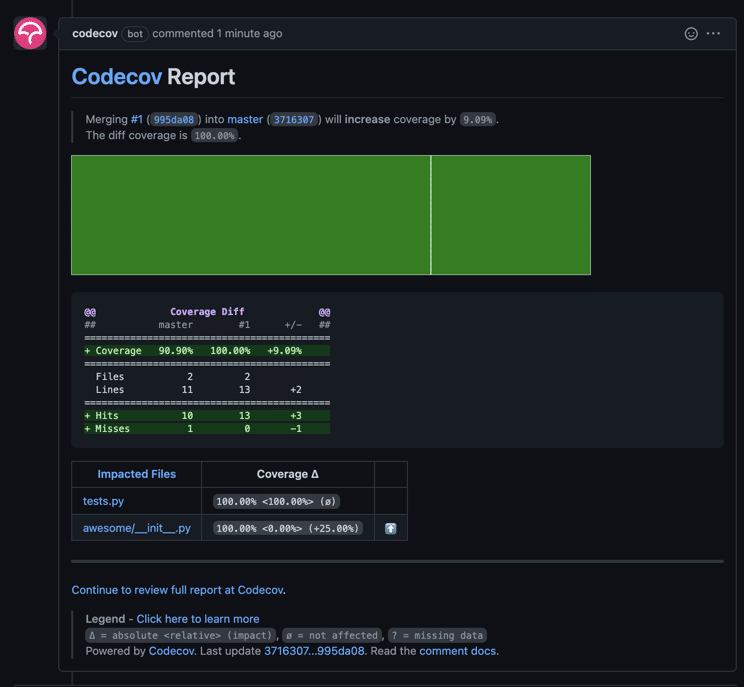
We can click back into the Codecov report above to see that we have fully covered the awesome/__init__.py file.
At the end of this tutorial, you will have
- set up a Codefresh pipeline
- viewed coverage reports on Codecov
- added a test to increase coverage through Codecov
If you have any questions or comments for the community, please share those below.