In web development, where every millisecond counts, JavaScript bundle size optimization helps you create faster, more efficient web applications.
This article highlights eight ways to optimize your JavaScript bundle size with Webpack and how it’s used on Bluesky—an open source alternative to Twitter.
Tree Shaking
Like you’d shake a tree to remove dead leaves, tree shaking identifies and removes dead code using the static structure of ES2015 module syntax (importing and exporting Javascript modules by name).
You can enable tree shaking by default in Webpack by setting the build mode to production. This sets usedExports: true (which marks unused code that should be removed) and sets minimize: true(which removes the code marked for removal). Structuring your code in modular units with clear export and import statements allows bundlers like Webpack to analyze the dependency graph and exclude unused exports.
Below is a three-step example to show how tree shaking works:
// Step 1. A function import for useNotUsedBarOffset is deleted in a refactor and never used anywhere else import {useBottomBarOffset, ~~useNotUsedBarOffset (deleted)~~} from lib/hooks/useBottomBarOffset // Step 2. The function's module is still imported because other functions are used const bottomBarOffset = useBottomBarOffset(100) // Step 3. A Software Engineer forgets to delete the unused function export export function useNotUsedBarOffset() { // This function is never used } export function useBottomBarOffset(modifier: number = 0) { // This function is still used } The code for useNotUsedBarOffset is never deleted after a refactor and never imported anywhere else.
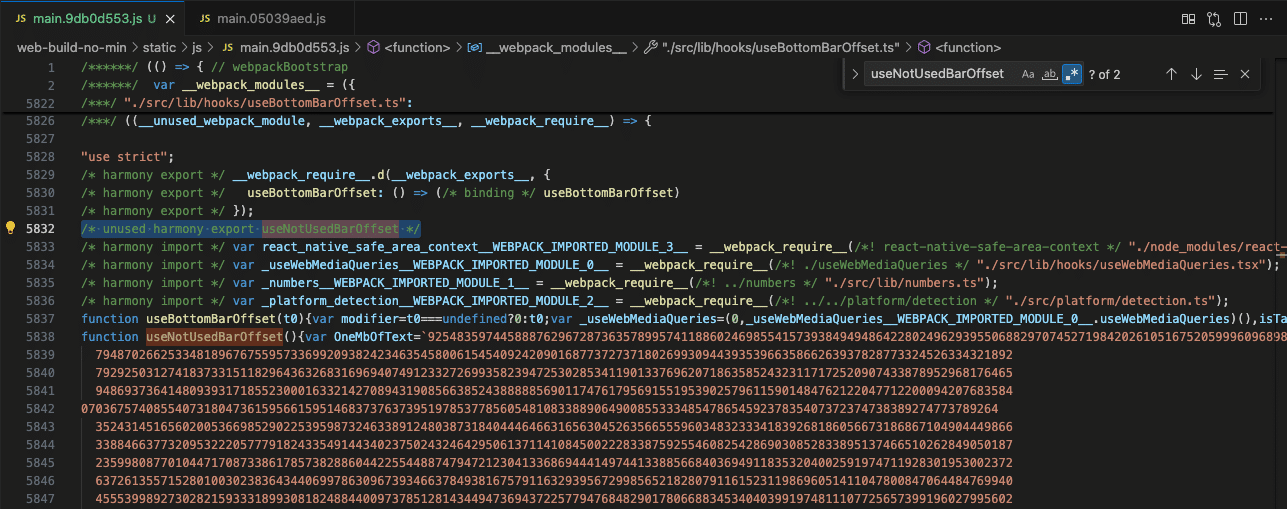
The unminified bundle size with the unused function is 37.37 MB:
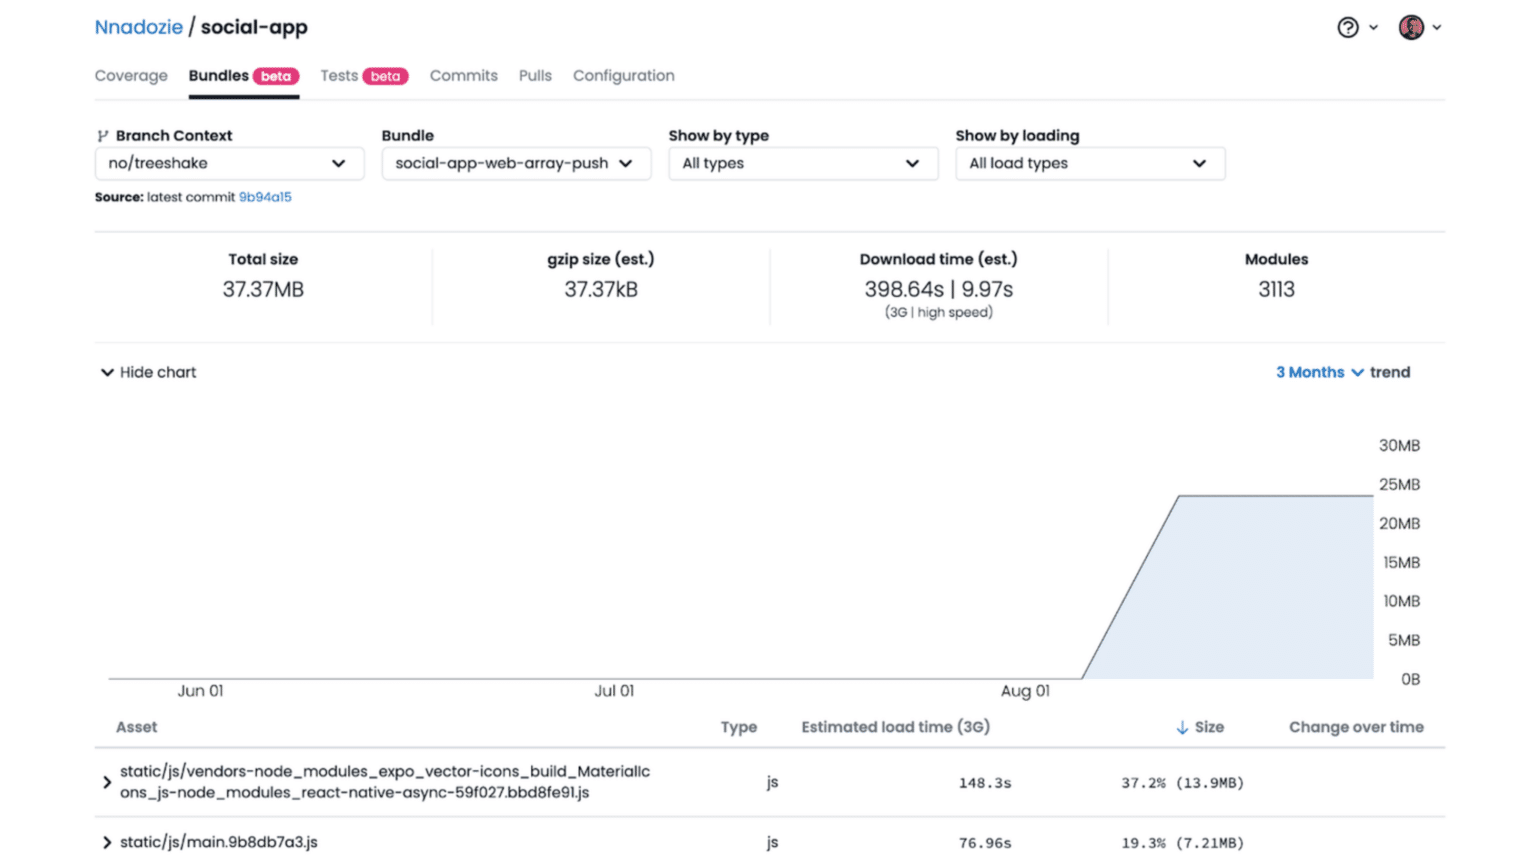
With config.mode: production, the unused function useNotUsedBarOffset is removed from the final bundle, reducing the bundle size to 31.98 MB:
To make tree shaking even faster and better at identifying all unused code, declare “pure” (free of side effects) files using the sideEffects property in package.json.
Code Splitting
This load-time optimization technique reduces initial load times by breaking an application into smaller, faster-to-load chunks. Only the code necessary for the current view or functionality is loaded. Modern frameworks, like React and Webpack, provide built-in support for code splitting through dynamic imports and lazy loading.
Dynamic imports, often used with React’s `lazy()` function, provide a flexible solution to code splitting by allowing on-demand loading of components or modules. The method is particularly effective for route-based splitting in single-page applications.
Advanced techniques like prefetching and preloading can further optimize the user experience. Prefetching predicts which resources may be needed in the future and loads them in the background while preloading downloads the most important or largest resources required for the current navigation.
Keep in mind that implementing these techniques improperly can negatively impact application performance. For instance, code splitting without dynamic imports will increase the number of HTTP requests required and the initial load time. When implementing code splitting, you must consider fallback scenarios and ensure proper error handling for dynamic imports to maintain a smooth user experience.
A fantastic example of code splitting can be seen in how the i18n locale language files in the Bluesky application are managed. Instead of bundling all language files into a single large file, Bluesky modularizes languages into separate files:
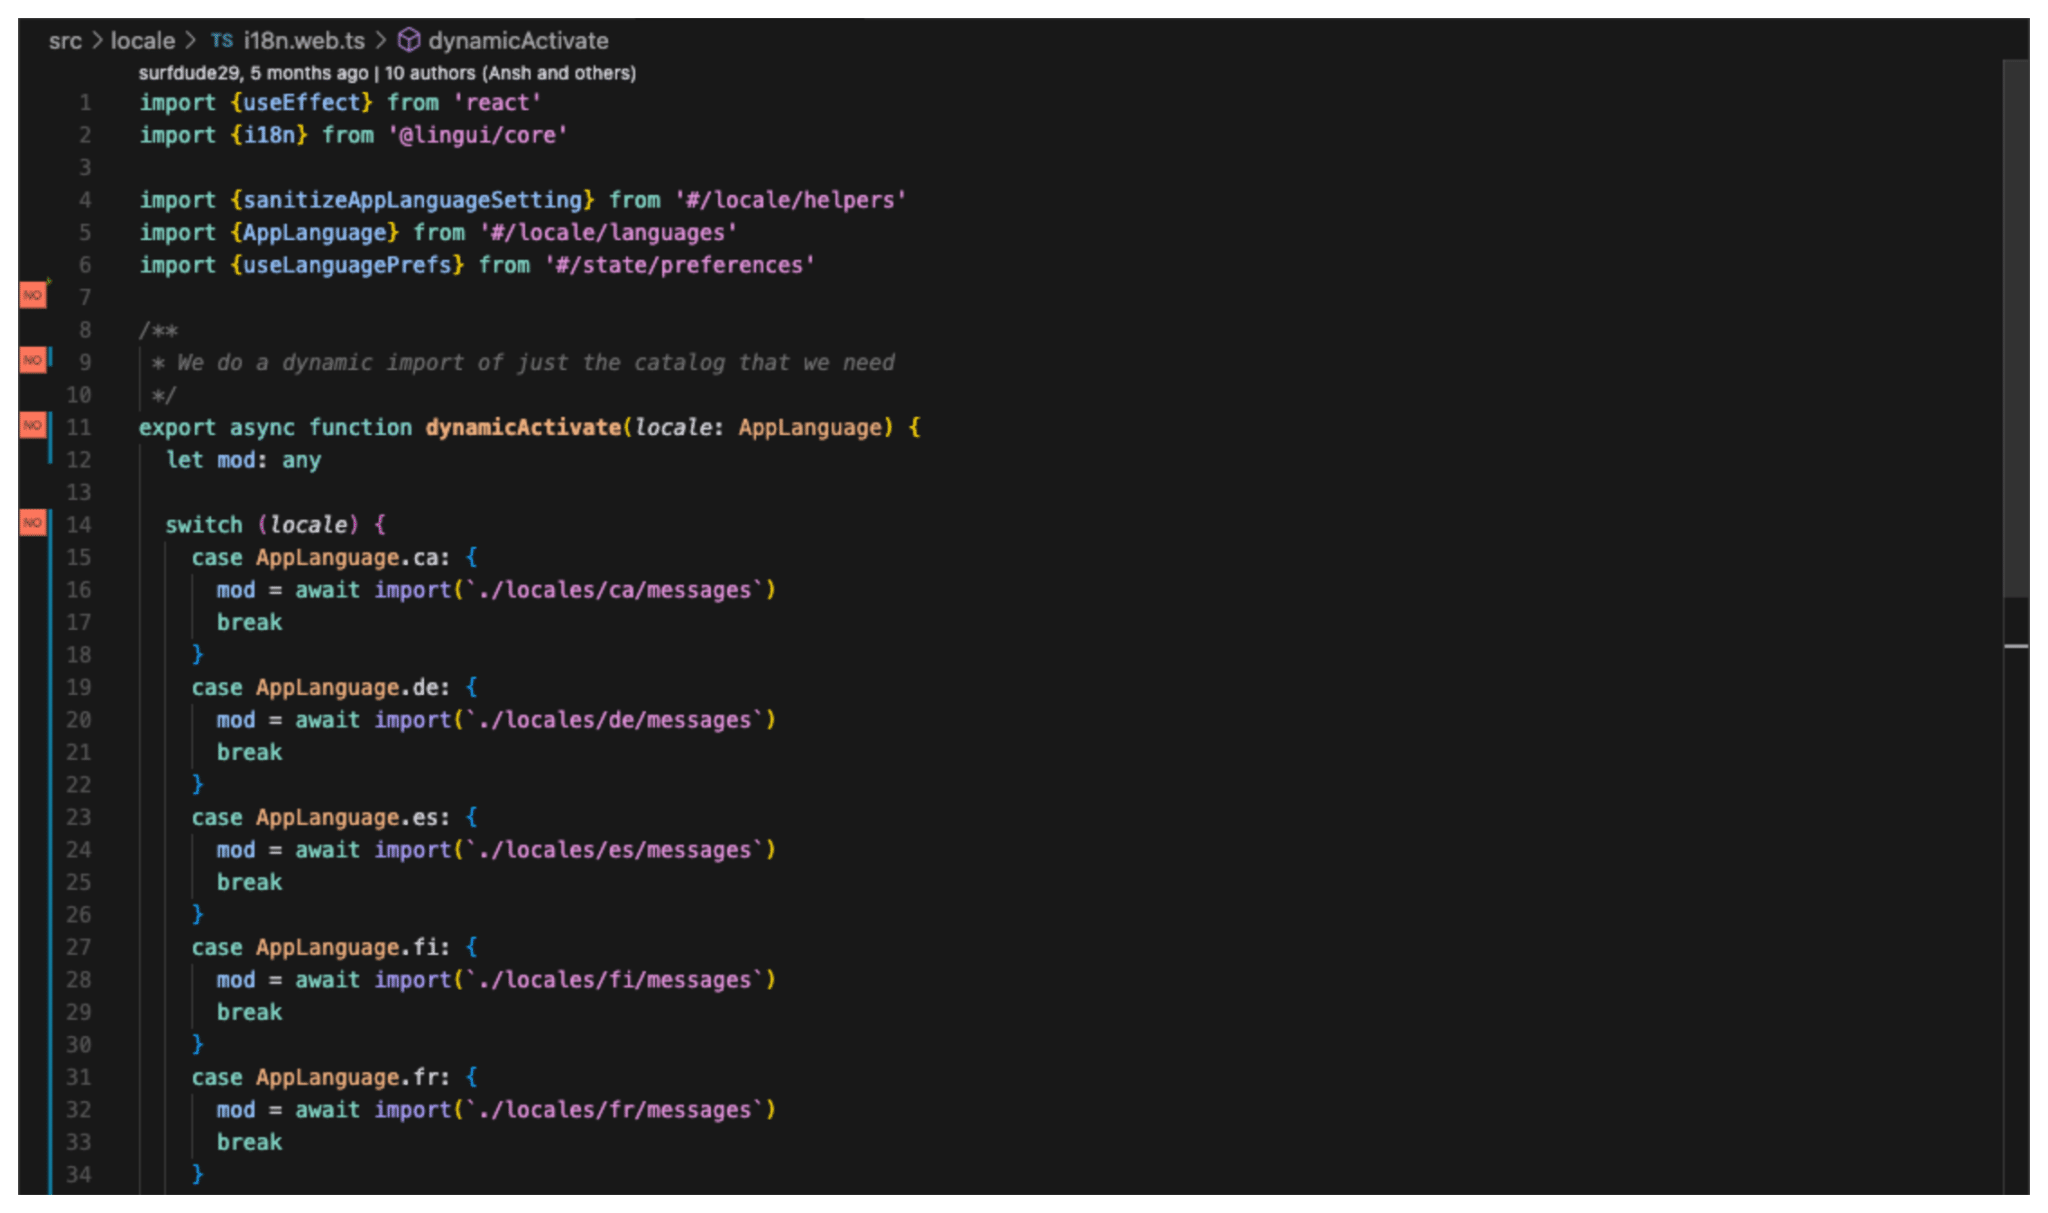
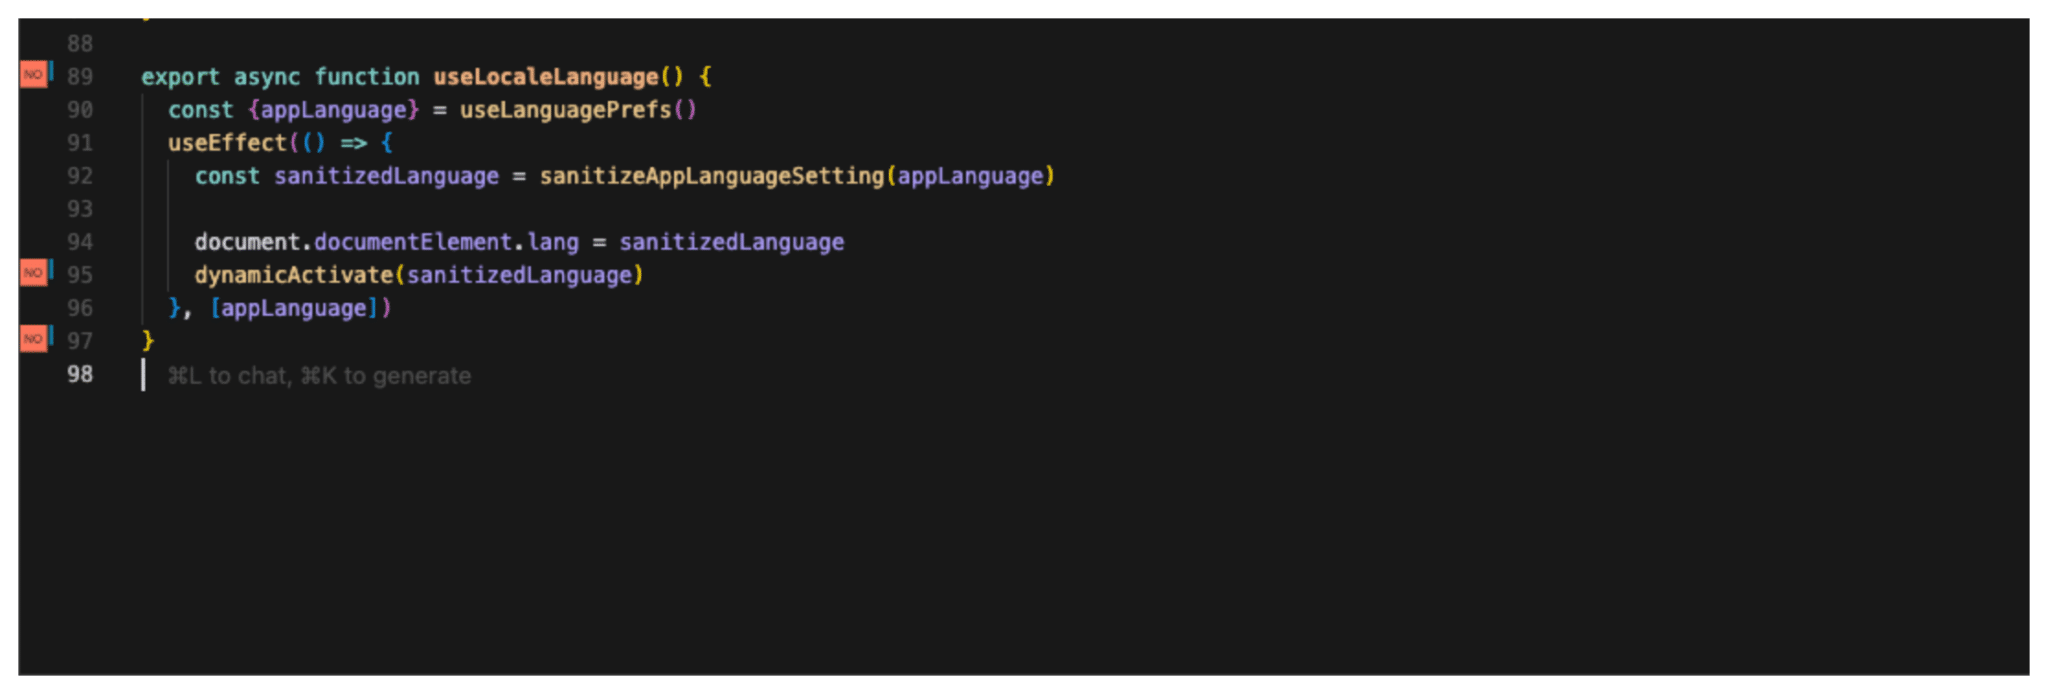
It then uses a lazy load approach to select languages. When the appLanguage state changes, a useEffect hook triggers, initiating an asynchronous download of the corresponding language module:
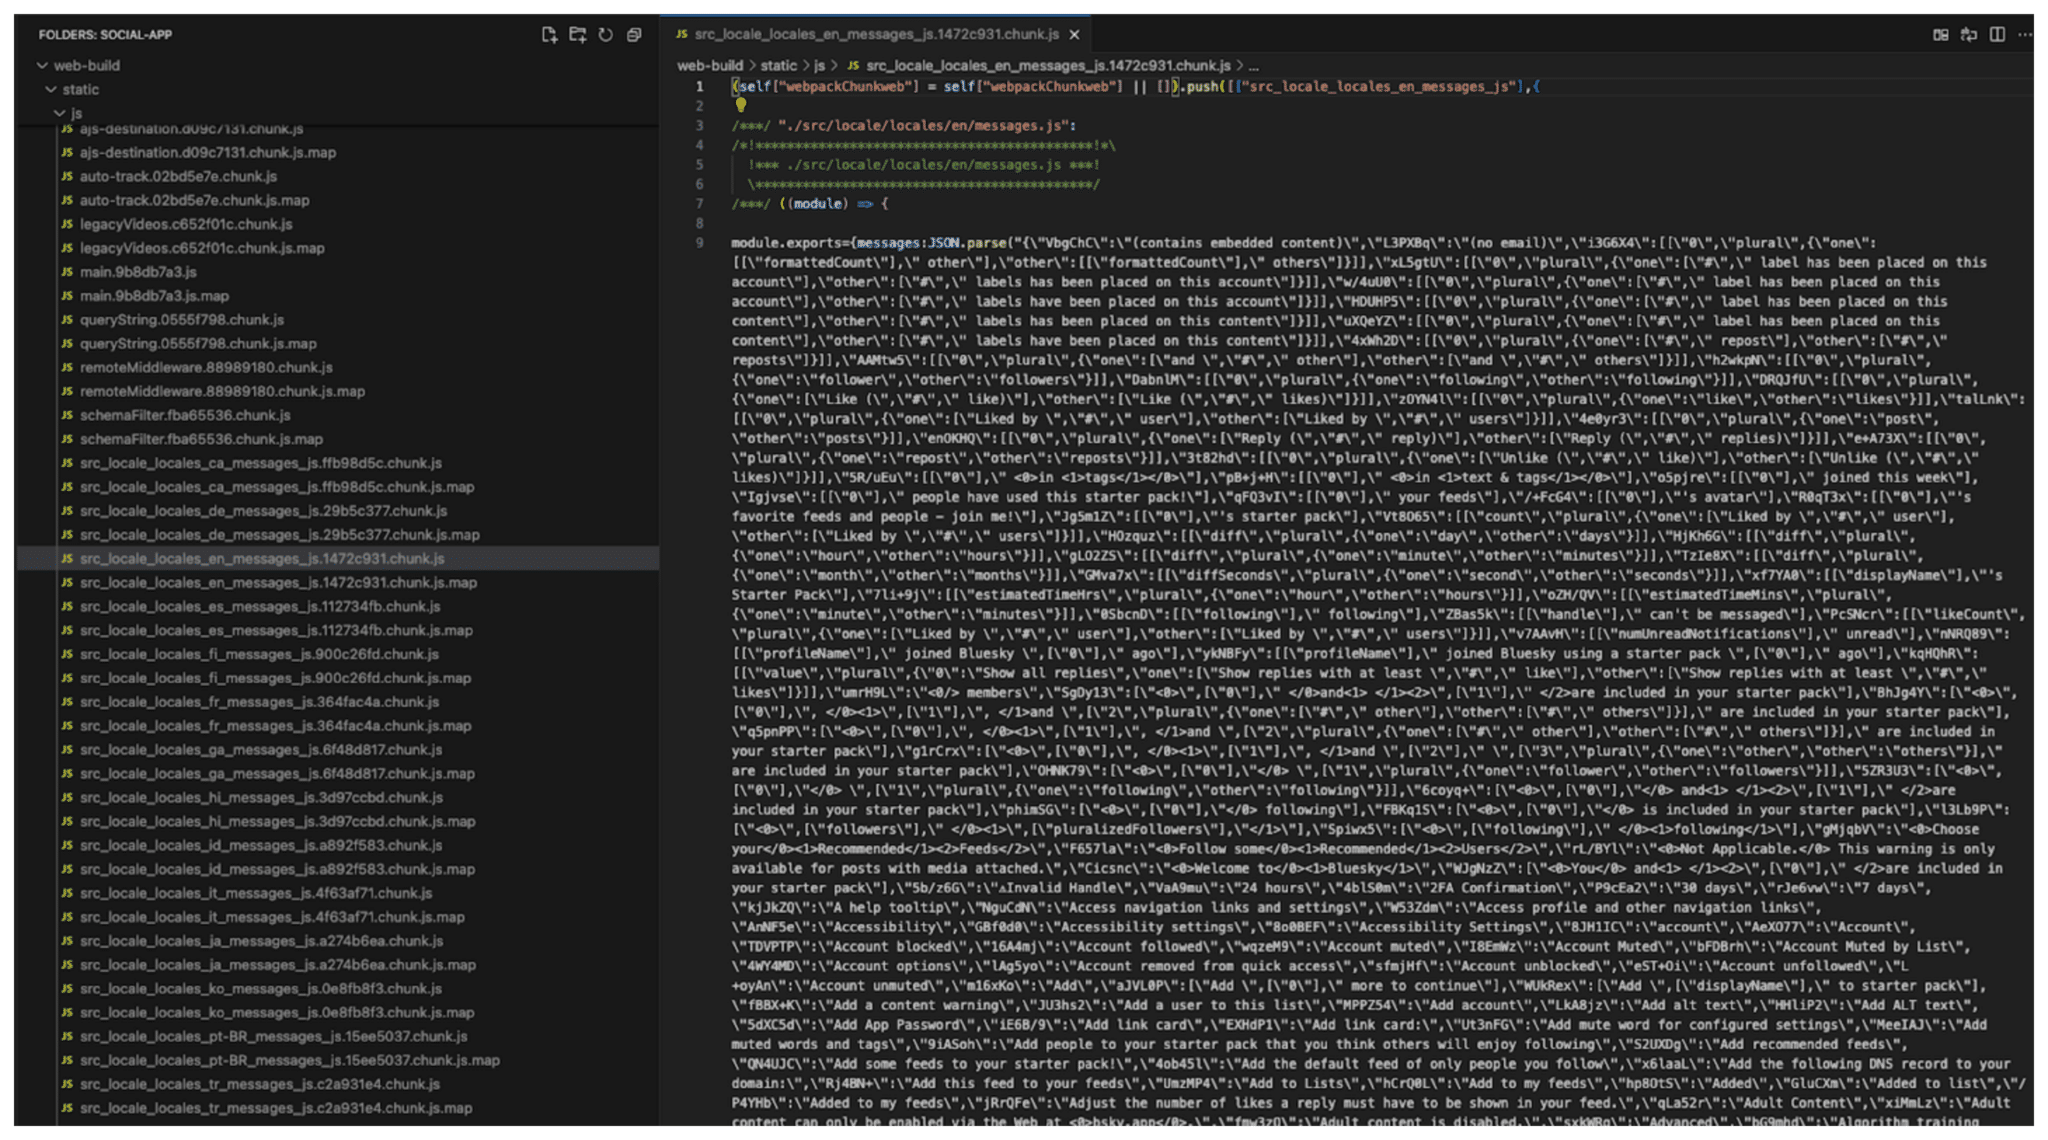
Post-build analysis shows that each language file is compiled into its own distinct chunk. Webpack creates each chunk based on the dynamic import syntax await import(<module>).
Vendor Splitting
Vendor splitting works by separating third-party libraries from application code to use browser caching more effectively and reduce the overall download size for users on the next visits.
By default, Webpack’s SplitChunksPlugin incorporates all vendor Node modules into a defaultVendors cacheGroup, as explained in the default SplitsChunksPlugin configuration.
Here’s a basic example of a custom configuration that shows how to specify when a new chunk—which is, in essence, equivalent to a cache group—should be created:

This configuration, adapted from Webpack’s documentation, implements the following:
– targets modules in the node_modules directory using the test regex
– names the resulting chunk vendors
– applies to all types of chunks (chunks: 'all')
– requires a module to be present in at least three different chunks before splitting it into its own chunk (minChunks: 2)
– sets a minimum size threshold of 30 KB for separate chunk generation (minSize: 10)
Minification and Compression
Minification and compression are techniques that work together to reduce the bundle size of text-based assets by up to 70 percent.
Minification removes unnecessary characters from code files without changing functionality. Webpack’s production mode automatically applies minification using TerserPlugin for JavaScript. For CSS minification, you can use plugins like css-minimizer-webpack-plugin, which is the same one used in the Bluesky application.
Compression further reduces minified files through data encoding. Popular algorithms include Gzip and Brotli. To enable GZIP compression with Webpack, use the CompressionPlugin.
While compression plugins create compressed versions of your assets, remember that you’ll need to configure your server to serve these compressed files with the appropriate Content-Encoding header:
res.set('Content-Encoding', 'gzip');
Rather than applying GZIP compression through Webpack, Bluesky uses a GZIP middleware wrapper at the server level to handle compression on the fly:
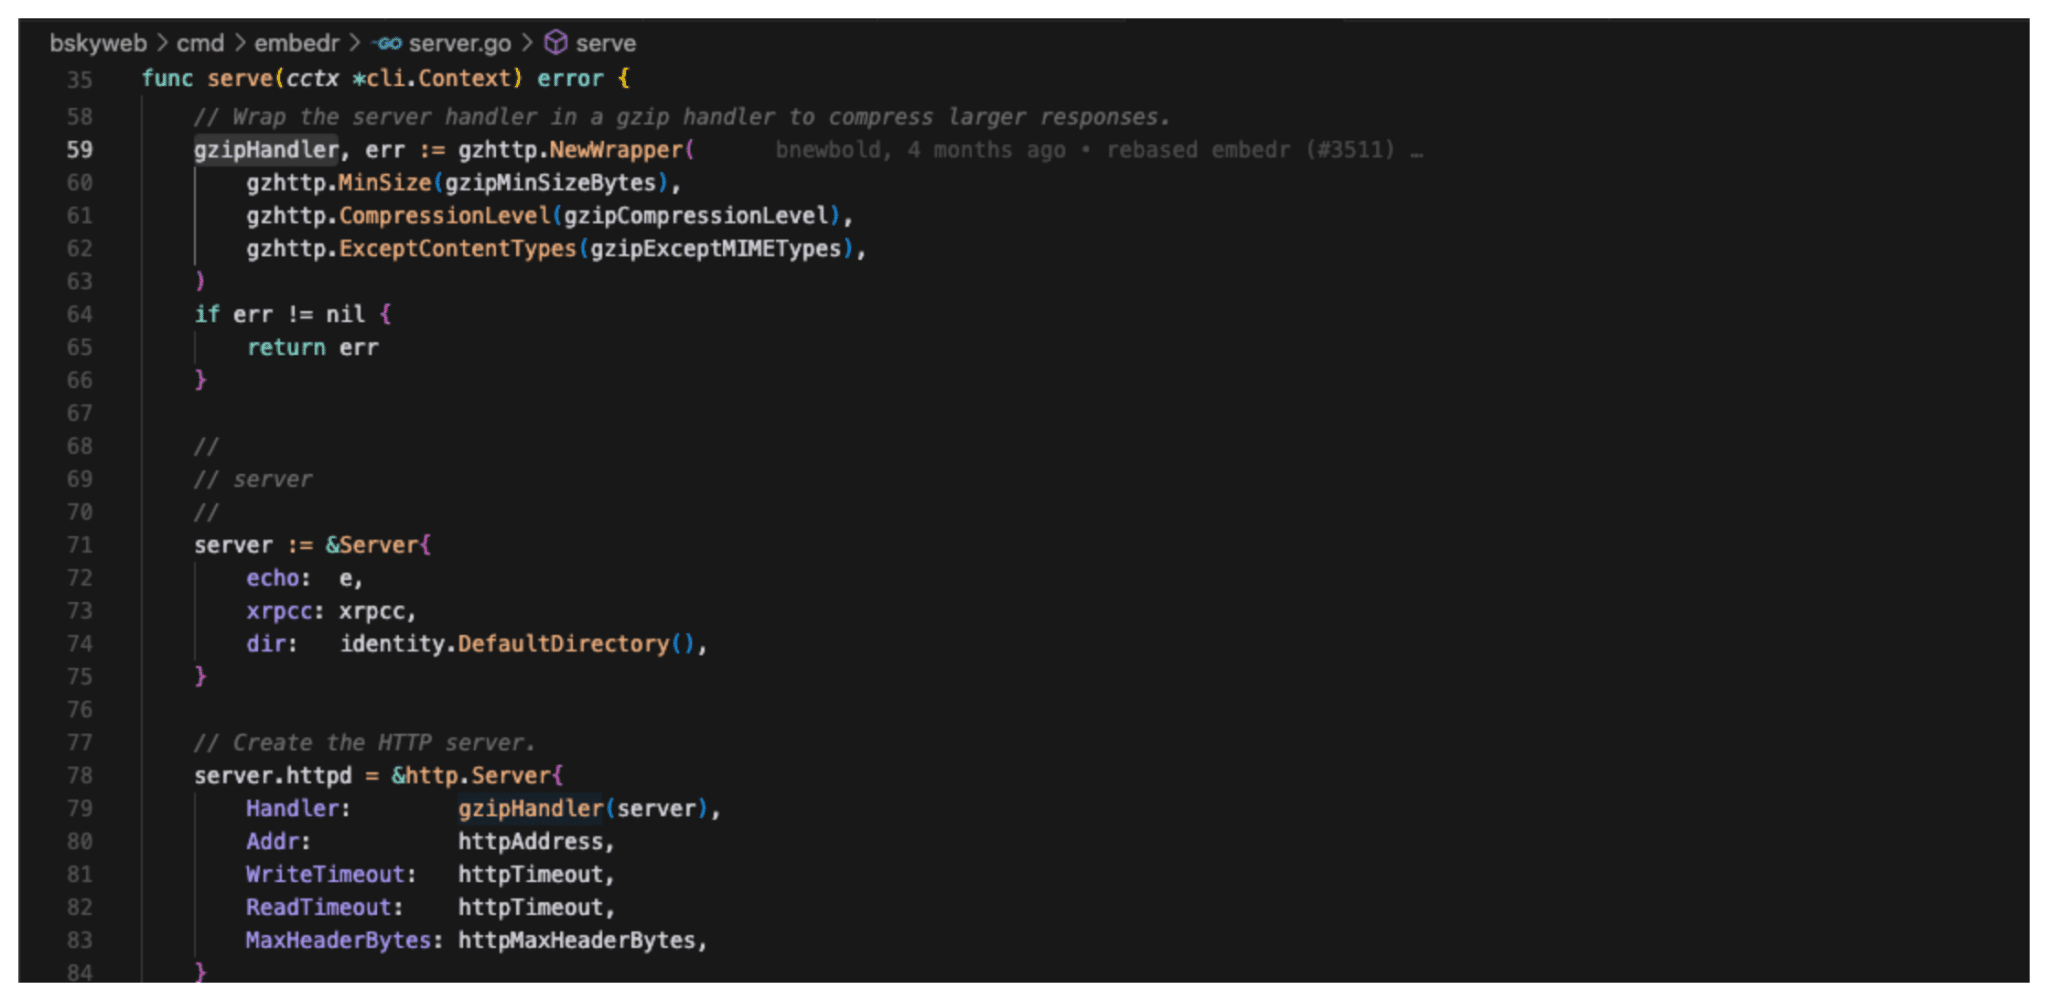
The server uses the gzhttp package to create a GZIP wrapper and applies it to the server’s main handler.
When a response is large enough (over gzipMinSizeBytes), the GZIP middleware will compress the response and automatically set the appropriate Content-Encoding: gzip header. This happens transparently, without having to set the header explicitly in the server code. The Express compression middleware lets you do the equivalent in a JavaScript codebase.
Removing Unused Dependencies
Since unused dependencies are equivalent to unused code, correctly configuring tree shaking is the most effective way to remove unused dependencies. However, dependency analysis tools and linters can cut down your build time and speed up your CI deployments by catching obvious unused dependencies and imports before the bundling stage.
Depcheck is a great tool for analyzing the dependencies in a Node project and finding unused dependencies. It’s simple to run once you have npm installed using npx, which is a package runner bundled in npm:
$ npx depcheck ESLint is a commonly used linter that comes with built-in plugins with rules for catching unused imports. Both @typescript-eslint and eslint-plugin-unused-imports will highlight unused variables in your codebase, and you can set them up to run before a commit using Husky.
Optimizing Third-Party Library Inclusions
Optimizing third-party libraries by including only what you need is one of the easiest techniques to cut down your build time:
– Install smaller Node modules over larger ones where possible. For example, go with day.js over date-fns, if `day` contains all you need for date manipulation.
– Stick with native JavaScript operations over third-party libraries where practical. For example, consider not importing libraries like lodash if all you need are basic arithmetic operations.
– Consider using content delivery networks (CDNs) for common libraries, like React, over including them in your bundle
– Import only what you need within your codebase:
import * as MaterialUI from '@material-ui/core' import _ from 'lodash' Instead of loading everything in through a single import for loadash, do something like the following, which will only load in the specified functions:
import { Button, TextField } from '@material-ui/core' import debounce from 'lodash/debounce' import throttle from ‘lodash/throttle’ Lazy Loading Assets
Lazy loading defers the loading of noncritical or resource-intensive components until they’re actually needed. Reducing the amount of code and resources that need to be loaded upfront improves your app’s initial load time and performance. Lazy loading doesn’t technically reduce bundle size, only load time.
Lazy loading, which combines the code-splitting technique with dynamic imports, is achieved by the following:
– identifying components or resources that are not immediately needed
– splitting these components into separate chunks
– loading these chunks only when they’re required, typically triggered by user interaction, or when they’re about to be needed
– using a loading indicator or placeholder while the content is being fetched
Examples of lazy loading include dynamic language loading, which does a dynamic import of only the language catalog that’s needed while providing a fallback or default:
/**
 * We do a dynamic import of just the catalog that we need
 */ export async function dynamicActivate(locale: AppLanguage) {   switch (locale) {     case AppLanguage.ca: {       i18n.loadAndActivate({locale, messages: messagesCa})       await import('@formatjs/intl-pluralrules/locale-data/ca') // the actual lazy load import statement       break     } ...    //A default fallback is always provided     default: {       i18n.loadAndActivate({locale, messages: messagesEn})       break     }   } }
Another example is showing a splash screen while an app loads:
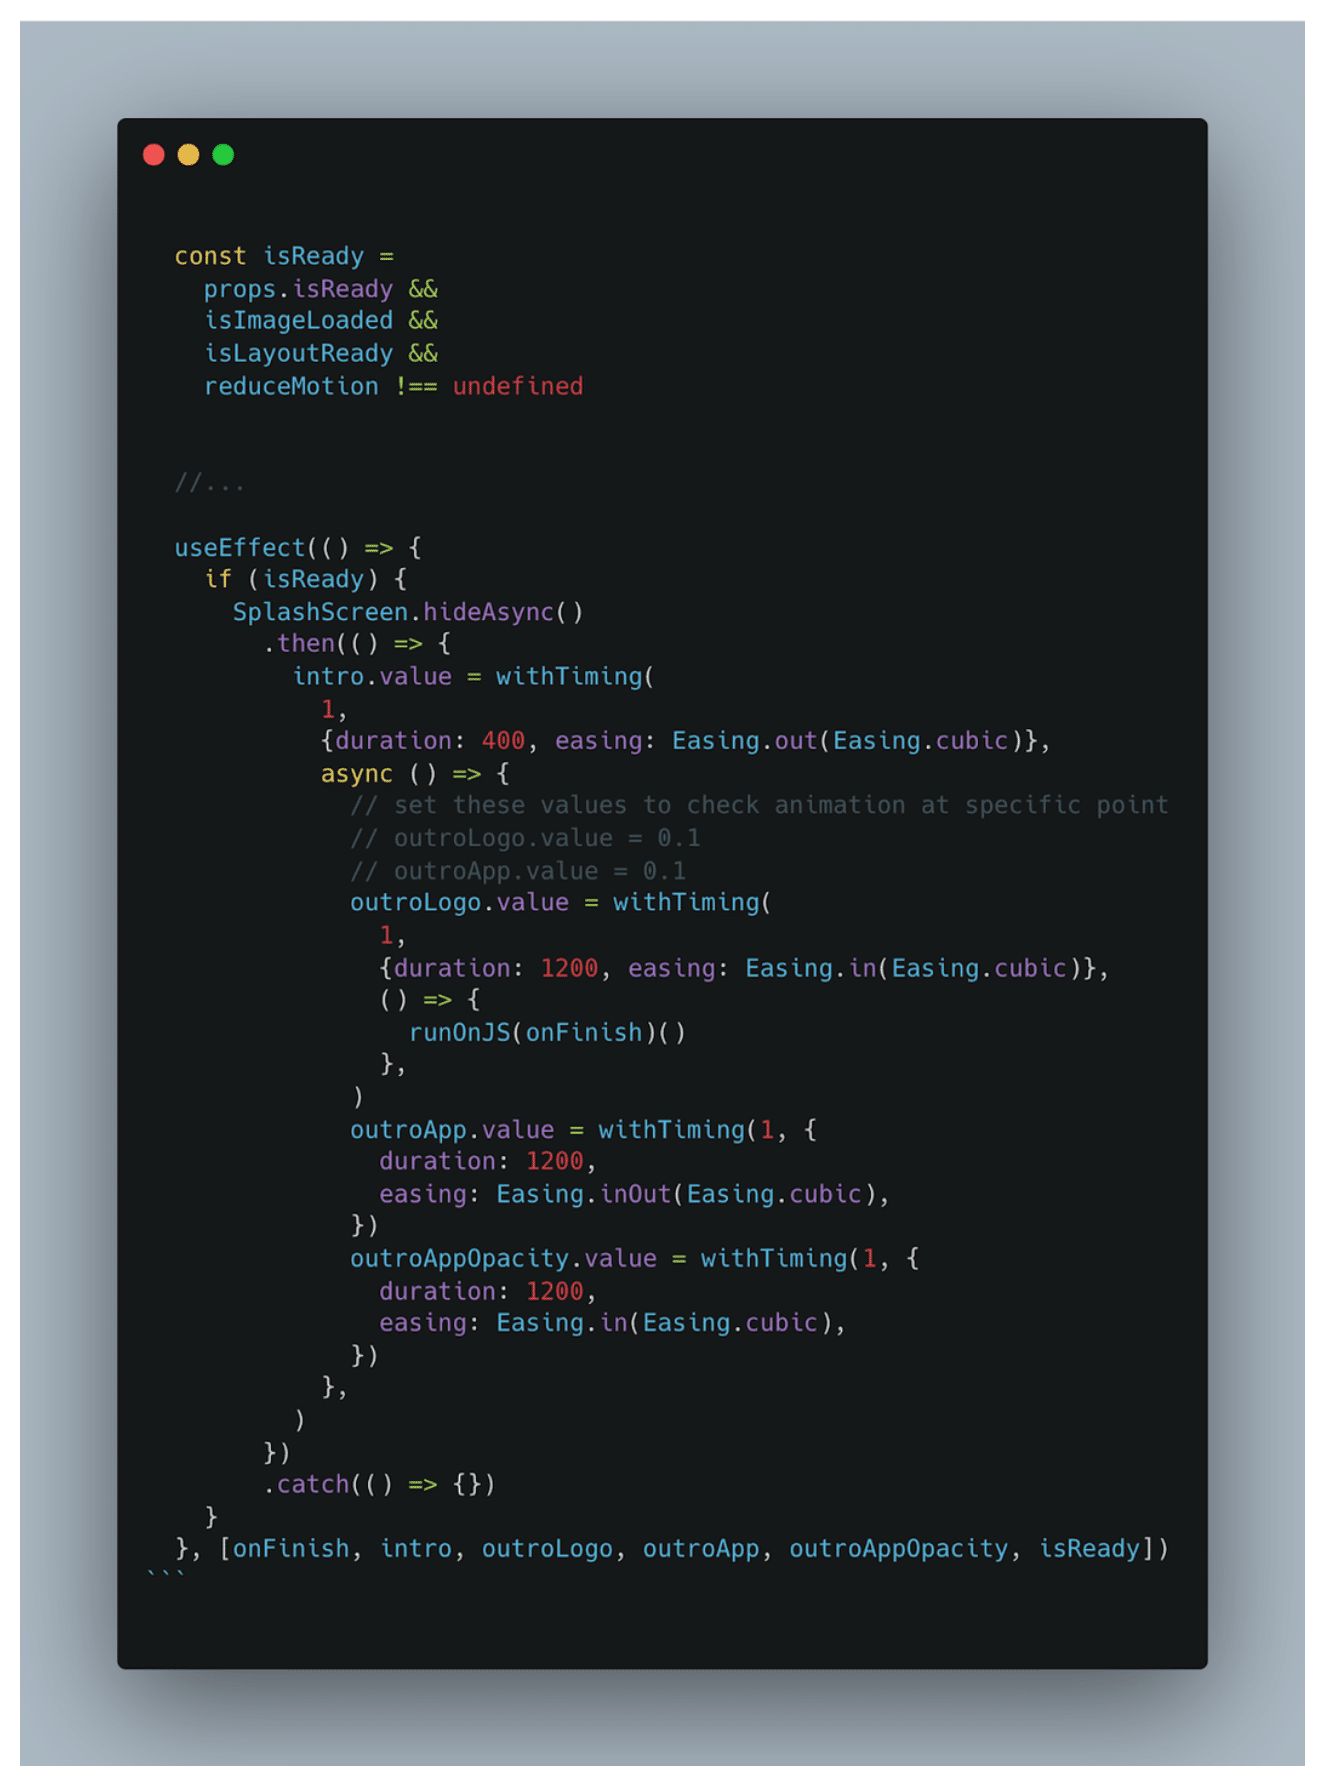
This example waits for resources to finish loading using isReady. It then hides the splash screen and runs animations transitioning to the main content of the application.
Performance Monitoring and Testing
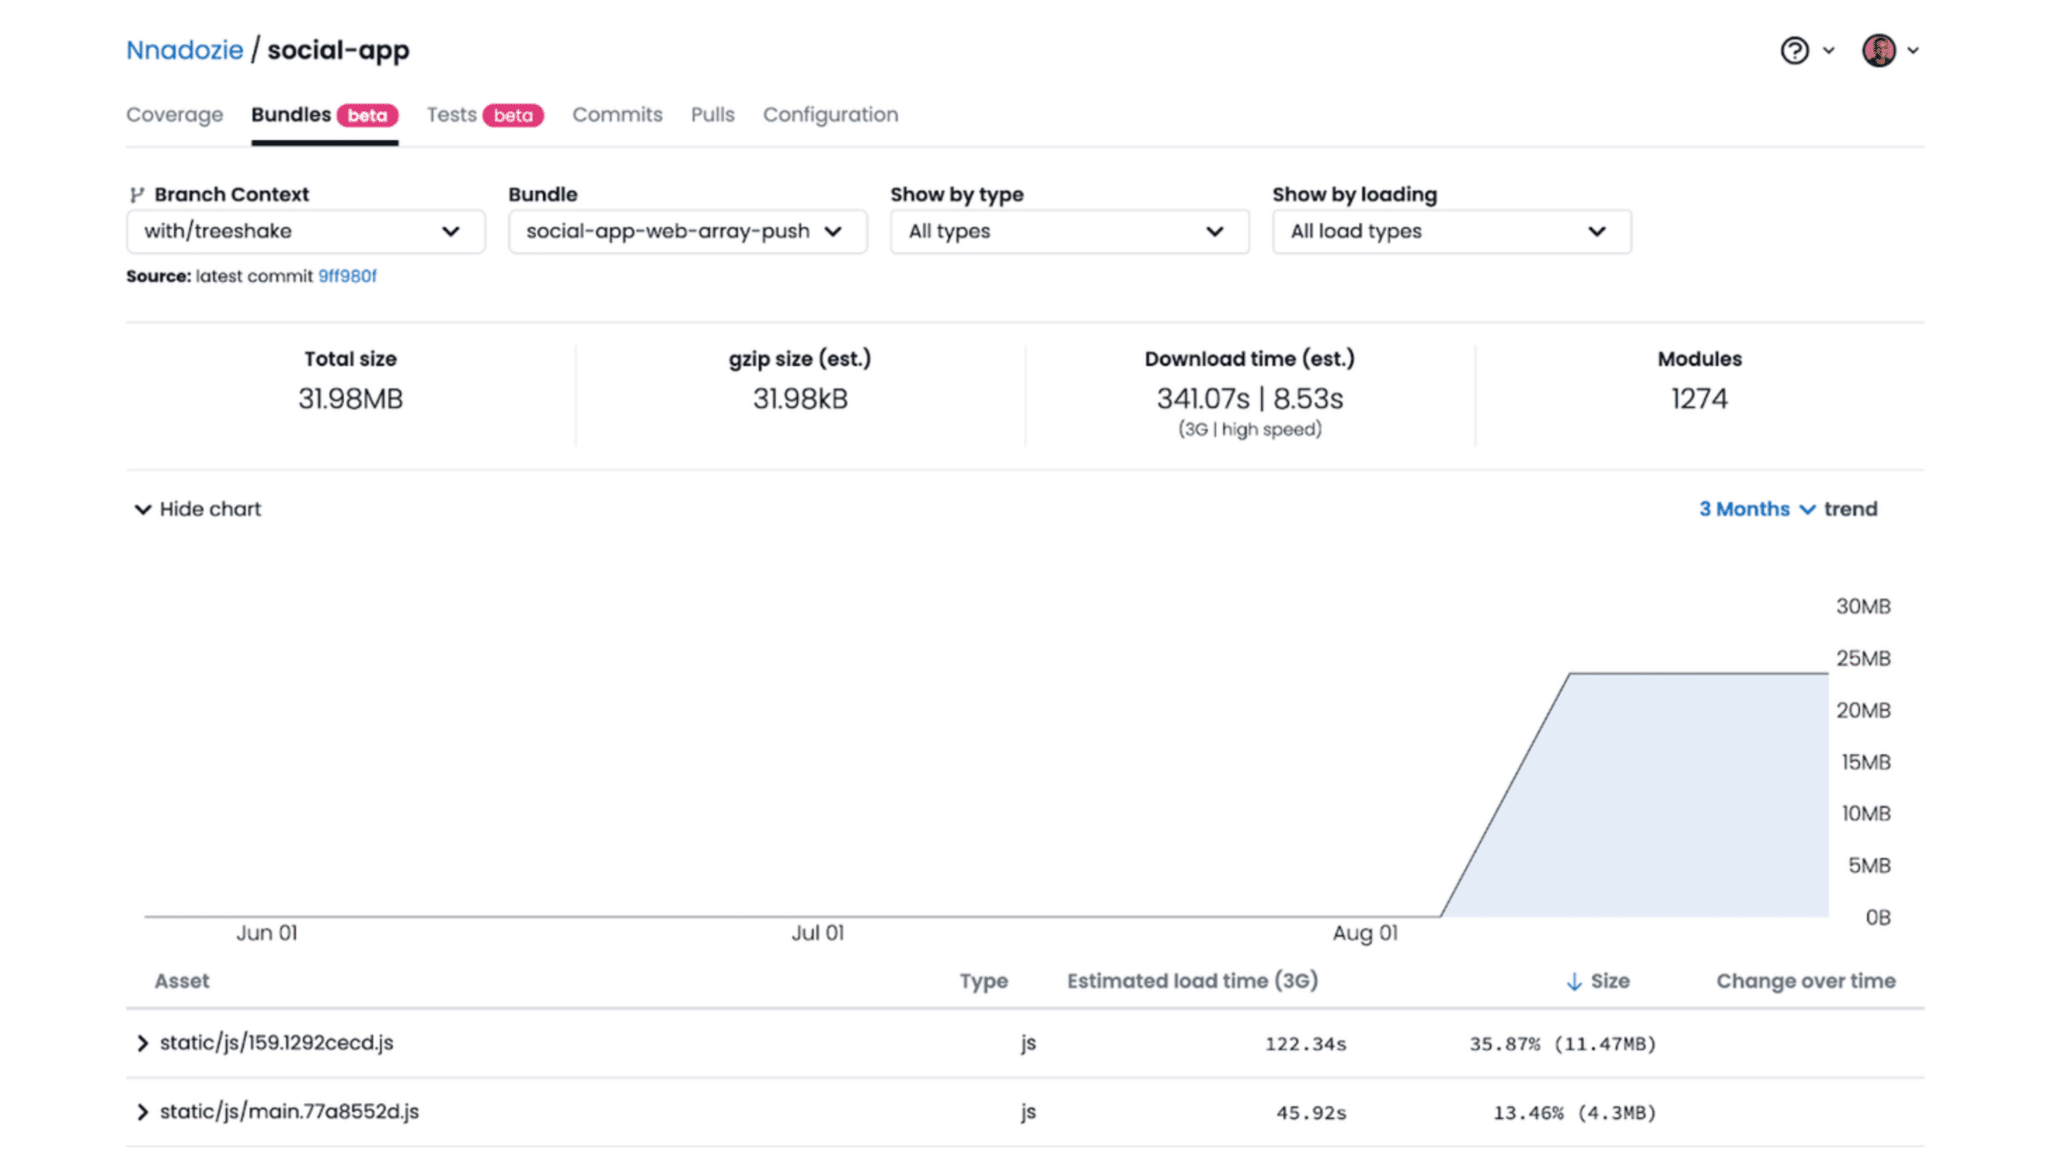
Lastly, don’t forget how continuous performance monitoring and testing can help you catch changes in your JavaScript bundle size. The most useful metrics to monitor are the total bundle size, the compressed bundle size, and the initial chunk size (the size of the first chunk loaded from the bundle by the browser) of your JavaScript bundles.
To monitor these metrics, configure Webpack to emit a stats data file after each build and put an automated mechanism in place to read these stats data files and alert you whenever the bundle sizes exceed your preferred limits.
You can implement this automated mechanism yourself using tools such as husky or GitHub Action workflows to run your bundle size tests before accepting any new code change.
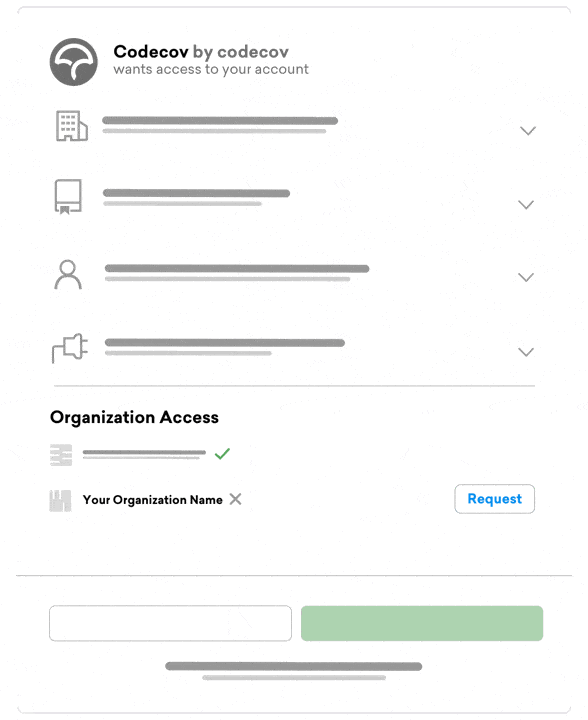
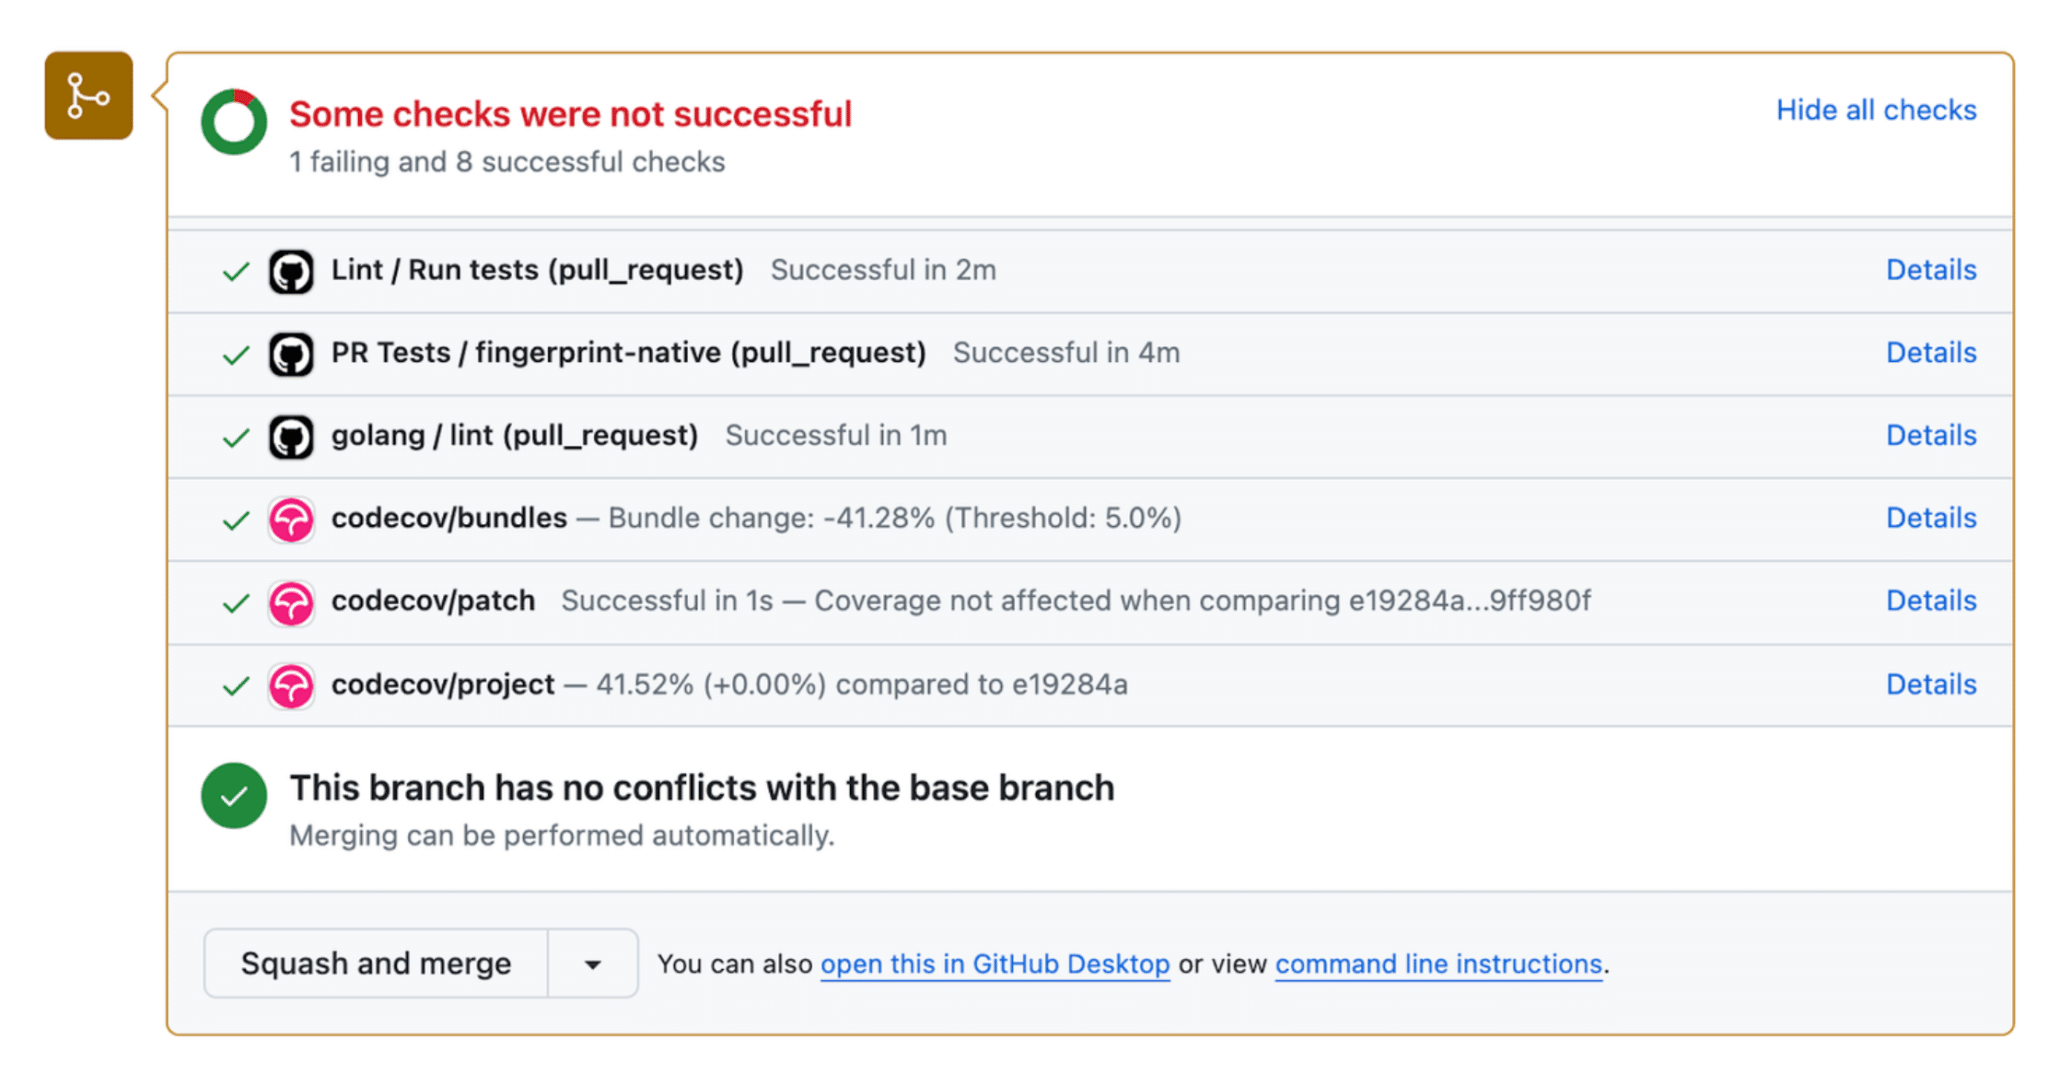
Alternatively, you can integrate third-party performance monitoring and analysis tools, such as Codecov, into pull request checks to intelligently monitor and report on changes in your JavaScript bundle size.
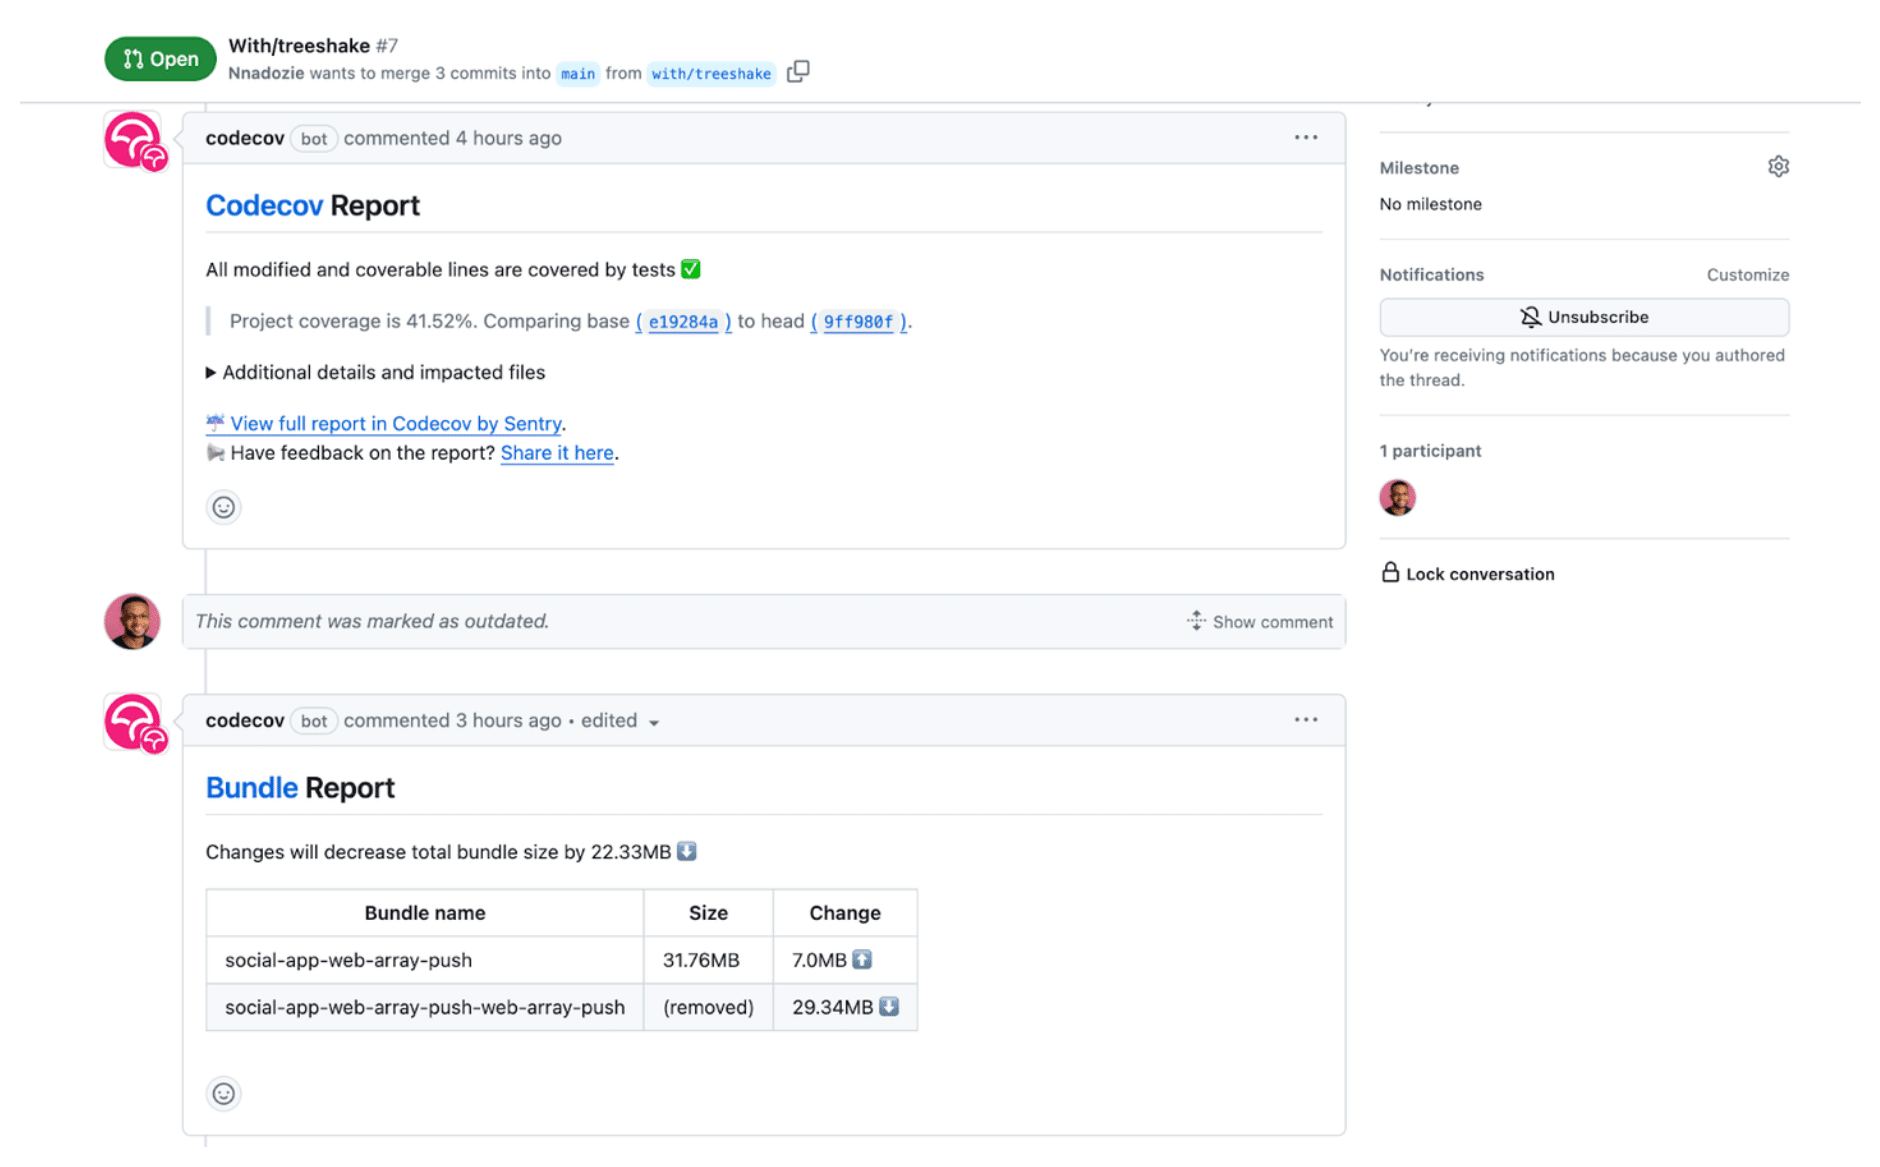
Putting an automated mechanism like this into place before accepting any new code helps detect potential issues early on.
Conclusion
The eight techniques in this article will help you keep your JavaScript bundles lean and your app performance top-notch. Knowing these techniques is not enough, though—you must implement them consistently and keep a vigilant eye on your bundle size as your application evolves.
Codecov’s new Bundle Analysis feature helps with exactly that. It alerts you to code changes that impact your bundle size—right in your CI workflow. It’s free for all Codecov users, requires little to no configuration, and works with Rollup, Vite, and Webpack. Try Codecov to see it in action.