When we first introduced flags in 2016, we wanted to make it easier for projects to group similar coverage reports together. Using flags has been helpful, as we learned, in a variety of use cases, from understanding total unit test coverage vs end-to-end coverage to separating frontend from backend test results. With thousands of repositories using flags, however, users were unable to quickly manage their flags without making changes to the Codecov configuration.
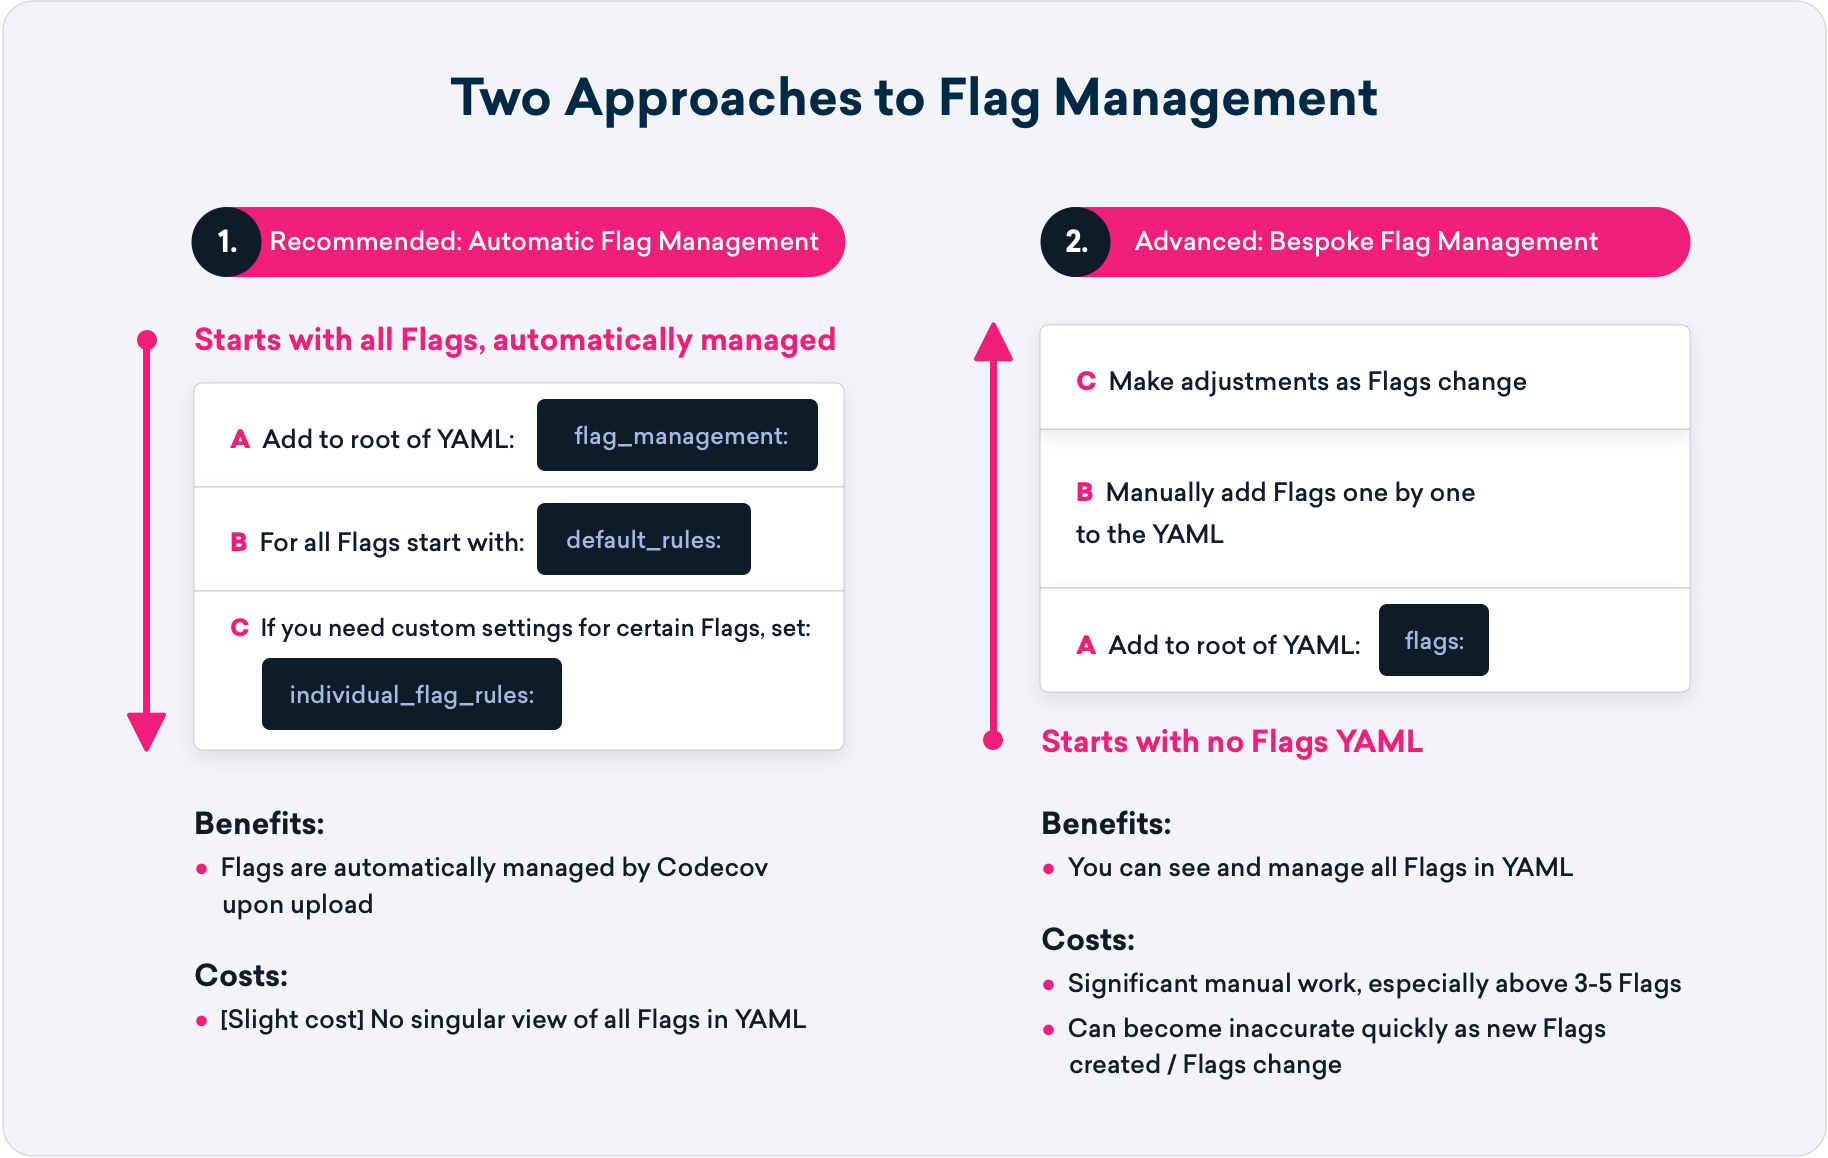
In order to make it easier to manage flags, we have introduced automatic flag management. Instead of having to specify every flag in your codecov.yml file, you can create default settings and make changes only to your upload process. Moving forward, this will be the recommended way of creating flags on a project. However, you will still be able to use bespoke flags for specific behavior.

The rest of this post will document how to start using automatic flags and how to get started using them if you are already familiar with our original flag workflow.
Setting up Automatic Flags
If you have not used flags, this section will detail how to start using automatic flags. First, you will need to add a new section to the codecov.yml
flag_management:
  default_rules:
    carryforward: true
    statuses:
      - name_prefix: project-
        type: project
        target: auto
        threshold: 1%
      - name_prefix: patch-
        type: patch
        target: 90%
The above configuration, unlike the previous method, does not specify any flag names. Instead, all flags uploaded will follow the above rules. First, all flags will be carried forward, meaning if you don’t upload coverage for every flag, we will pull the most recent coverage for that flag.
All flags will also have two status checks to act as quality gates for code changes. The first will have flag names prefixed with project-. This is to ensure you do not have conflicts with pre-existing flag names. It will also ensure that coverage is always increasing in a project with a leeway of 1%. The second status check will be applied to all flags with the prefix patch-. The name_prefix and type arguments are required.
Adding bespoke flags
Sometimes, you will need to have a flag that follows custom rules. This might be to ensure particularly high coverage for a sensitive part of the codebase or to encourage test writing on a new feature that might not be as well tested as the rest of the product. You can add these custom flags in the individual_flags section of flag_management
flag_management:
  default_rules:
    carryforward: true
    statuses:
      - name_prefix: project-
        type: project
        target: auto
        threshold: 1%
      - name_prefix: patch-
        type: patch
        target: 90%
  individual_flags:
    name: feature_1
    carryforward: true
    statuses:
      - name_prefix: new
        type: project
        target: 20%
      - name_prefix: new
        type: patch
        target: 100%
We have added on from the previous example, with the new individual_flags section. We’ve created a new flag called feature_1 that accepts lower overall coverage at 20% but requires all new code to be fully tested.
How to migrate existing flags
If you are already familiar with and using the flags section to configure your settings, you will not need to make any changes. However, we do recommend adding default rules, especially if you are constantly adding new flags to your codecov.yml file.
You can go to our example-flags PR that shows a repository using flags moving to one that uses automatic flag management. You’ll notice that the flags section is no longer necessary, but there are still statuses for the default project and patch checks (since they are not flags).
Uploading with flags
Now that the flag rules have been set, you can upload coverage without specifying the flag name beforehand. Instead, you can upload using the -f flag on the uploader with a new flag name, and the rules defined in the codecov.yml file will apply to that flag.
